
Connecting SAP SuccessFactors to ThriveSparrow
This guide walks you through connecting your SAP SuccessFactors account to ThriveSparrow so that employee data stays automatically synced. You can authenticate using either your SAP username and company ID, or via OAuth (client ID and client secret).
Before You Begin
- You must have administrator access in SAP SuccessFactors to complete this setup.
- Depending on the authentication method you choose, you will need either your SAP username and Company ID, or an OAuth client ID and client secret.
Step 1 - Access the Integration
Navigate to the Integrations section in your ThriveSparrow account.
- Go to Account → Integrations.
- Find SAP SuccessFactors in the list and click Connect.
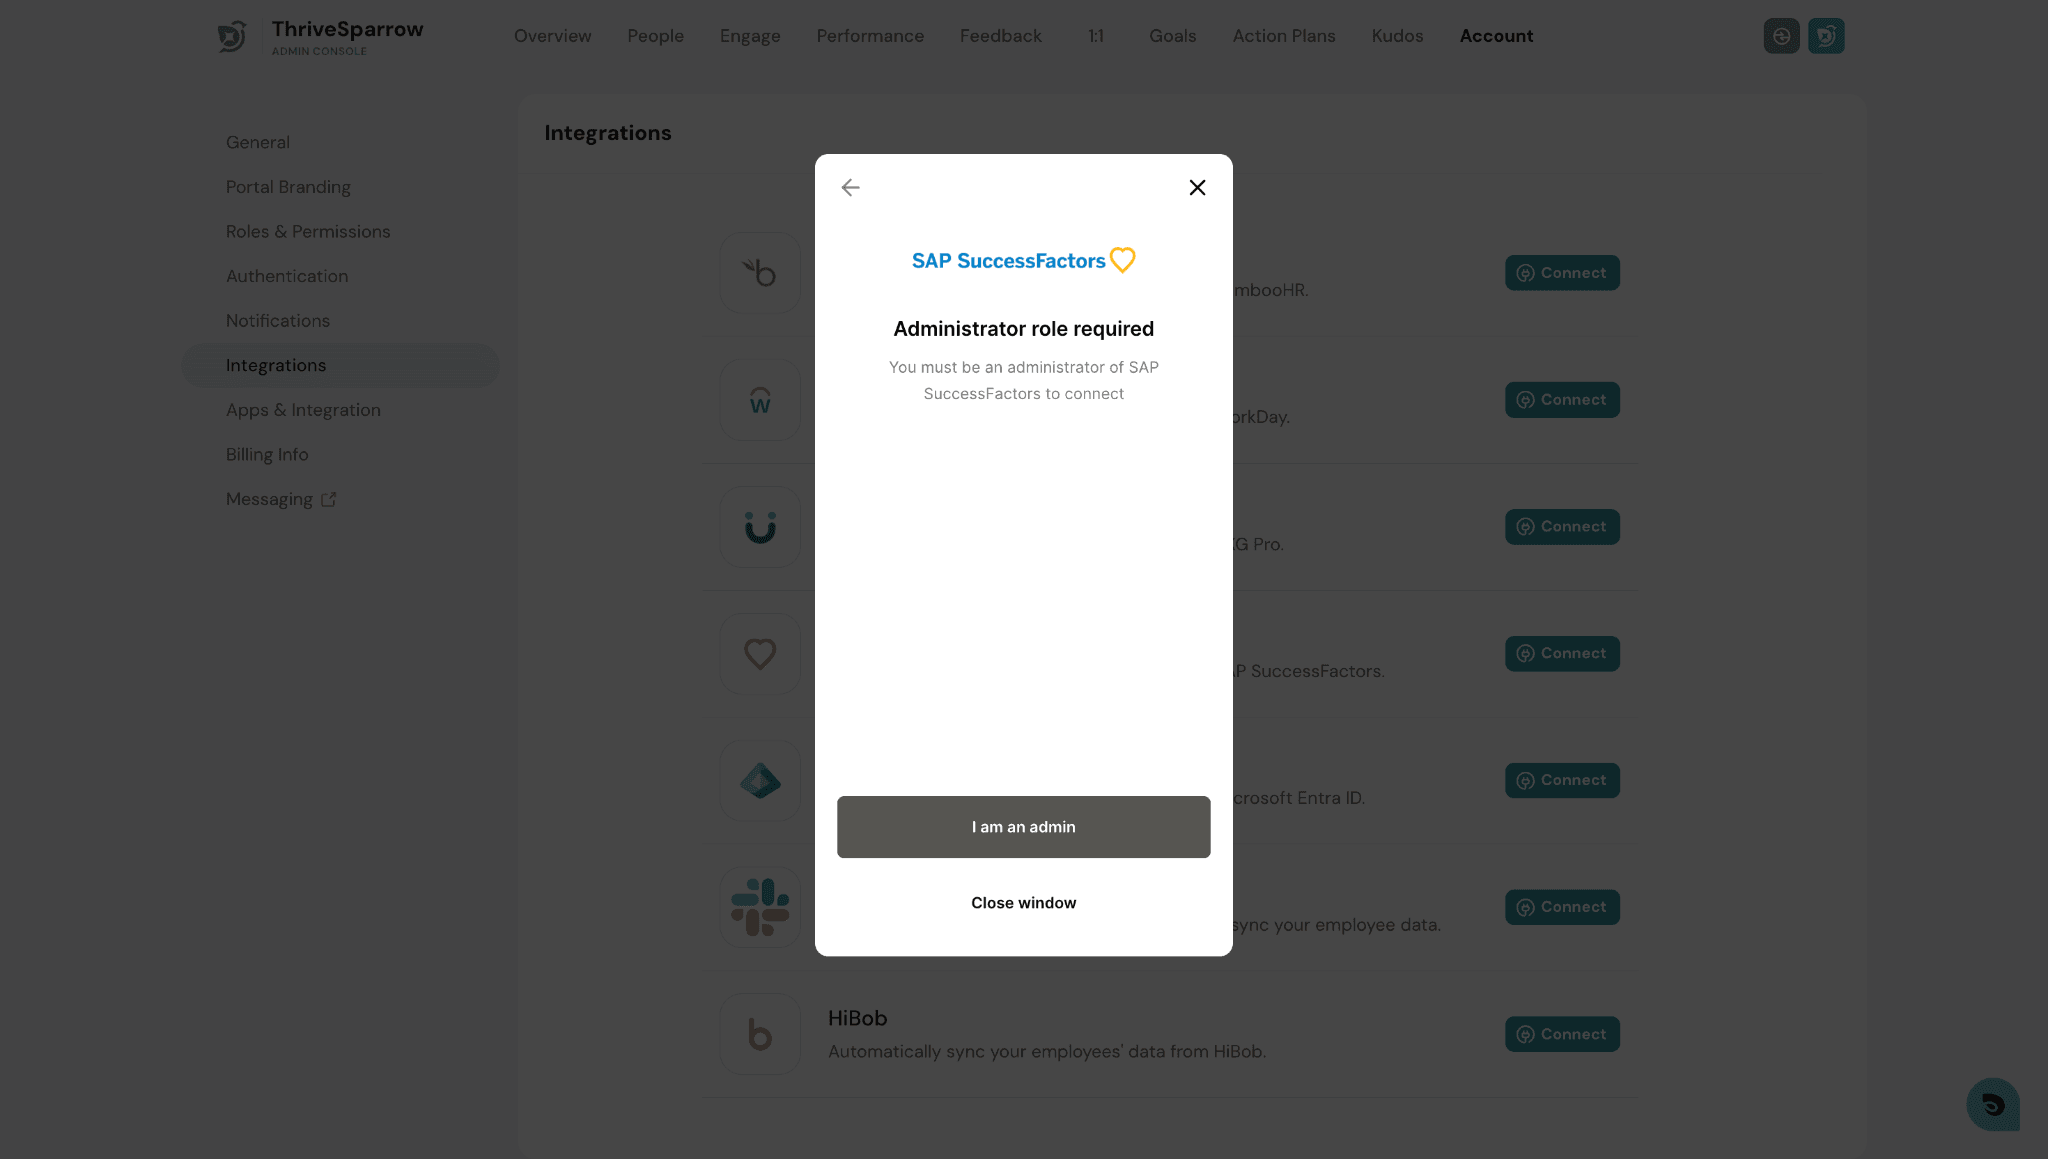
Step 2 - Confirm Administrator Role
A prompt will appear confirming that administrator access is required. Click I am an admin to proceed.
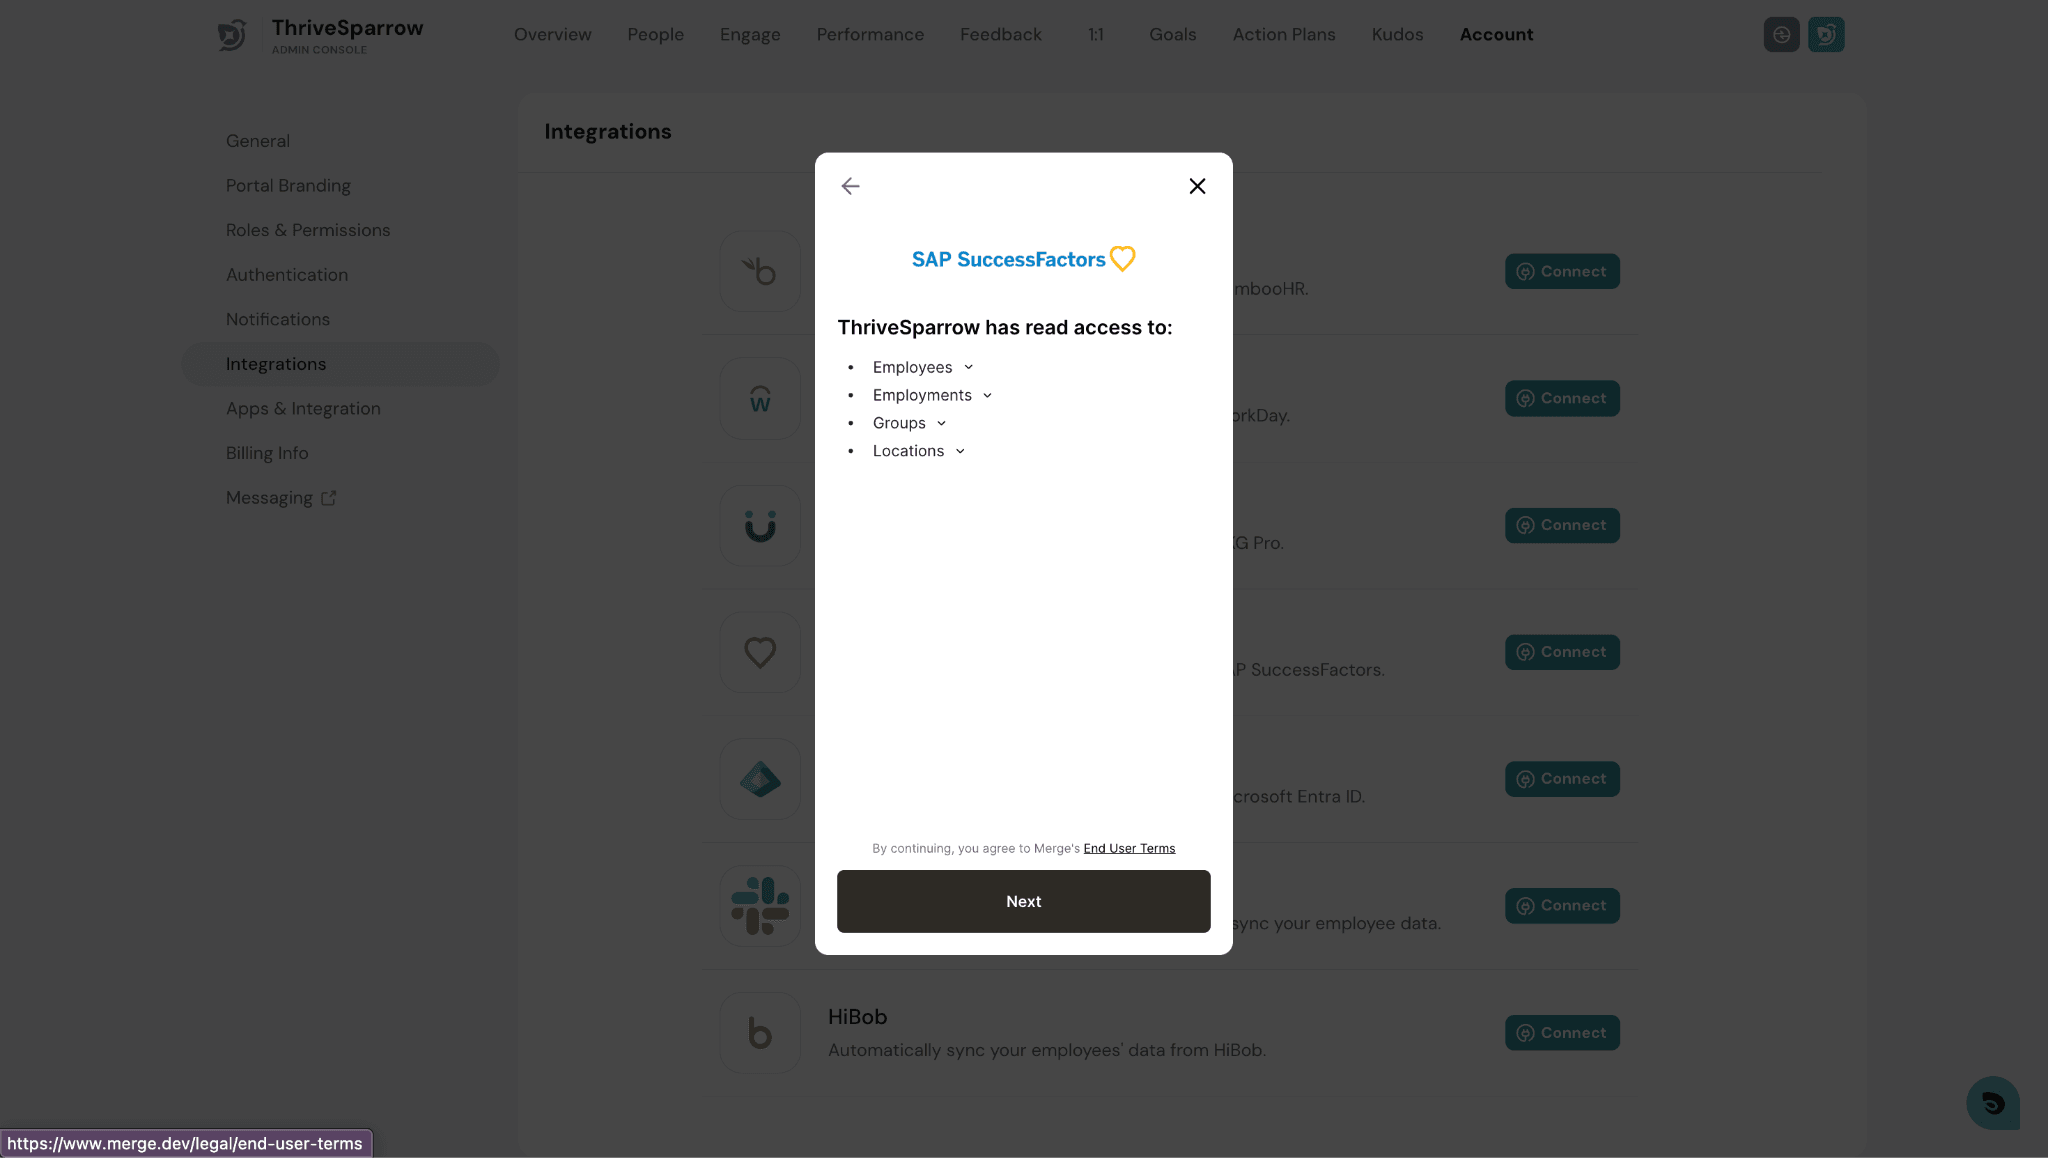
Step 3 - Review Read Access Permissions
ThriveSparrow will display the data it needs read access to: Employees, Employments, Groups, and Locations. Review the list and click Next to agree and continue.
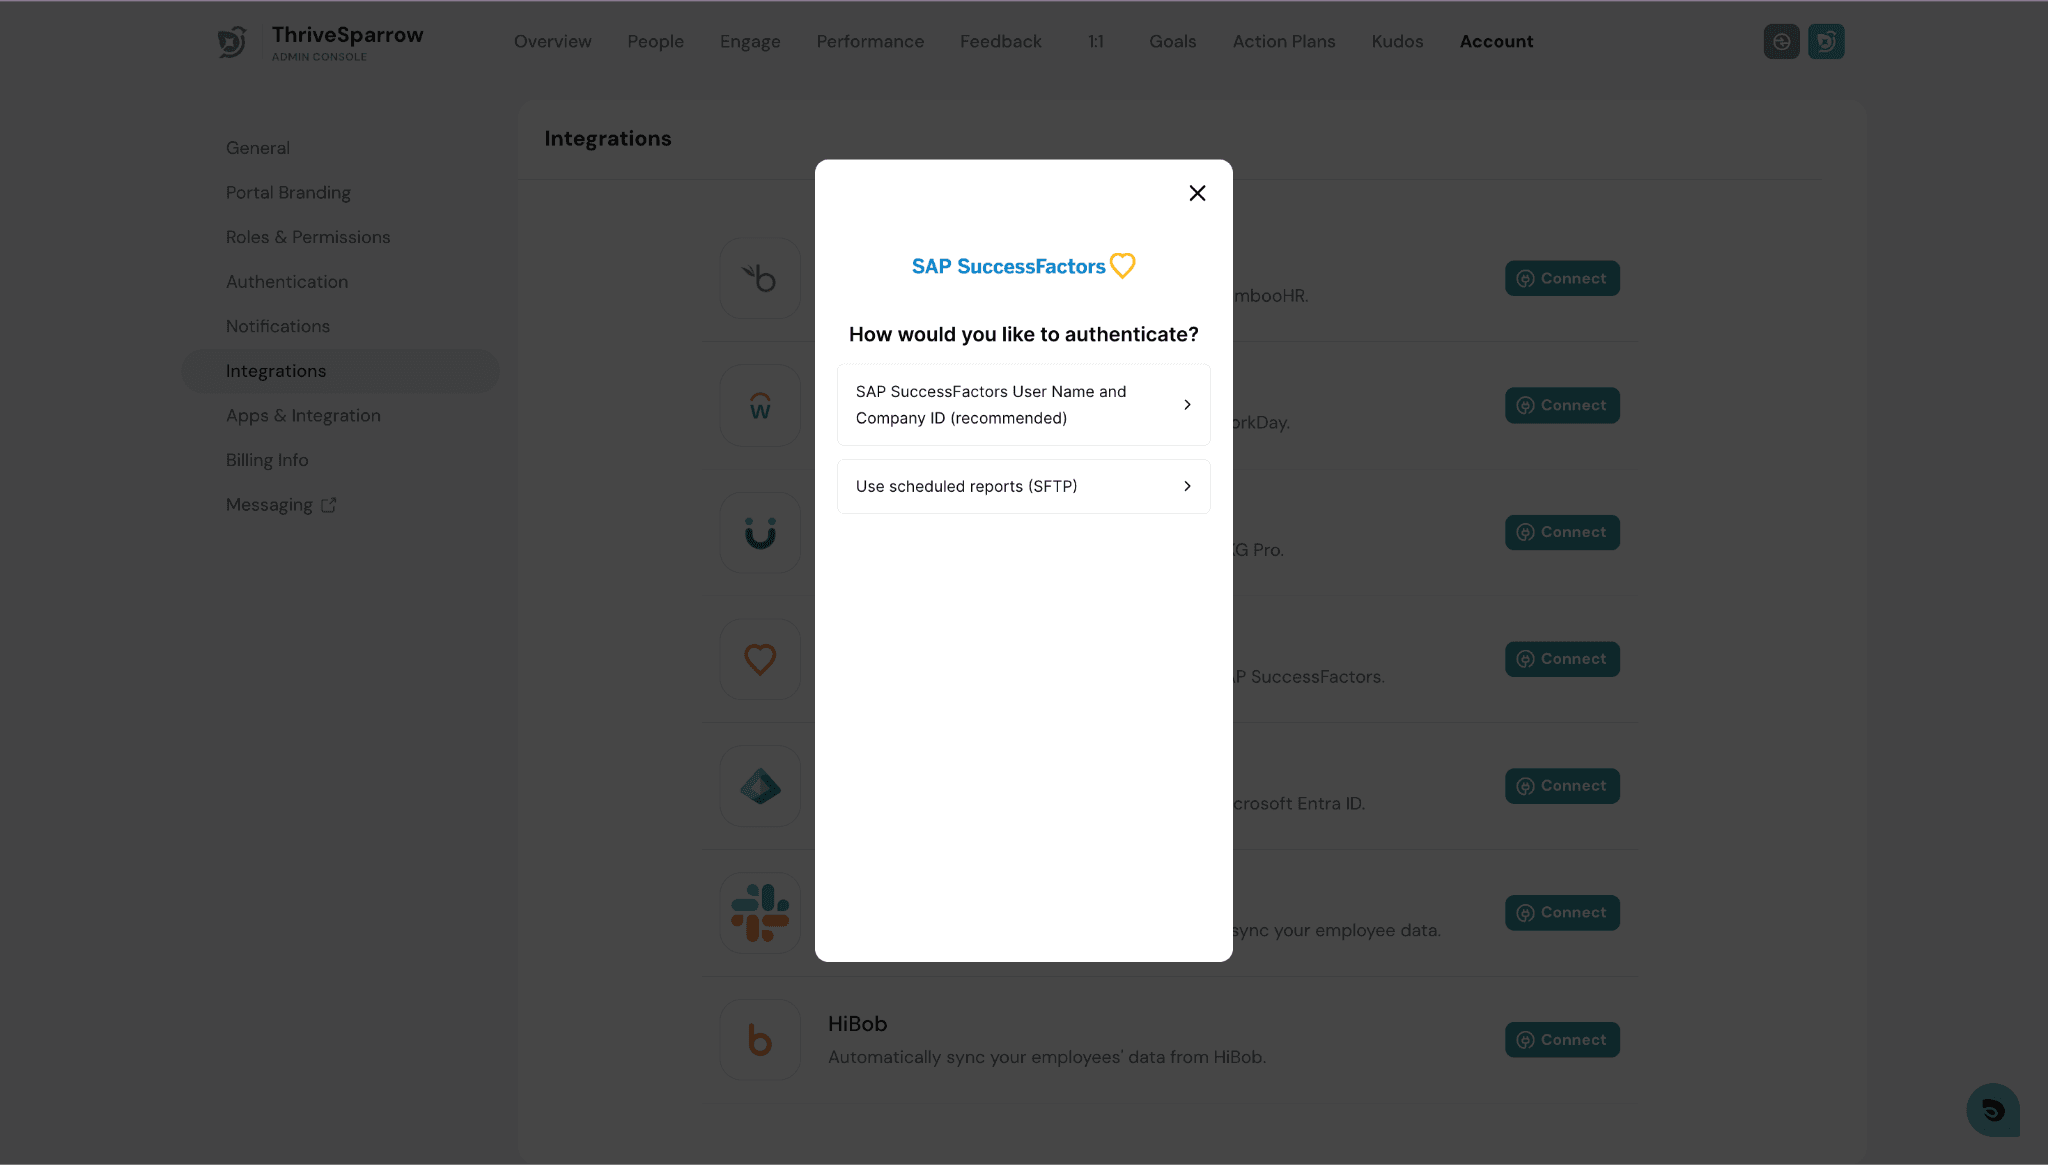
Step 4 - Choose an Authentication Method
Select how you want to authenticate with SAP SuccessFactors:
- SAP SuccessFactors User Name and Company ID (recommended)
- Use scheduled reports (SFTP)
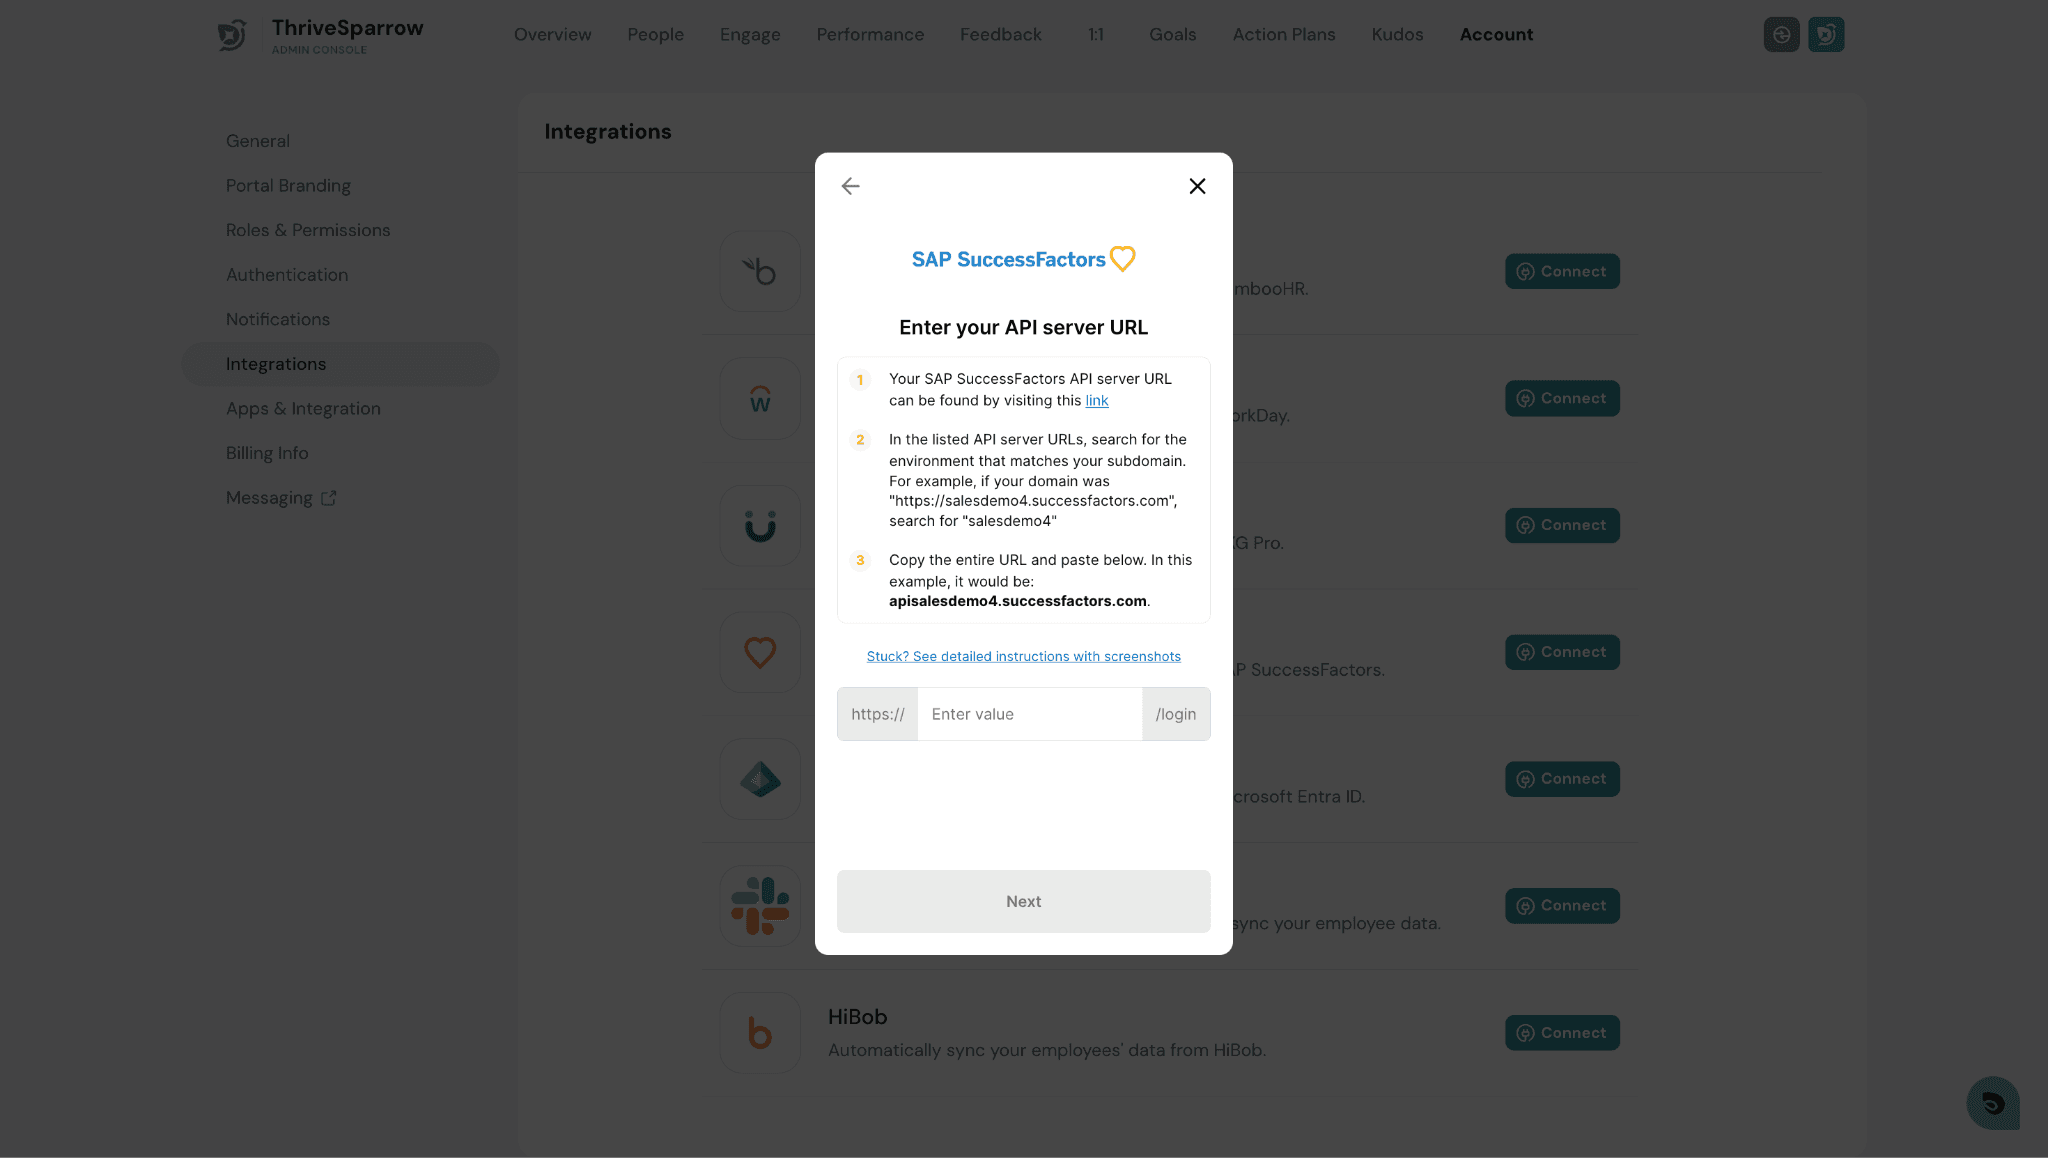
Step 5A - Enter Your API Server URL (Username/Company ID path)
If you chose the username and company ID method, you will first be asked for your SAP SuccessFactors API server URL.
- Visit the link provided in the dialog to find the correct API server URL for your environment.
- Match the URL to your subdomain. For example, if your domain is salesdemo4.successfactors.com, search for "salesdemo4."
- Copy the full URL (e.g., apisalesdemo4.successfactors.com) and paste it into the field.
- Click Next.
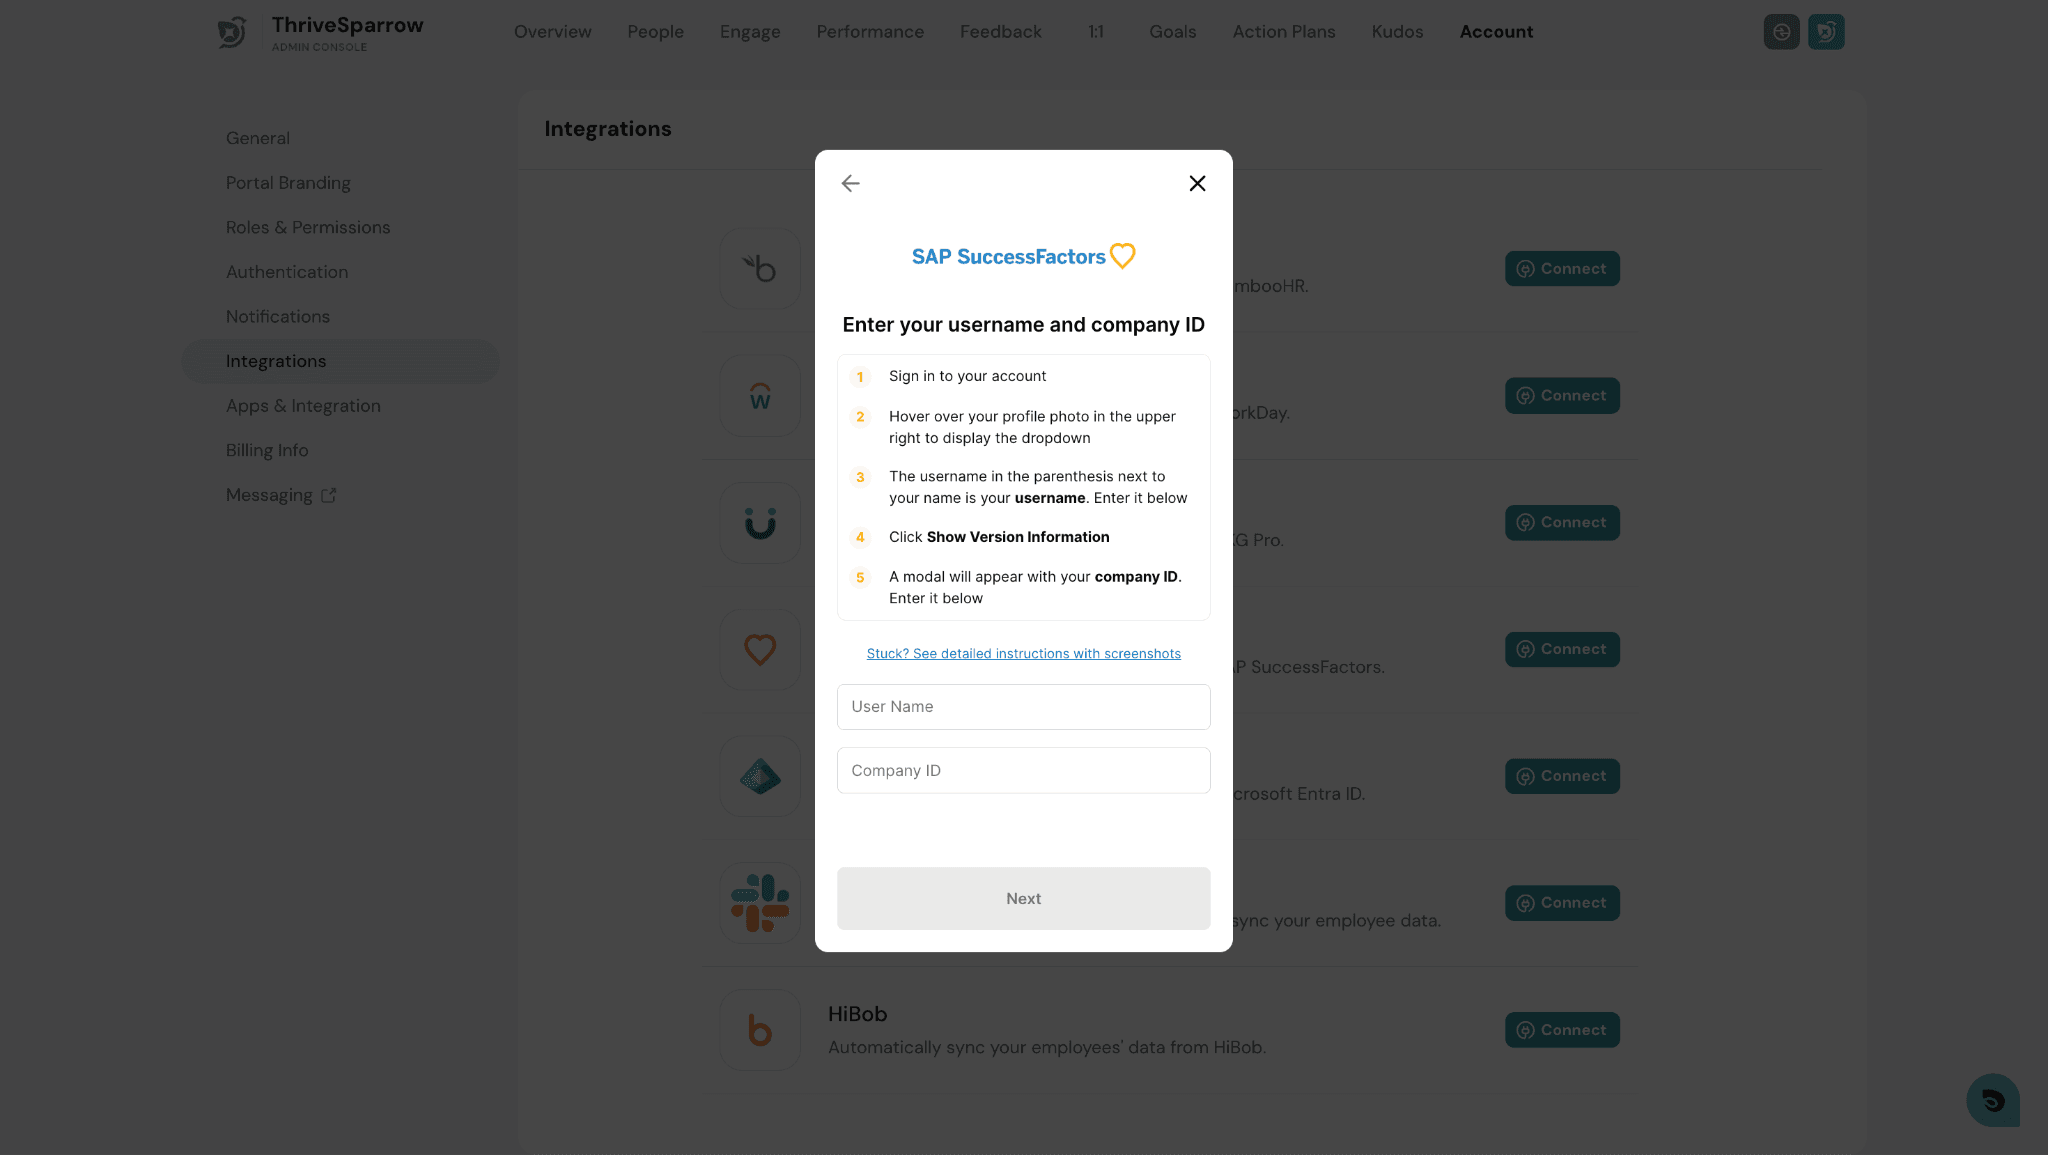
Step 5B - Enter Your Username and Company ID
- Sign in to your SAP SuccessFactors account.
- Hover over your profile photo in the upper right to open the dropdown.
- The username shown in parentheses next to your name is your username.
- Click Show Version Information - a modal will display your Company ID.
- Enter both values in the fields shown and click Next.
Step 5C - Enter Client ID and Client Secret (OAuth path)
If you chose the OAuth method instead, follow these steps to obtain your credentials:
- Sign in to your SAP SuccessFactors account.
- Search for Manage OAuth2 Client Applications in the search bar.
- Click Register Client Application.
- Fill in the Application Name and Application URL (must start with "https://").
- Press Generate X.509 Certificate.
- Fill in the Common Name field with any value.
- Enter the resulting Client ID and Client Secret in the fields and click Next.

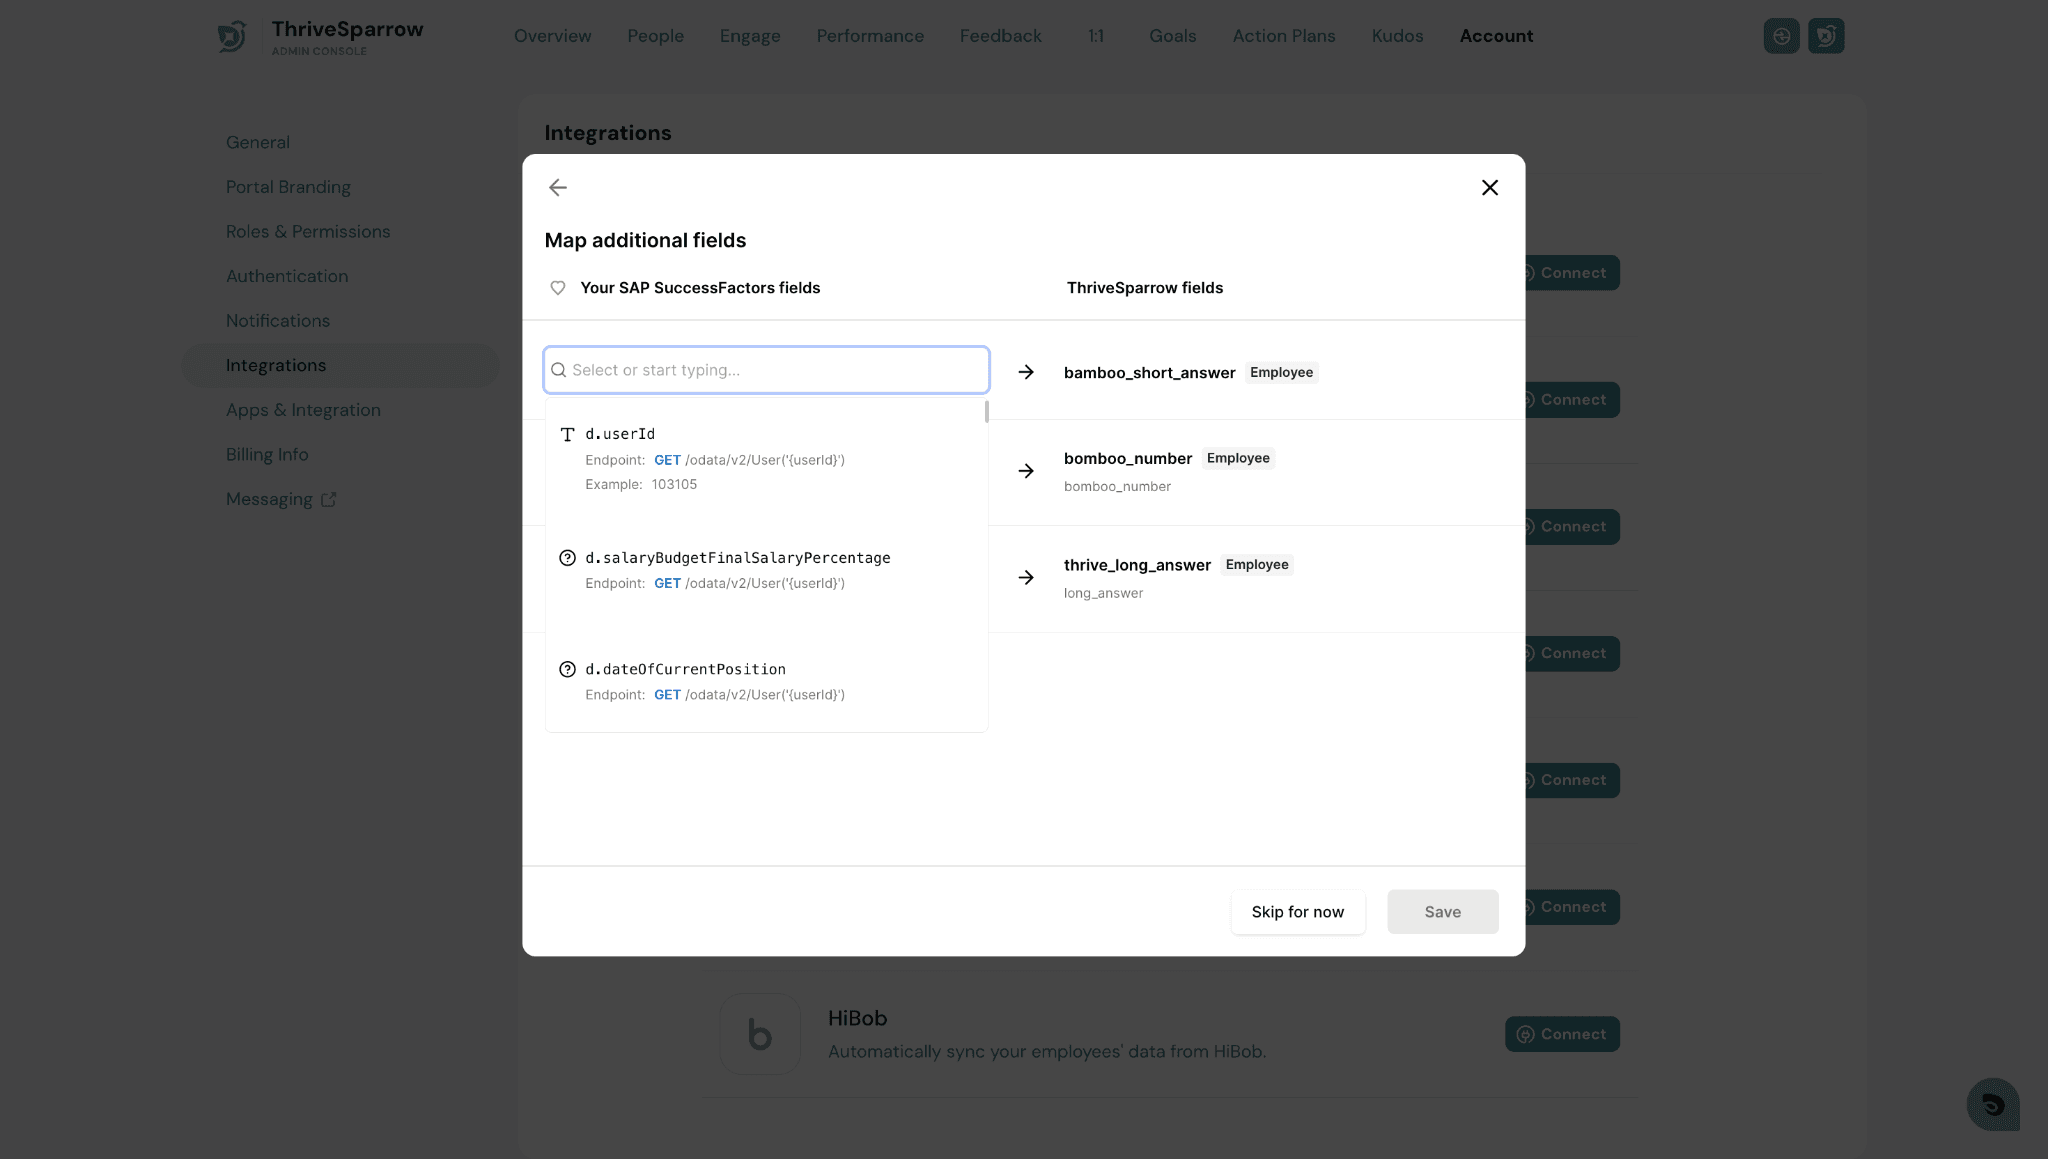
Step 6 - Map Additional Fields
Once credentials are verified, you will be prompted to map additional fields between ThriveSparrow and SAP SuccessFactors. Standard fields are already included by default - this step is for any extra custom fields you want to sync.
Review the mapping overview
A summary screen shows the types of field mappings that are possible. Click Map fields to proceed, or Skip for now if you don't need custom mappings at this time.

Add field mappings
On the mapping screen, you will see a list of ThriveSparrow fields on the right. For each row, use the left-hand search input to select the corresponding SAP SuccessFactors field you want to map to it. Click + Mapping to add more rows as needed.

Select an SAP SuccessFactors field
Click into any left-hand input to open the SAP SuccessFactors field picker. Fields are listed with their API endpoint for reference. Select the field you want to import.
Once all your mappings are configured, click Save to preserve them.
Step 7 - Wait for the Sync to Complete
After saving, the integration page will show a status message indicating that the initial sync is in progress. Please wait until the sync process finishes before proceeding to import employees.
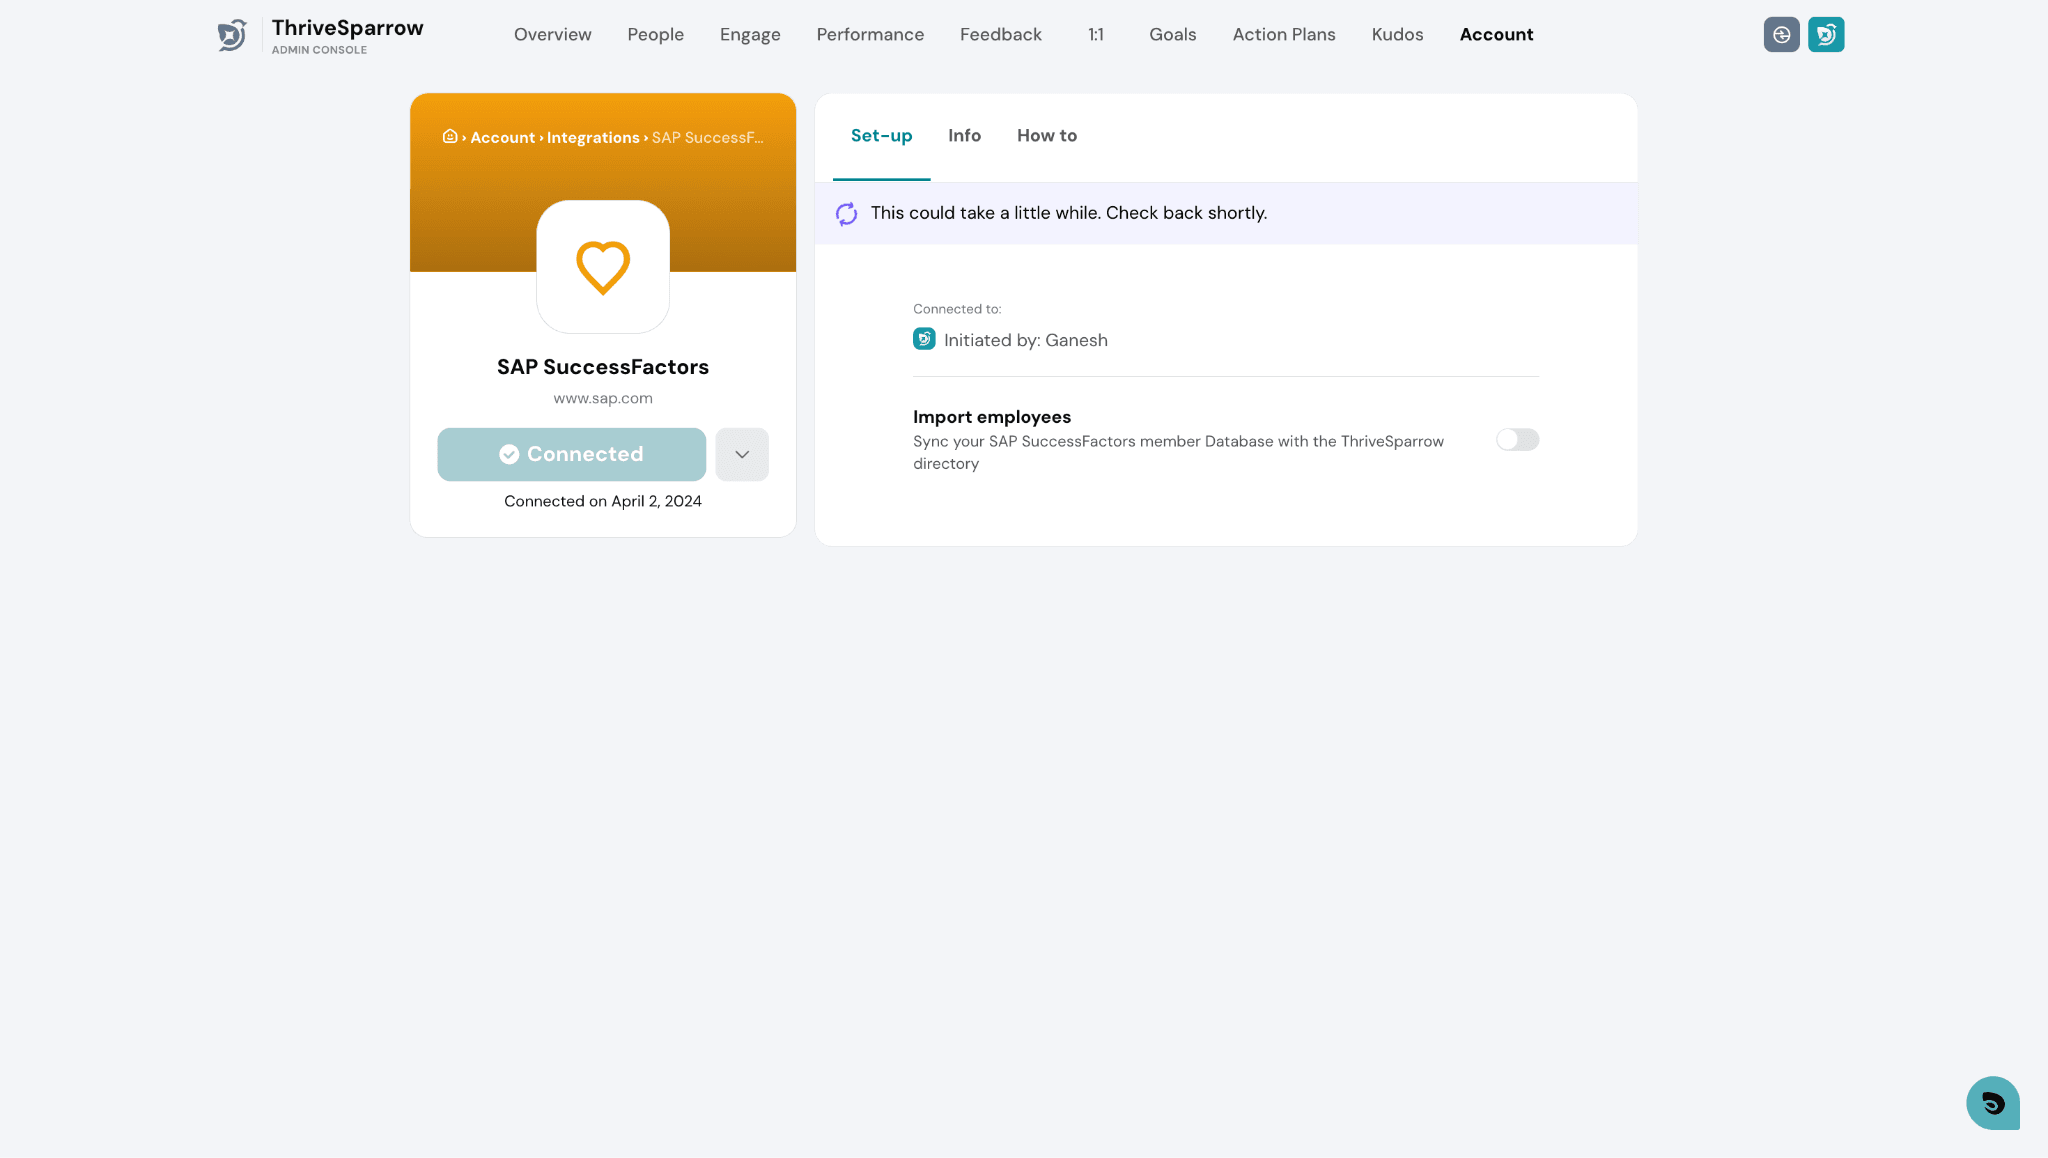
Step 8 - Enable Employee Import
Once the sync is complete and the status shows "All set. You can import your employees now," toggle on the Import employees switch. This will open the Auto Import employees modal.
Step 9 - Map Fields for Employee Import
The Auto Import modal opens at the Map Field step. Choose whether to import all employees or selected groups, then review and confirm the field mappings between SAP SuccessFactors and ThriveSparrow properties.
Fields such as First name, Last name, and Preferred name are automatically mapped where possible. For any Unmapped fields, use the dropdown to select the appropriate ThriveSparrow property.
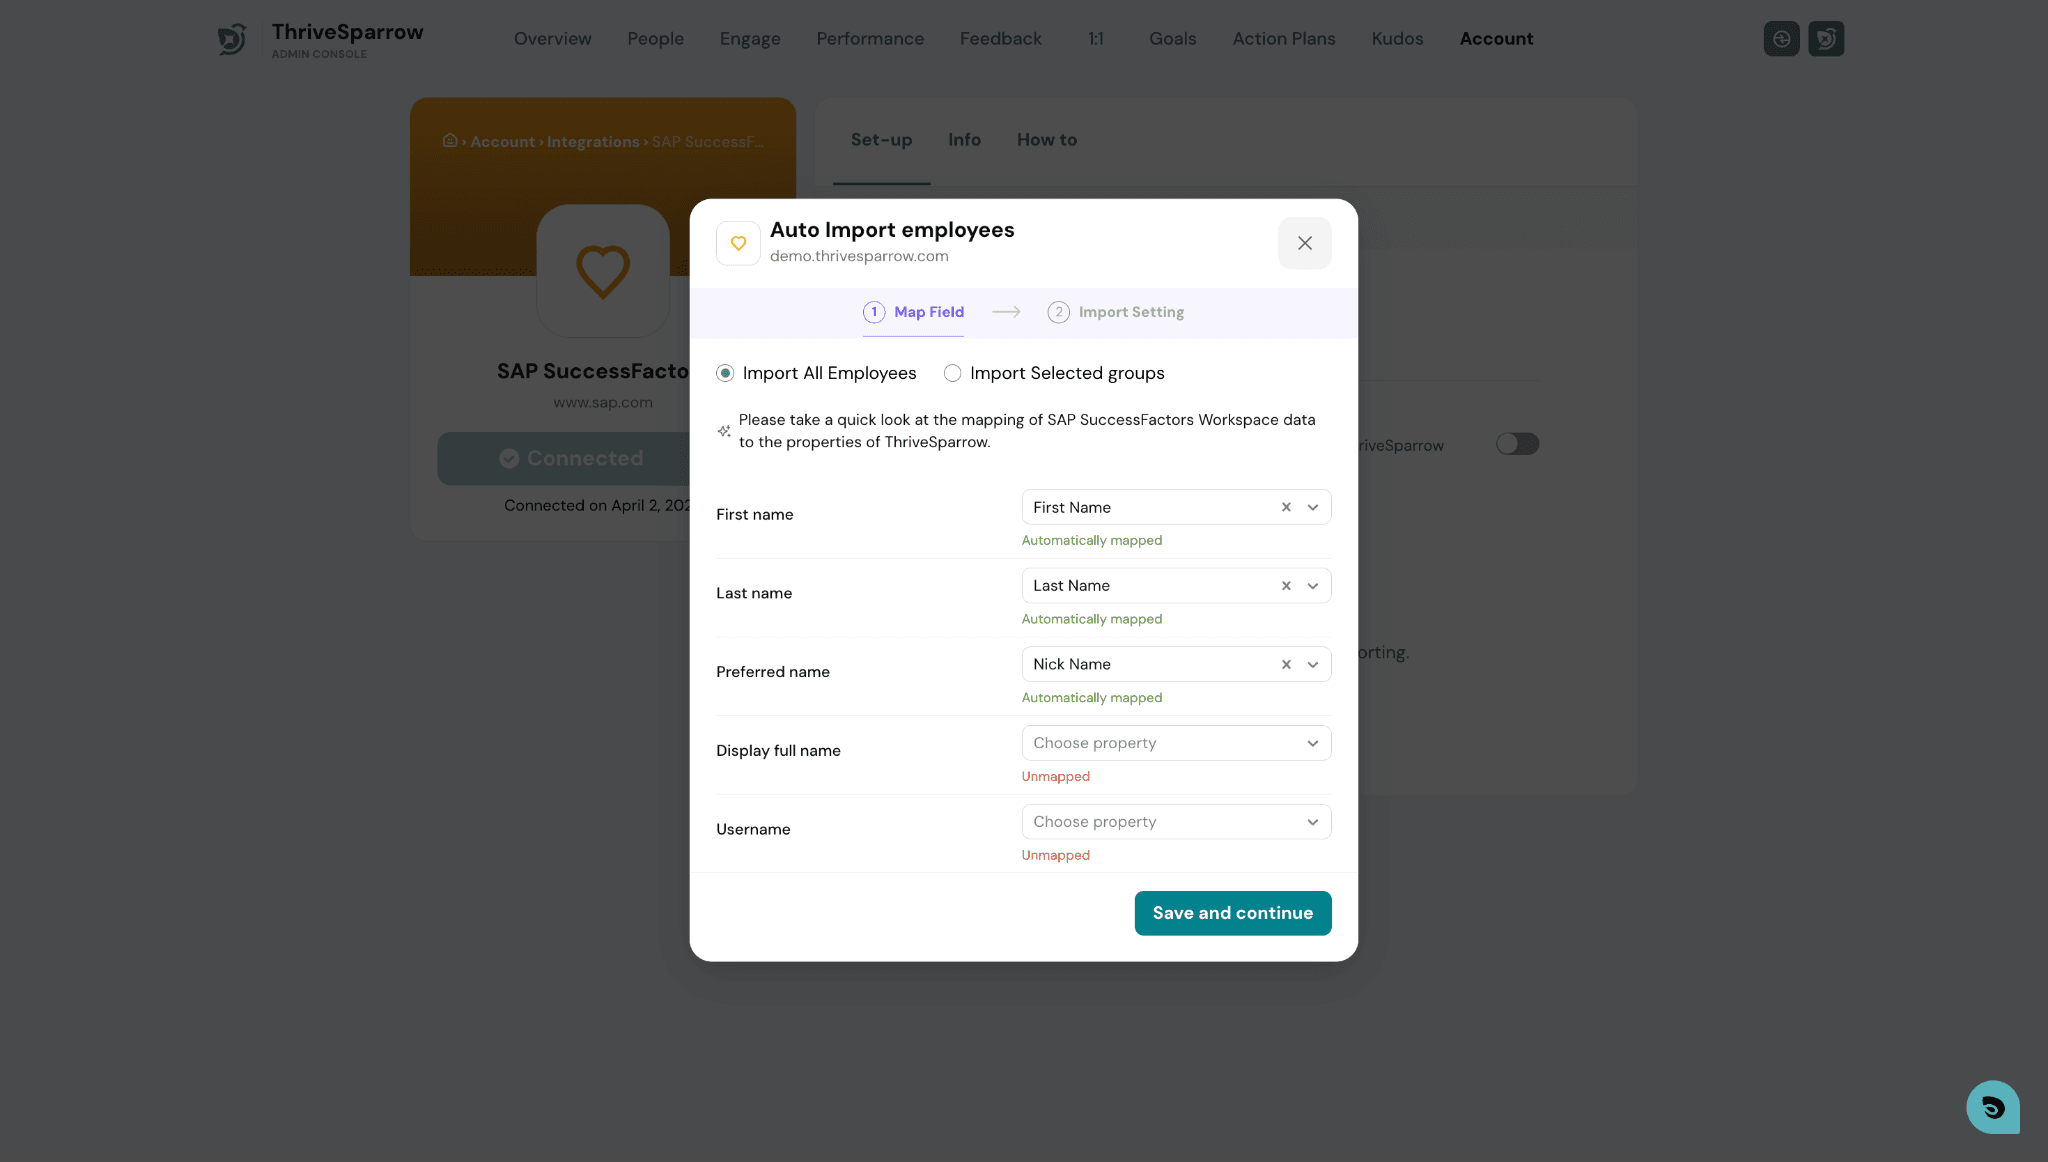
Click Save and continue once your field mappings are set.
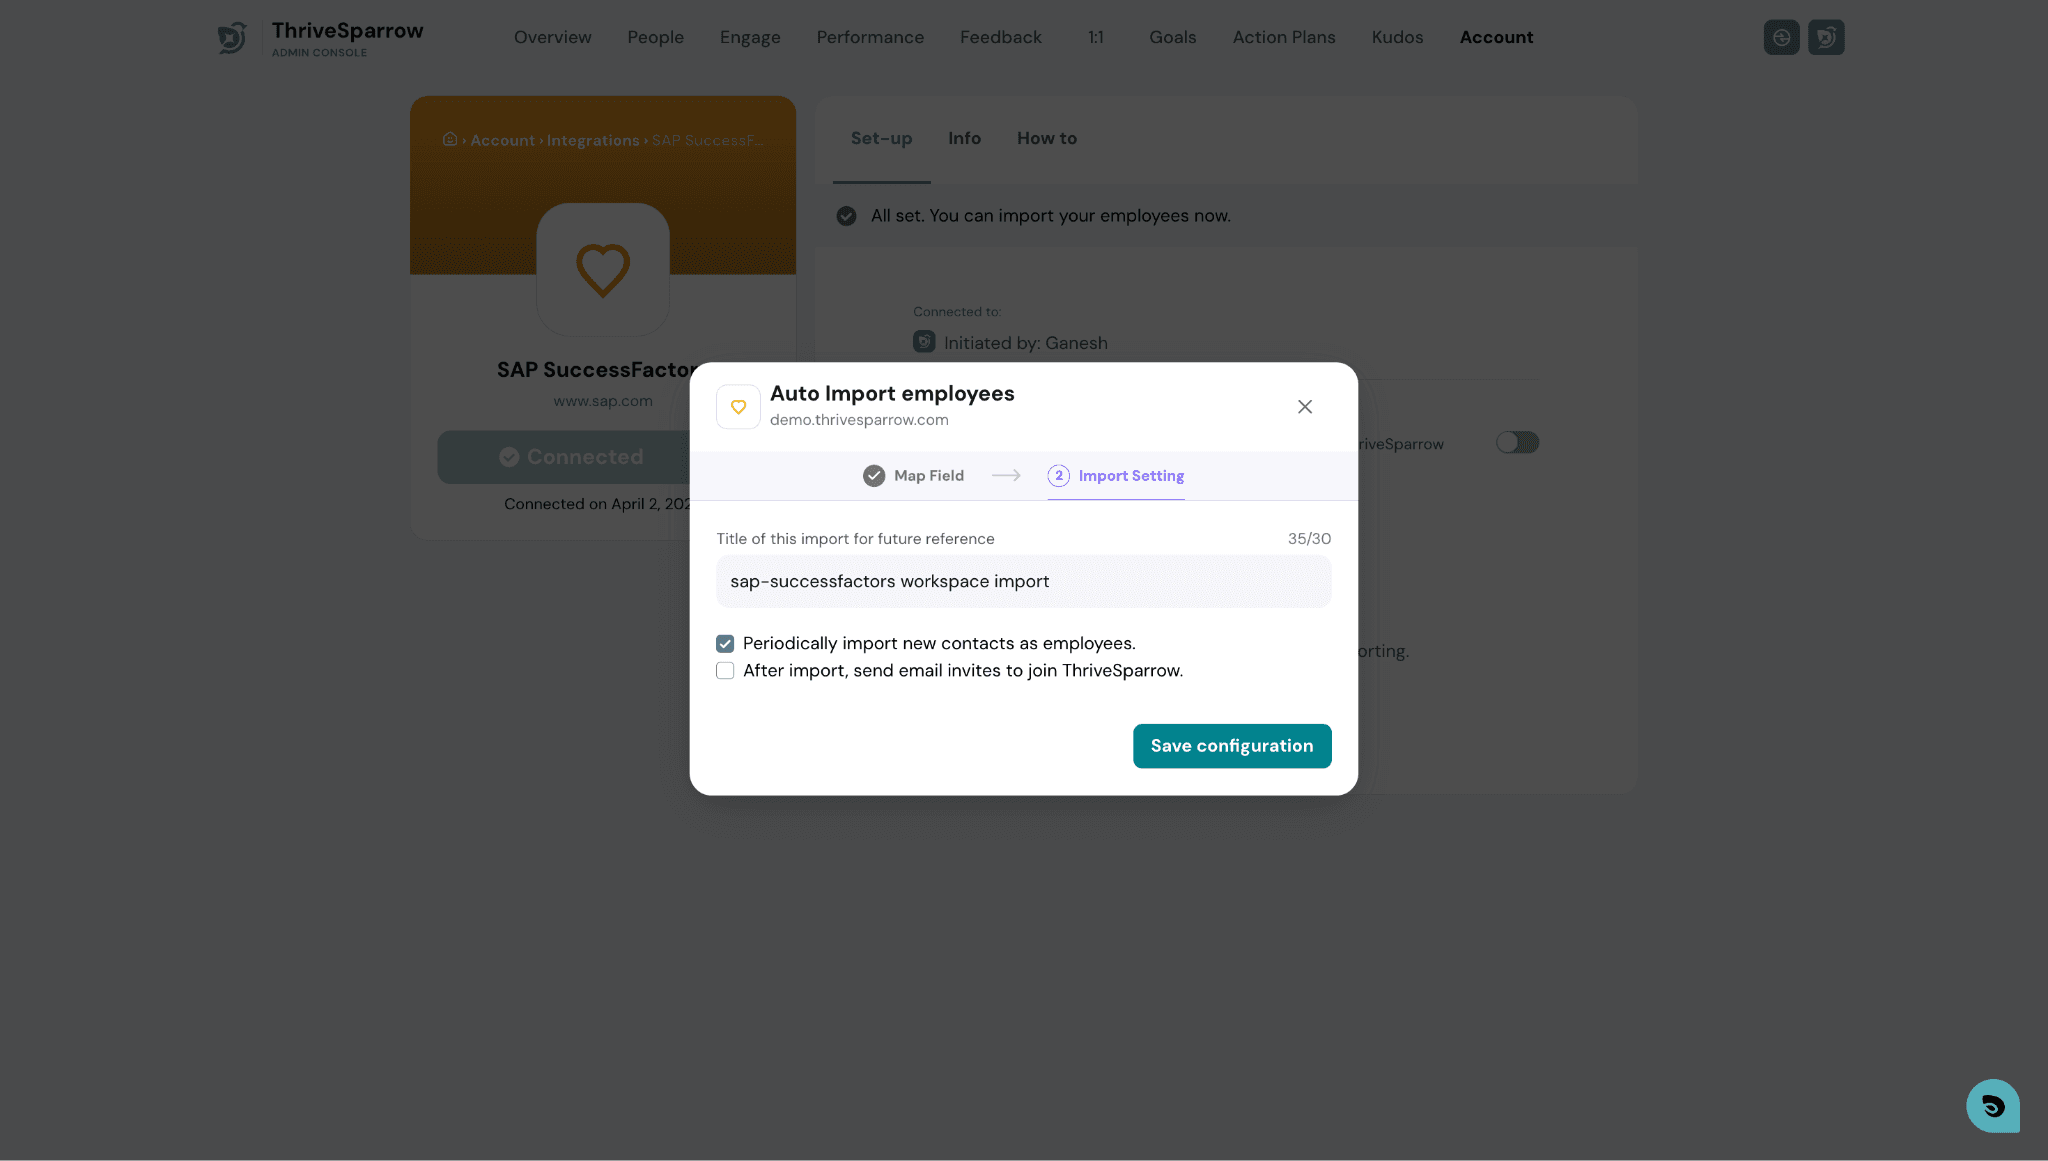
Step 10 - Configure Import Settings
On the Import Setting step:
- Enter a title for this import configuration so you can identify it later.
- Enable Periodically import new contacts as employees if you want new hires to be automatically synced on an ongoing basis.
- Optionally, enable After import, send email invites to join ThriveSparrow if you want employees to receive an invitation email.
- Click Save configuration to complete the setup.
Your SAP SuccessFactors integration is now complete. Employee data will begin syncing into ThriveSparrow using the mappings you configured, and will be available for segmentation and reporting across the platform.