Setting up your Hibob integration only takes a few steps. You’ll first create a service user and permission group inside Hibob, then link that account to ThriveSparrow.
Step 1: Create a service user in Hibob
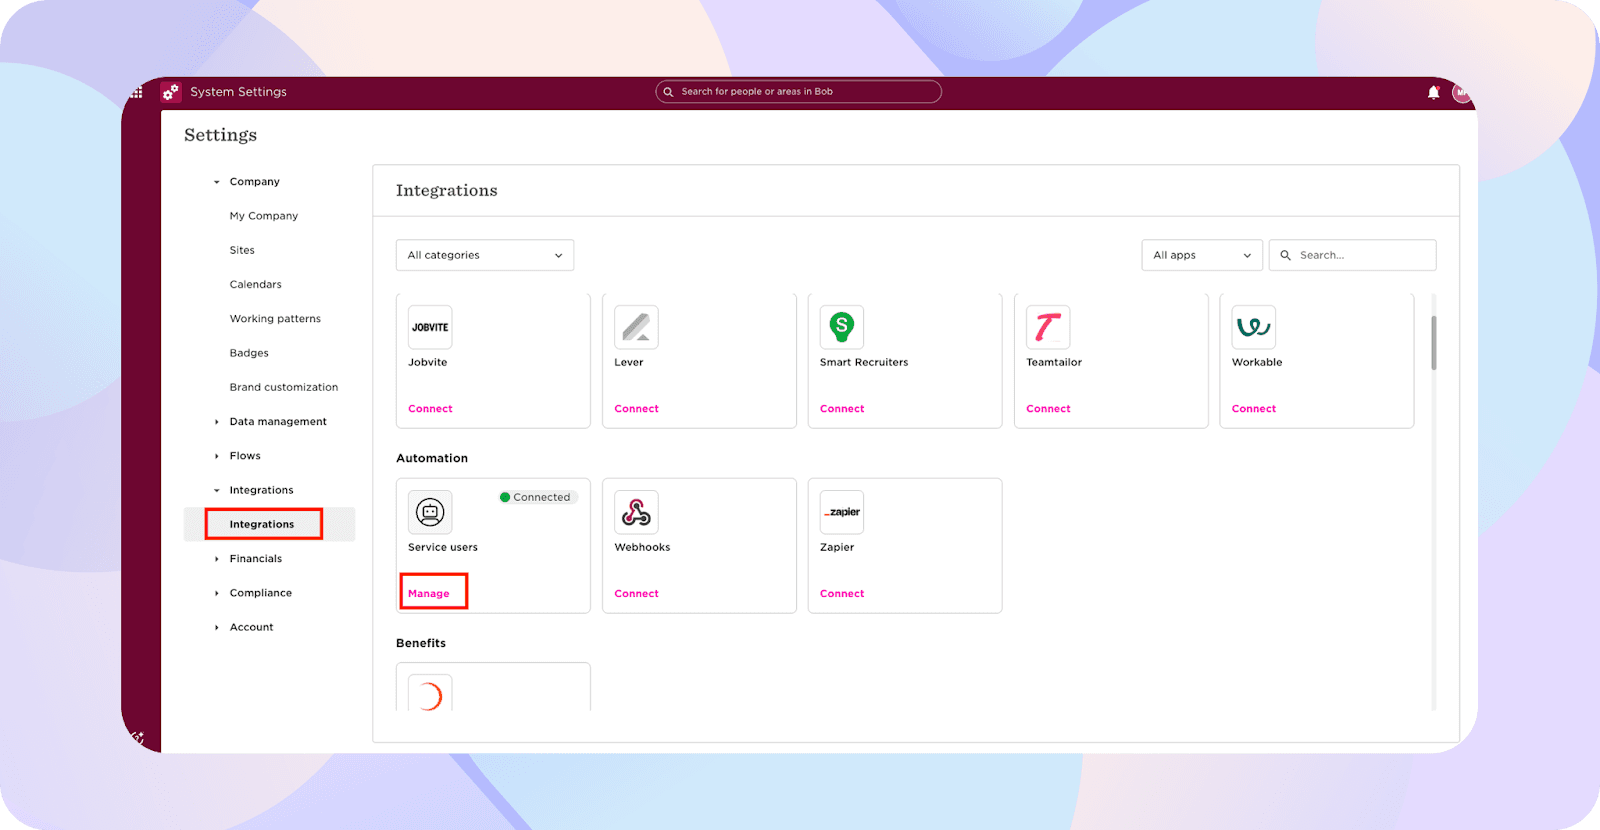
Log in to Hibob and head over to System Settings.
Open Integrations and click Manage under the Service users tile.
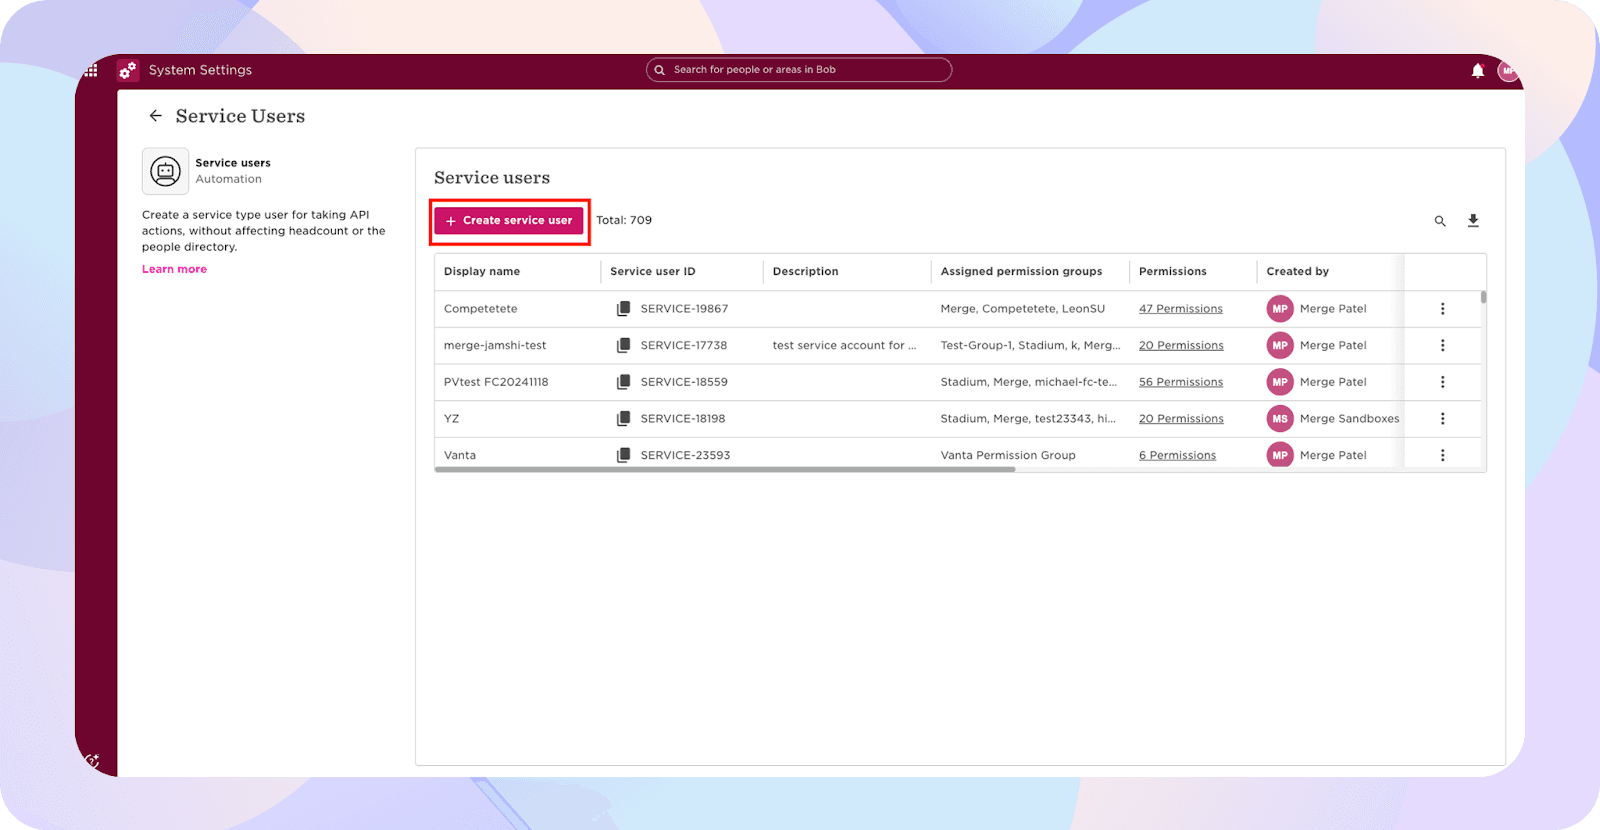
Click Create service user.
Enter the display name and description you like, then hit Create.
Hibob will now show you the Service Account User ID and Token. Make sure to copy both somewhere safe; you’ll need them shortly.
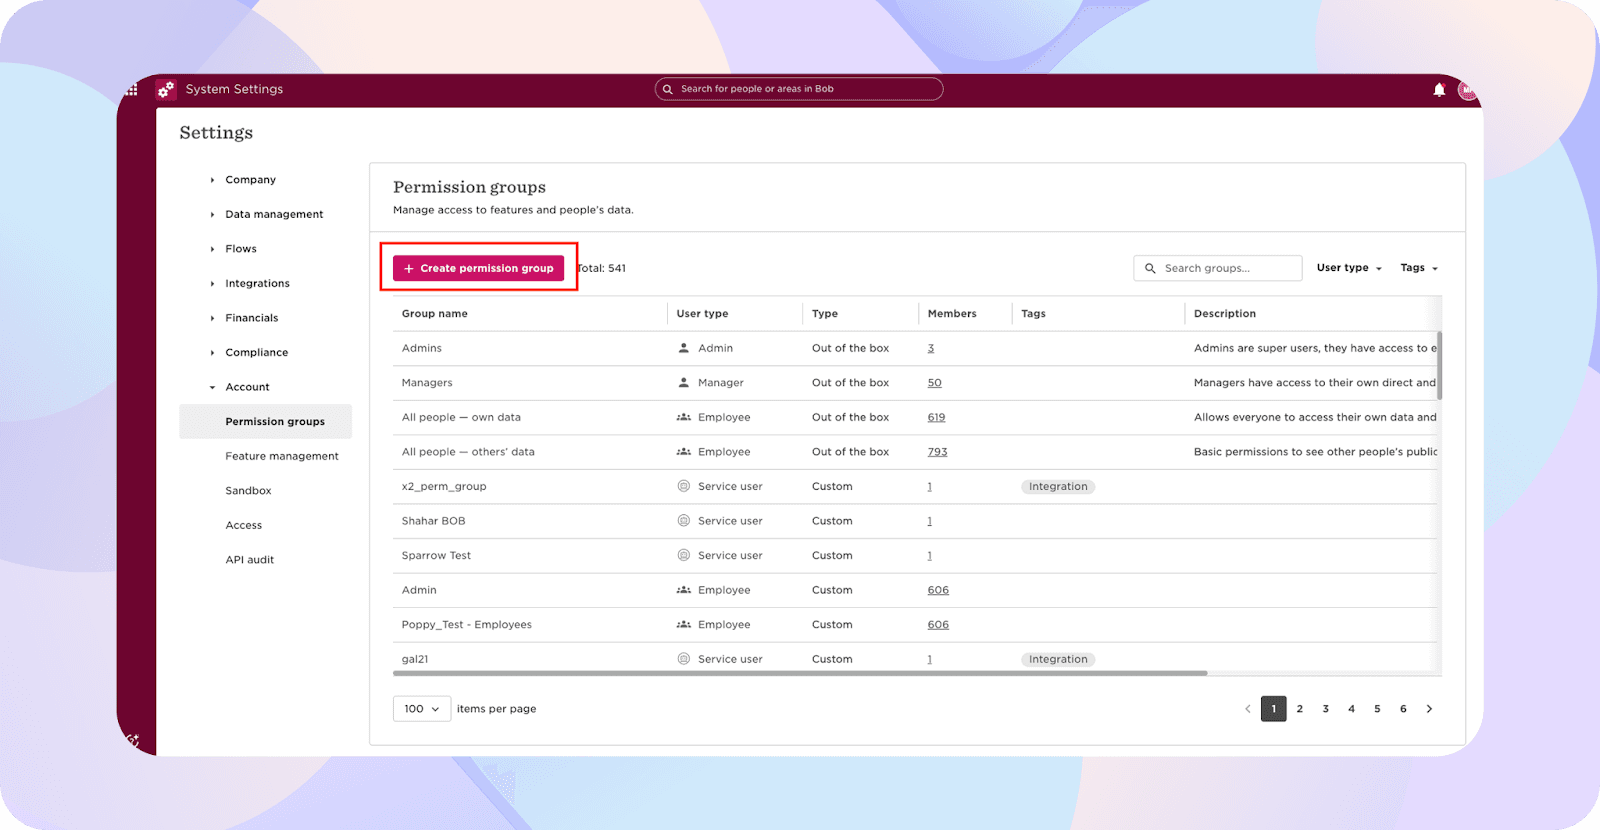
Click Go to permission groups to continue
Step 2: Set up a permission group
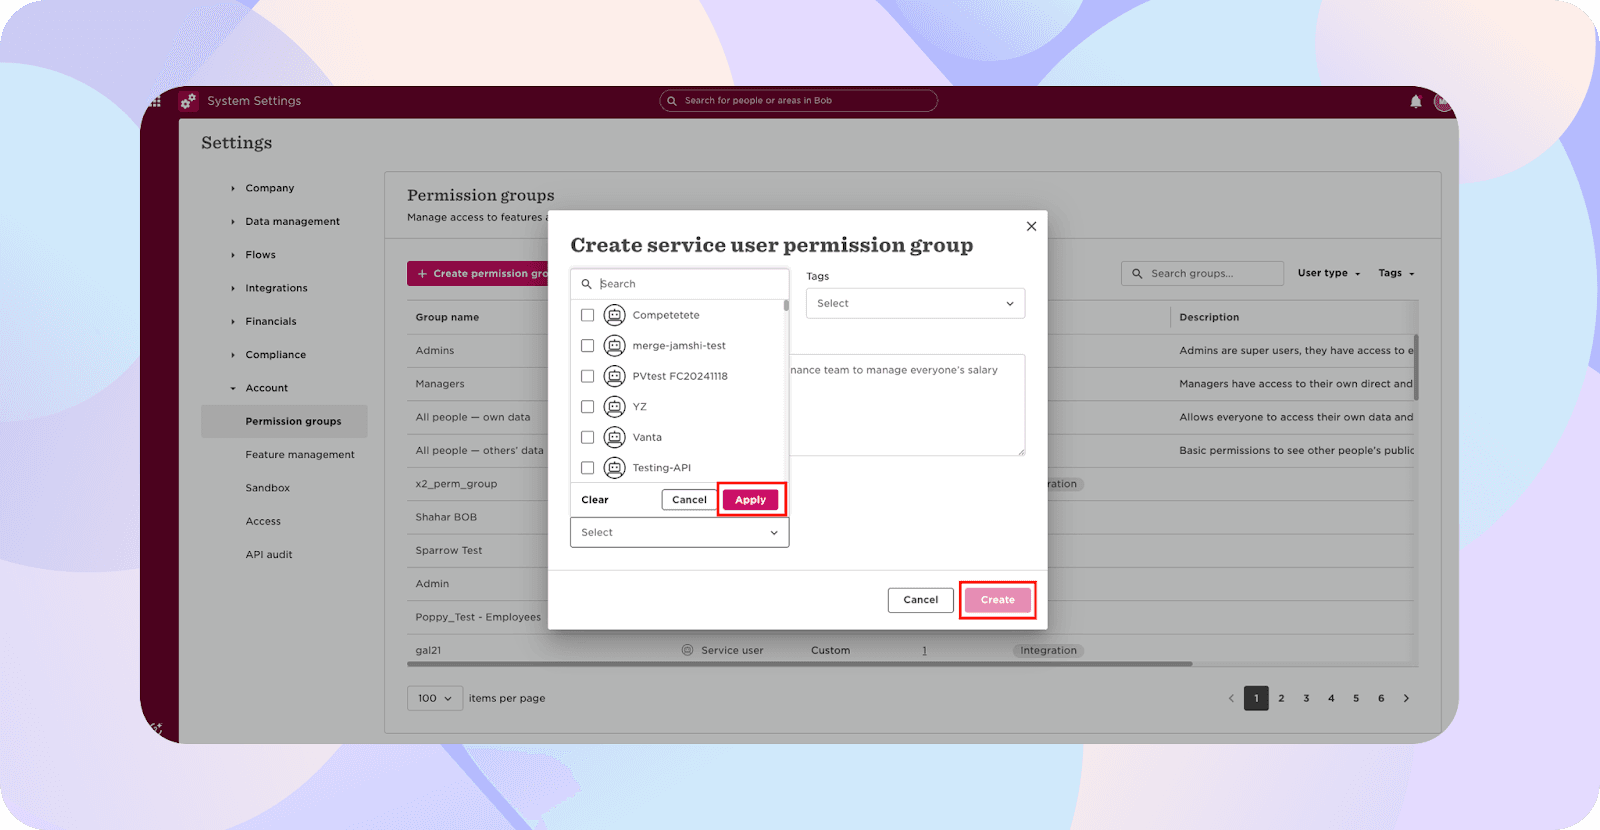
Select Add permission group, then choose Service user.
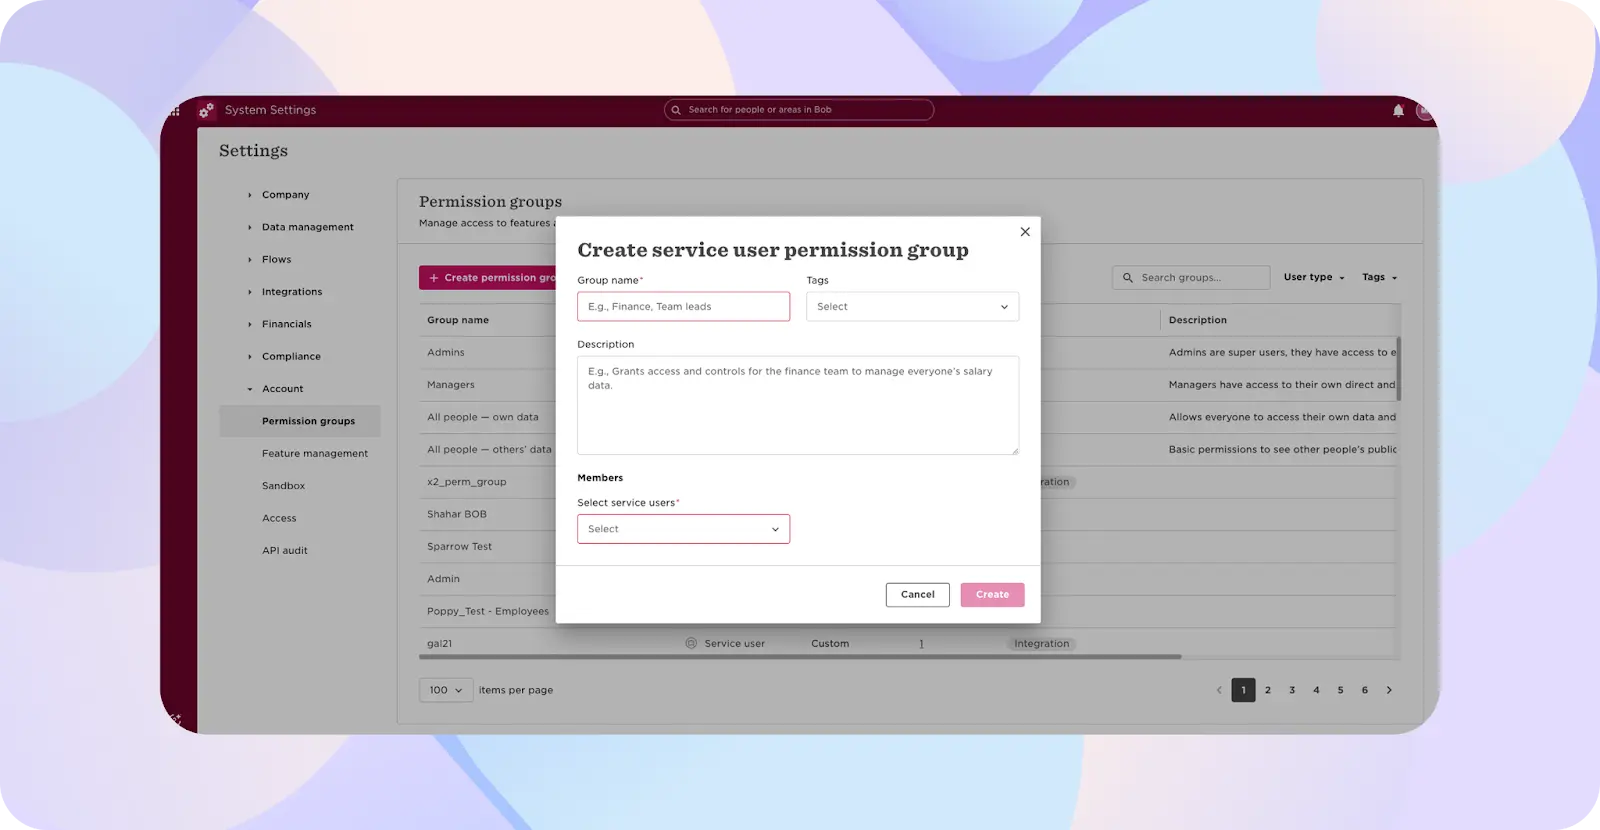
Give your group a name, select your new service user, and click Create.
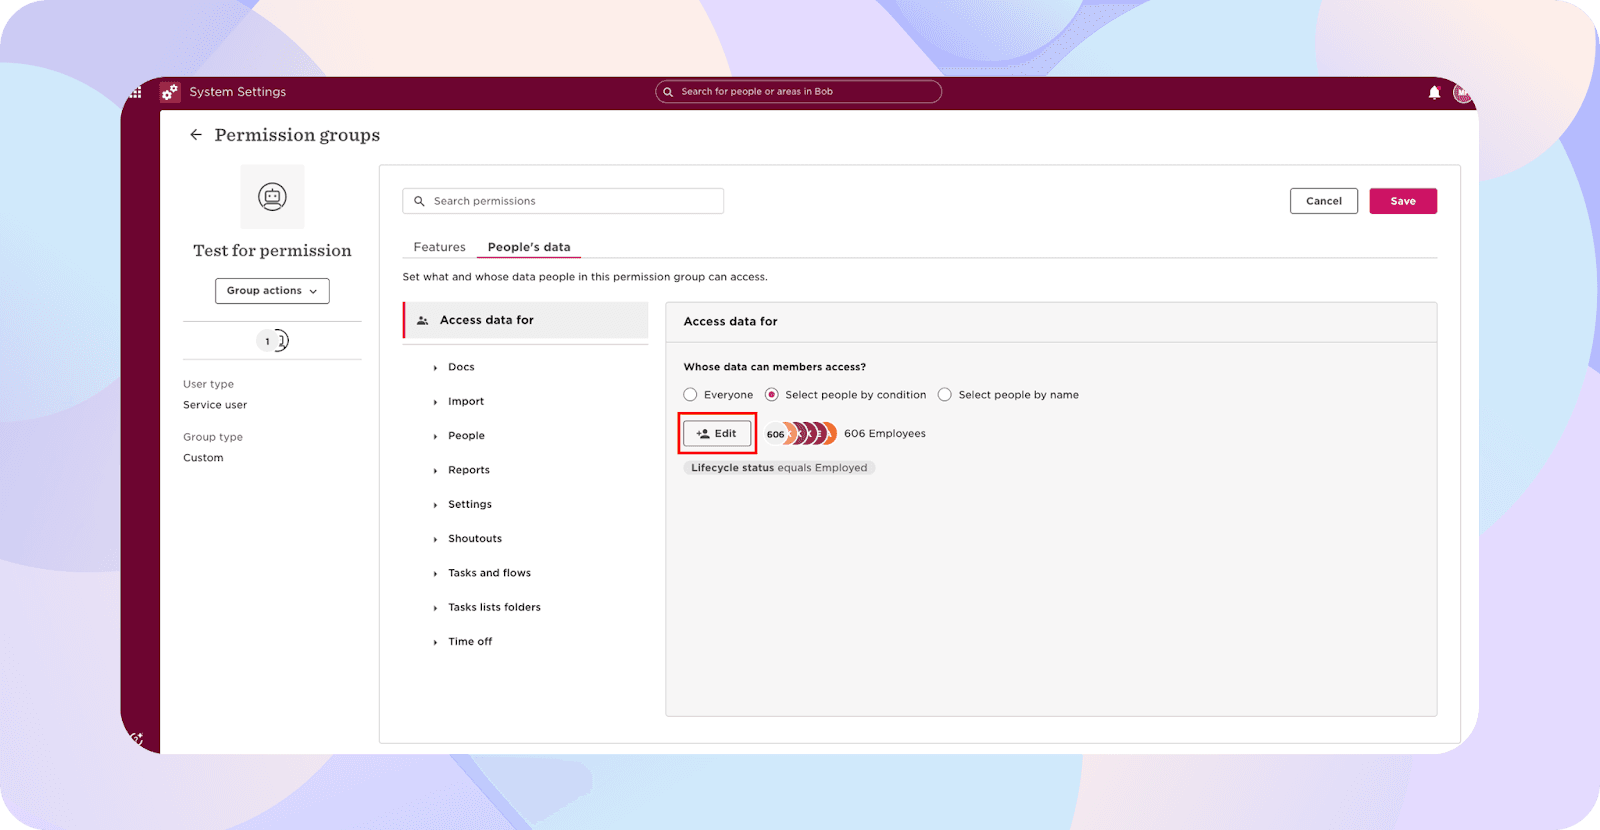
Switch to the People’s data tab in your new group.
Under Whose data can members access?, choose Select people by condition, then click Edit.
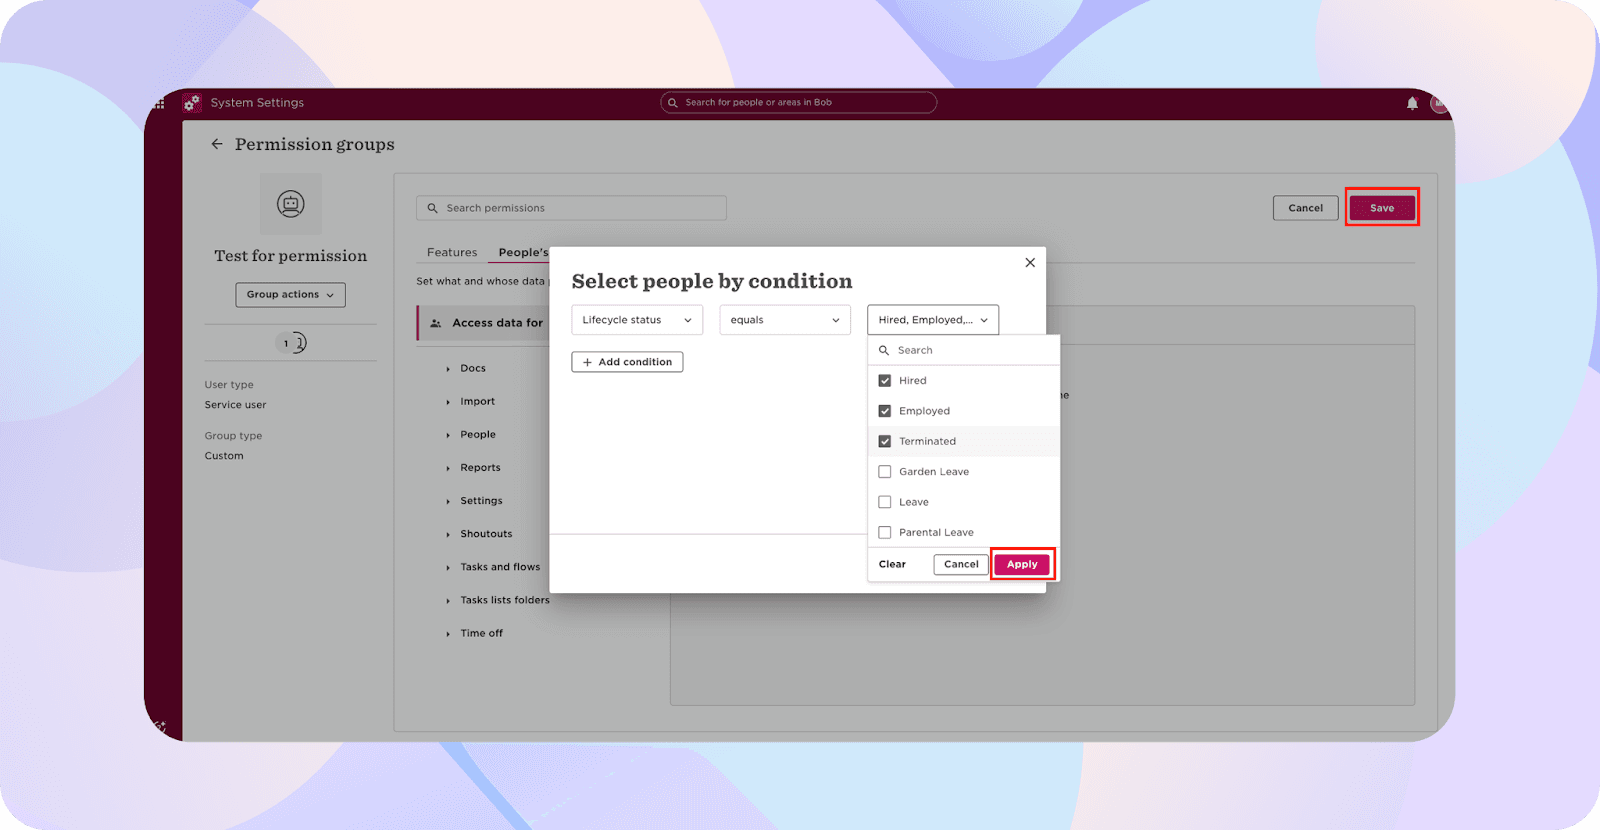
From the pop-up, select all relevant lifecycle statuses (for most cases: Hired, Employed, and Terminated). Click Apply twice.
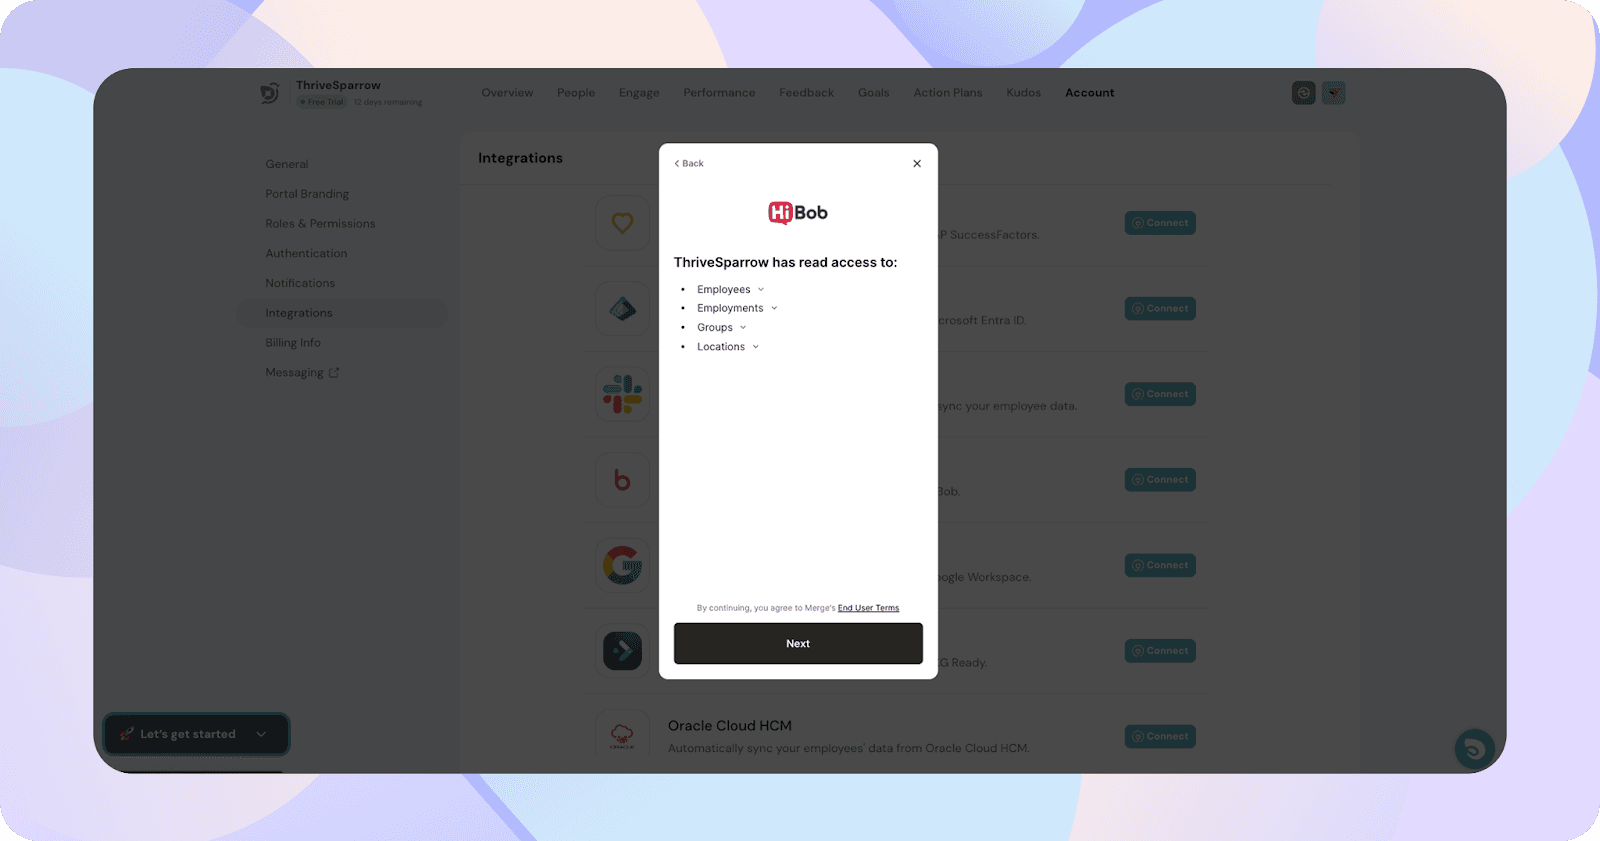
Assign the right permissions as these allow ThriveSparrow to pull in the data it needs to power your workflows.
At a minimum, you’ll want:
People > Basic Info → View selected employees’ basic info
People > Personal → View/edit personal sections (needed to surface Date of Birth; ThriveSparrow won’t make edits)
Contact Details (both personal and work) → View/edit contact info
Once you’ve added everything required, click Save.
Step 3: Link Hibob to ThriveSparrow
Log in to your ThriveSparrow account.
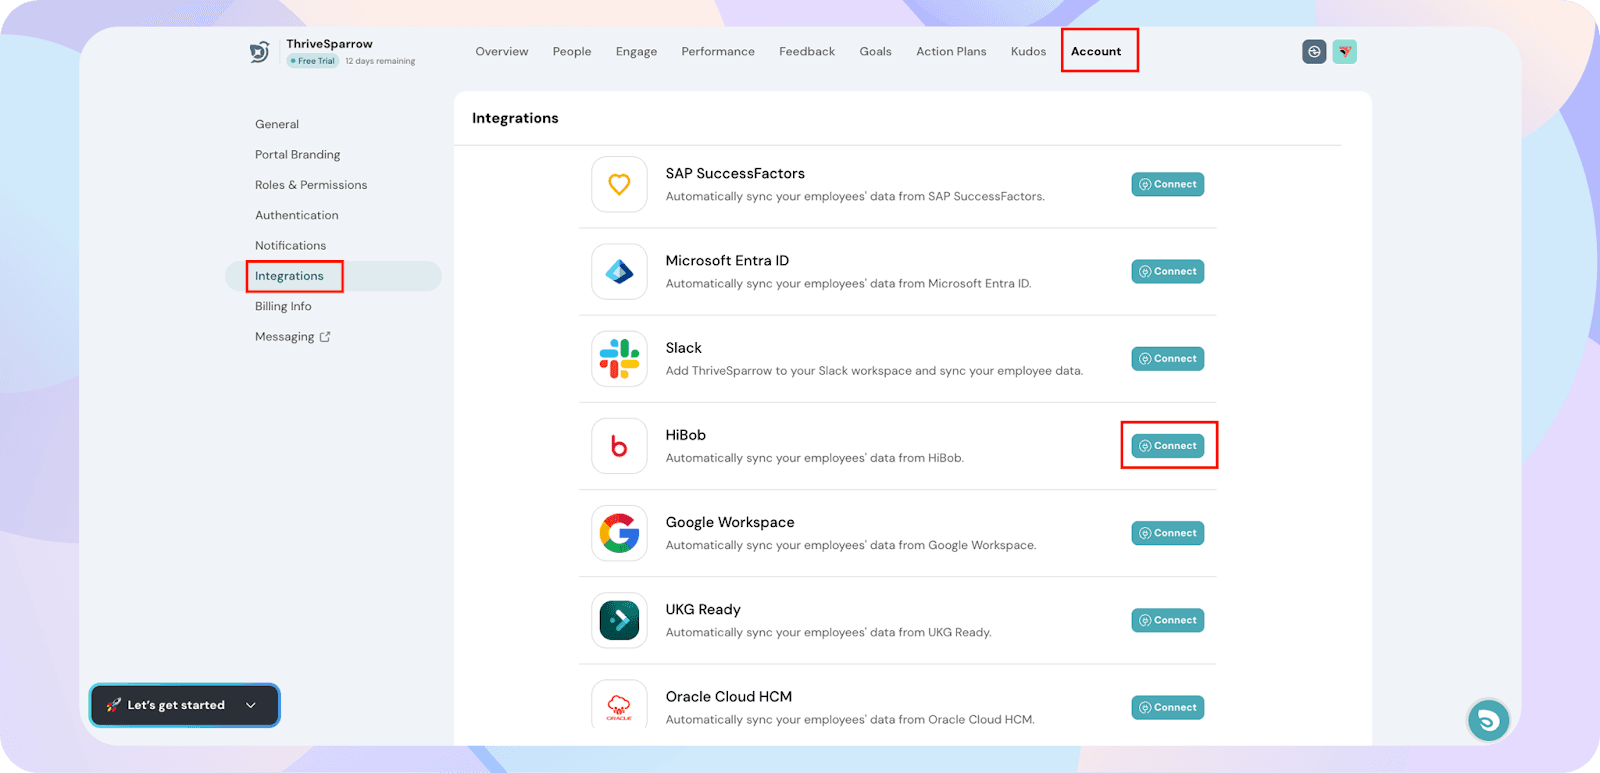
Go to the Accounts tab → click Integrations.
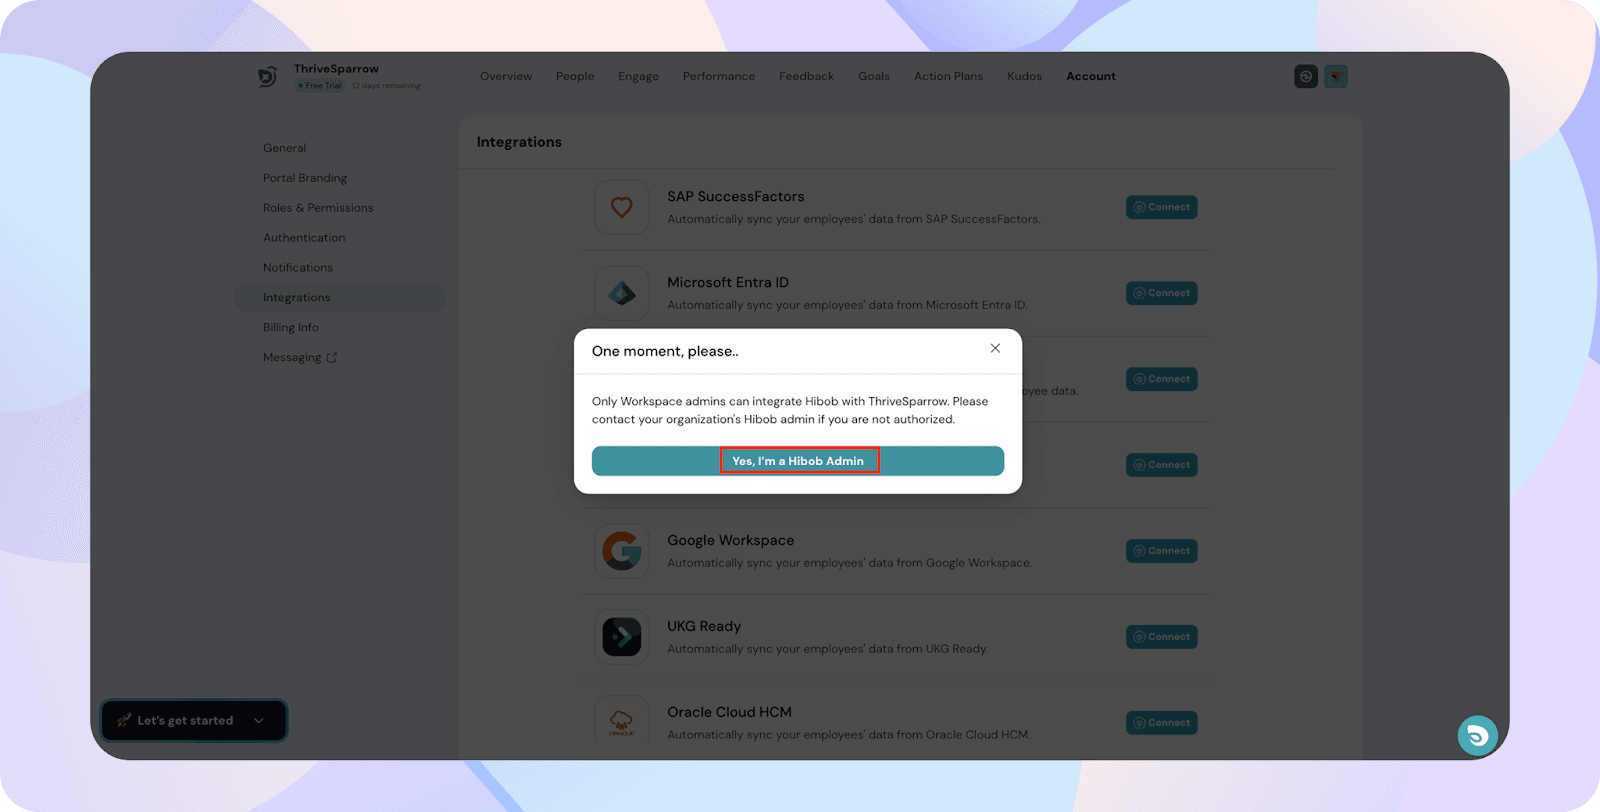
Search for Hibob and click Connect.
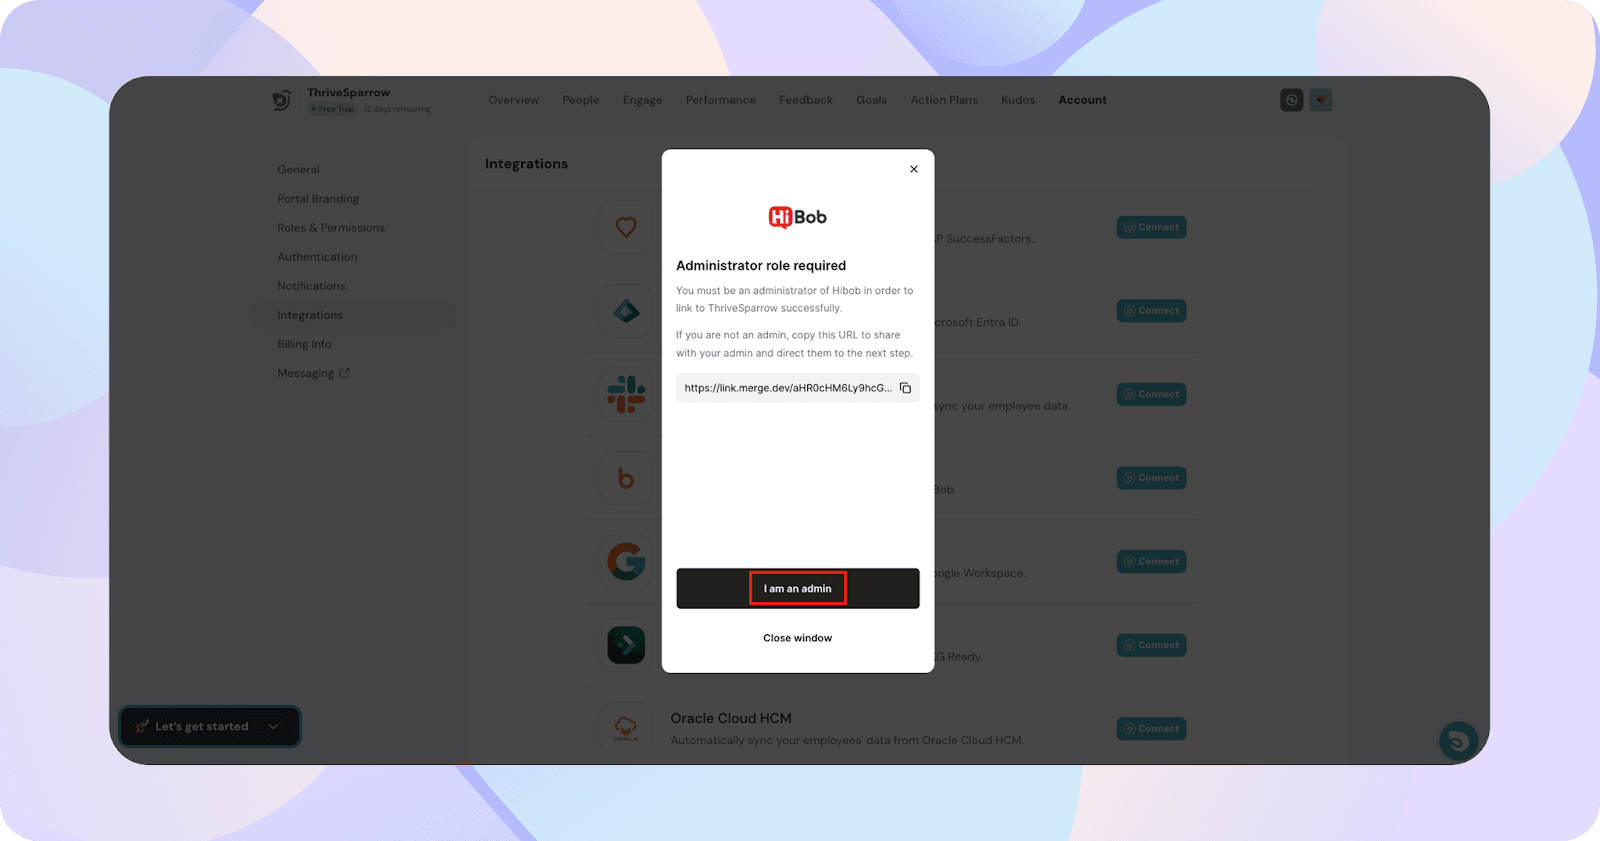
A pop-up will ask you to confirm that you’re a Hibob admin. Click on I’m an admin.
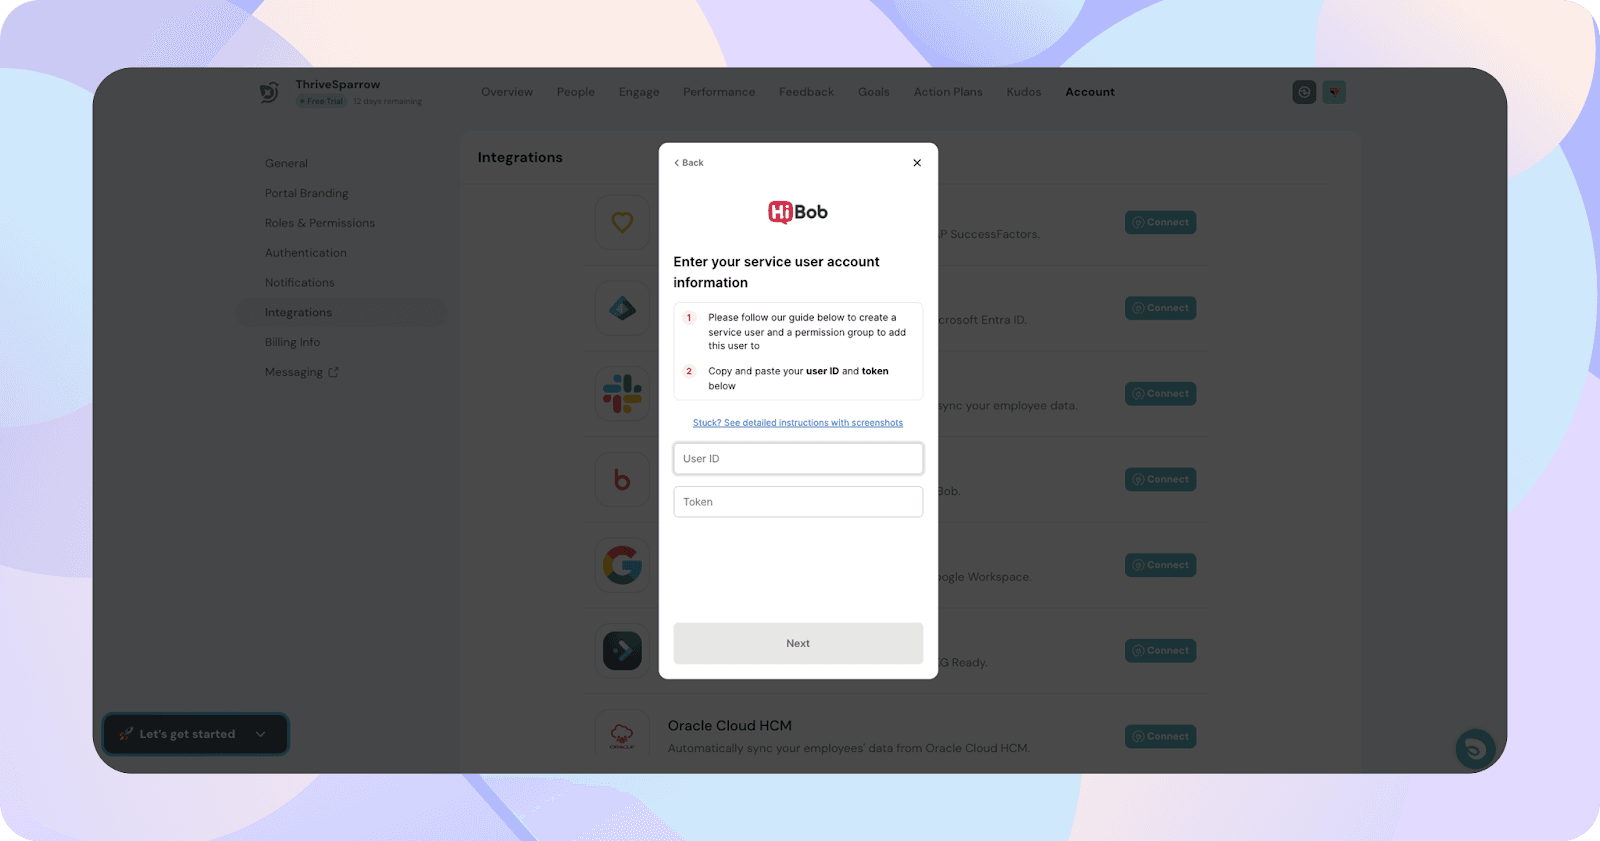
You’ll then be prompted to enter your Service User ID and Token. Paste the details you copied from Hibob.
Hit Next, and your integration is live.
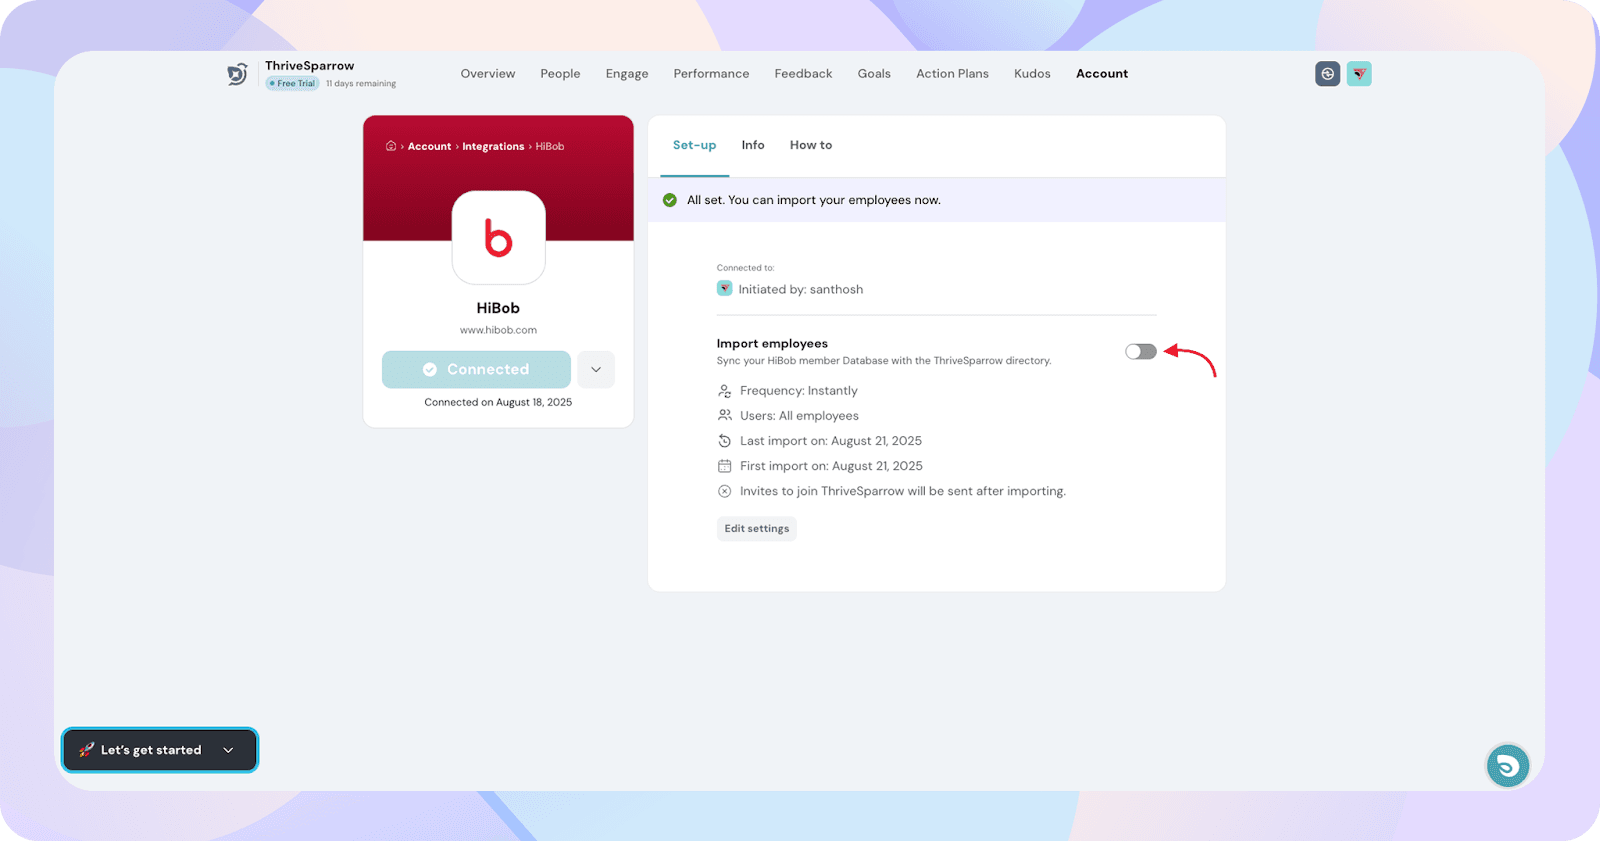
Step 4: Import your employees into ThriveSparrow
Enable import
On the Hibob integration page in ThriveSparrow, toggle the switch to start importing employees.
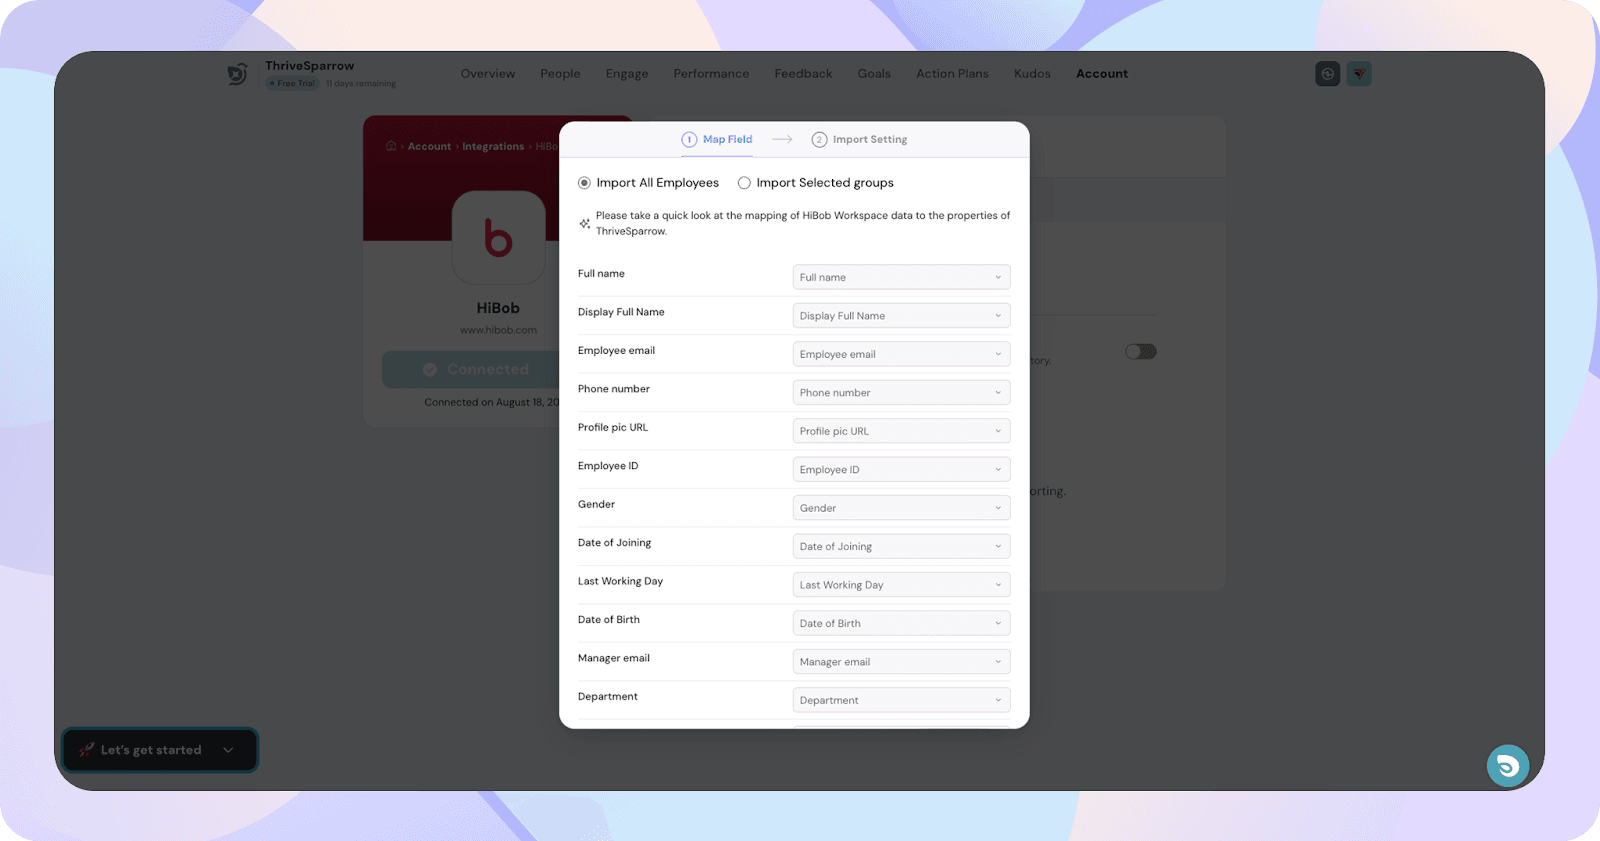
Map employee fields
Choose whether to import all employees or specific groups.
Review and confirm how Hibob fields (like Full Name, Email, Date of Joining, Department, etc.) map to ThriveSparrow fields. Adjust if needed.
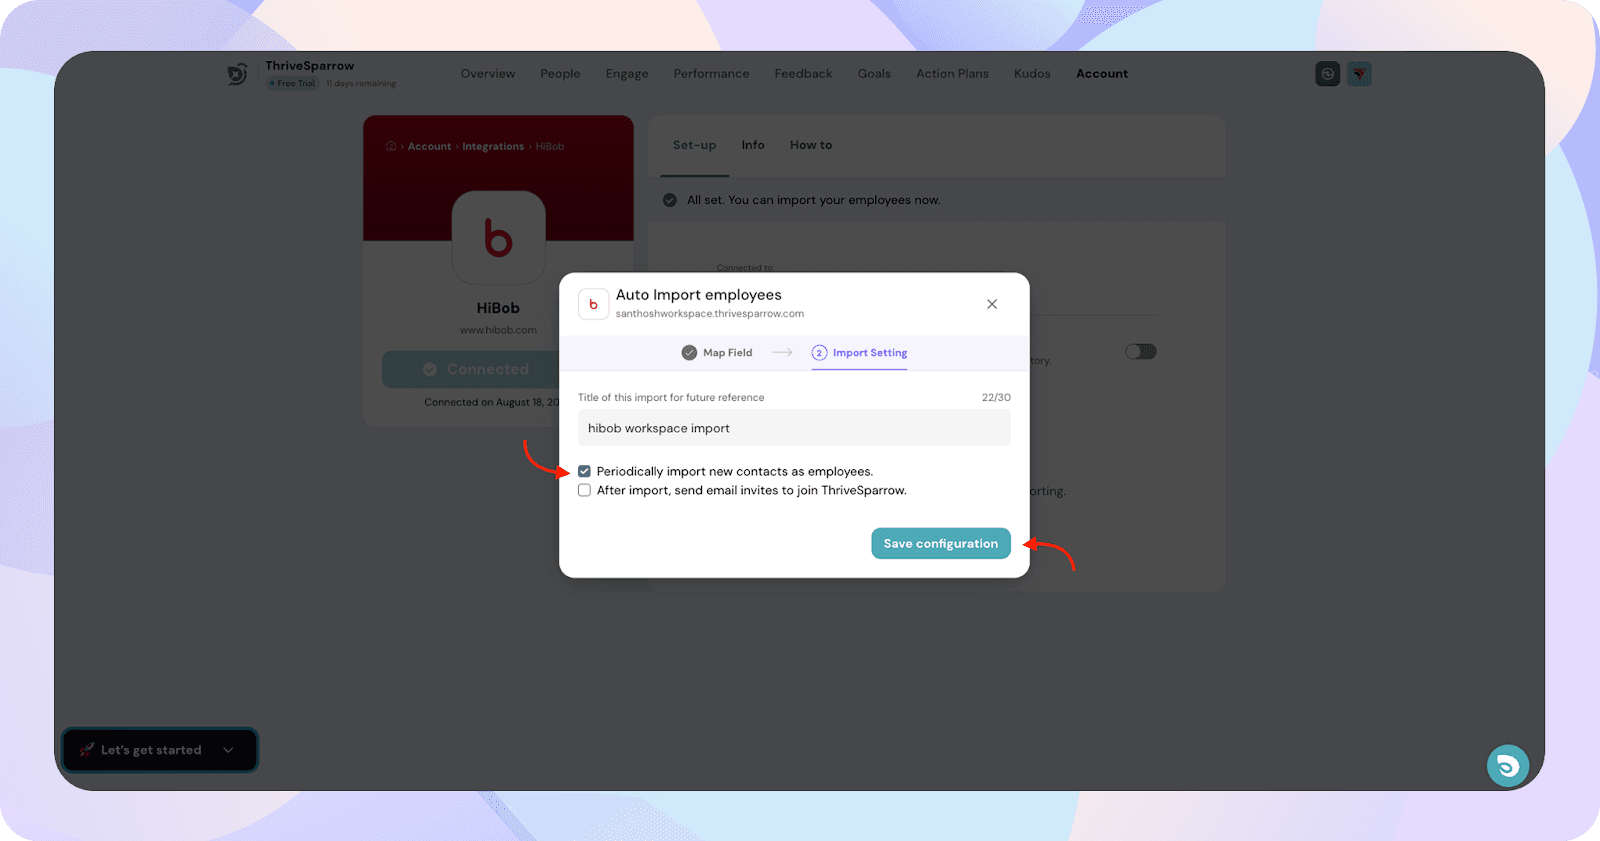
Set import preferences
In the import settings window, give your import a title.
Check “Periodically import new contacts as employees” to keep data in sync.
(Optional) Select “After import, send email invites to join ThriveSparrow” if you want invites to go out automatically.
Click Save configuration to finalize.
That’s it, you’re all set! Hibob is now fully connected to ThriveSparrow and your employees are synced.
If you have any further doubts, feel free to reach out to us.