As an employee, you can create individual goals for yourself and align them to broader team, department, or organization goals if needed. Here's how you can get started:
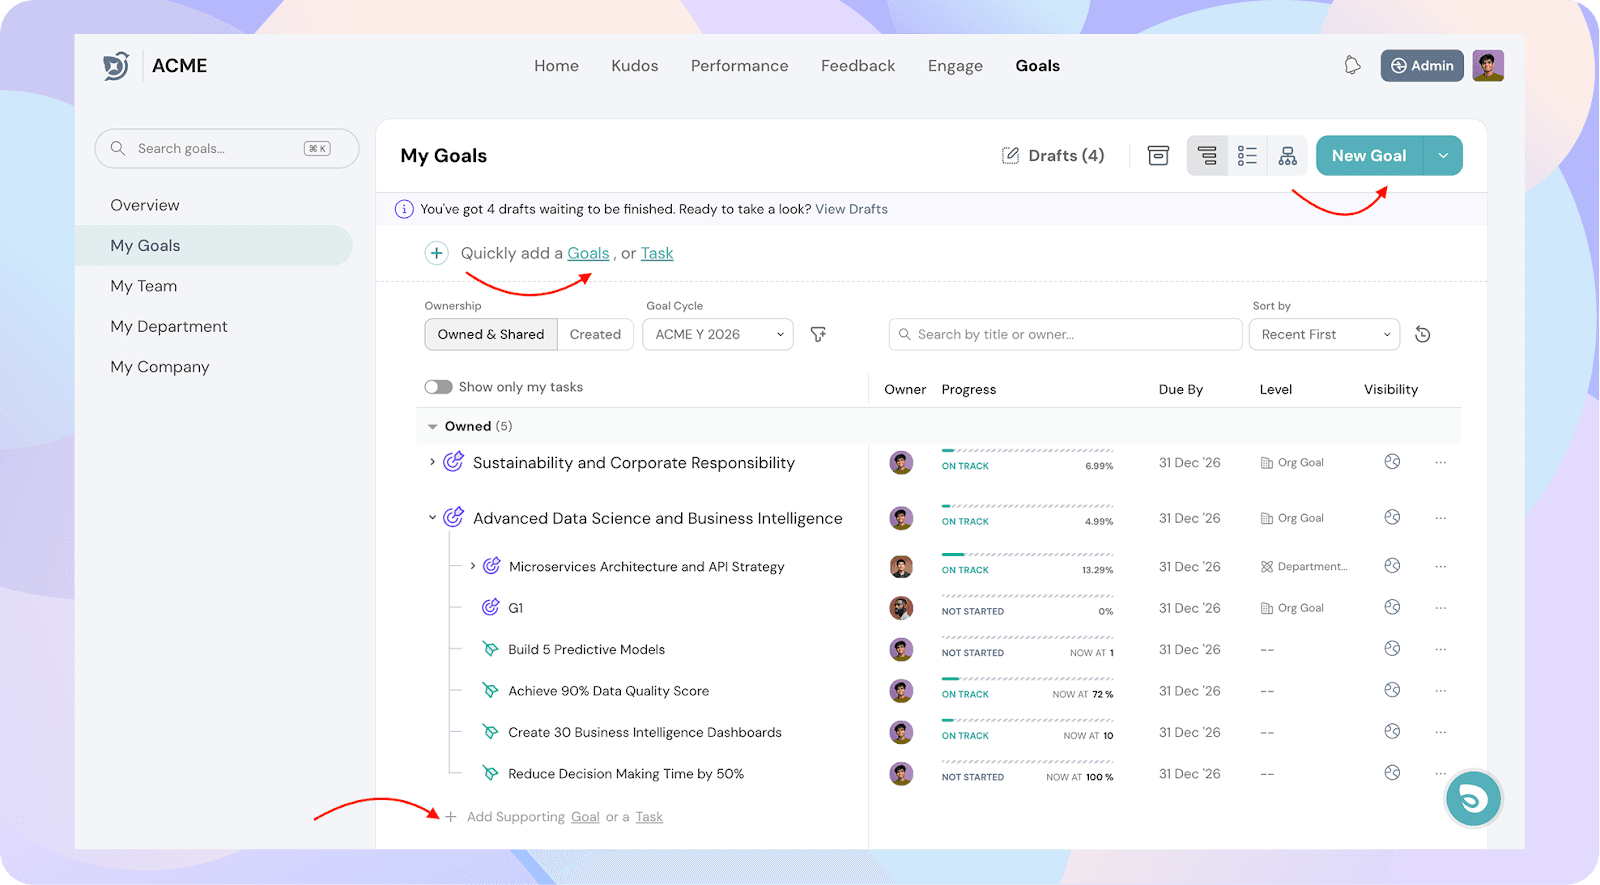
1. Navigate to My Goals
Go to Goals → My Goals to access your goal dashboard.
2. Create a New Goal or Task
Click the “New Goal” button on the top right corner. You’ll see three options in the dropdown:
Goals – Create a new personal goal
Tasks – Add a task under an existing goal
Import CSV – Bulk upload goals (generally used by admins or managers)
As an employee, you’ll primarily use the Goals or Tasks option.
Create a Goal Using the “New Goal” Button
Navigate to the relevant tab (My Goals, My Team, My Department, or My Company).
Click the New Goal button in the top-right corner.
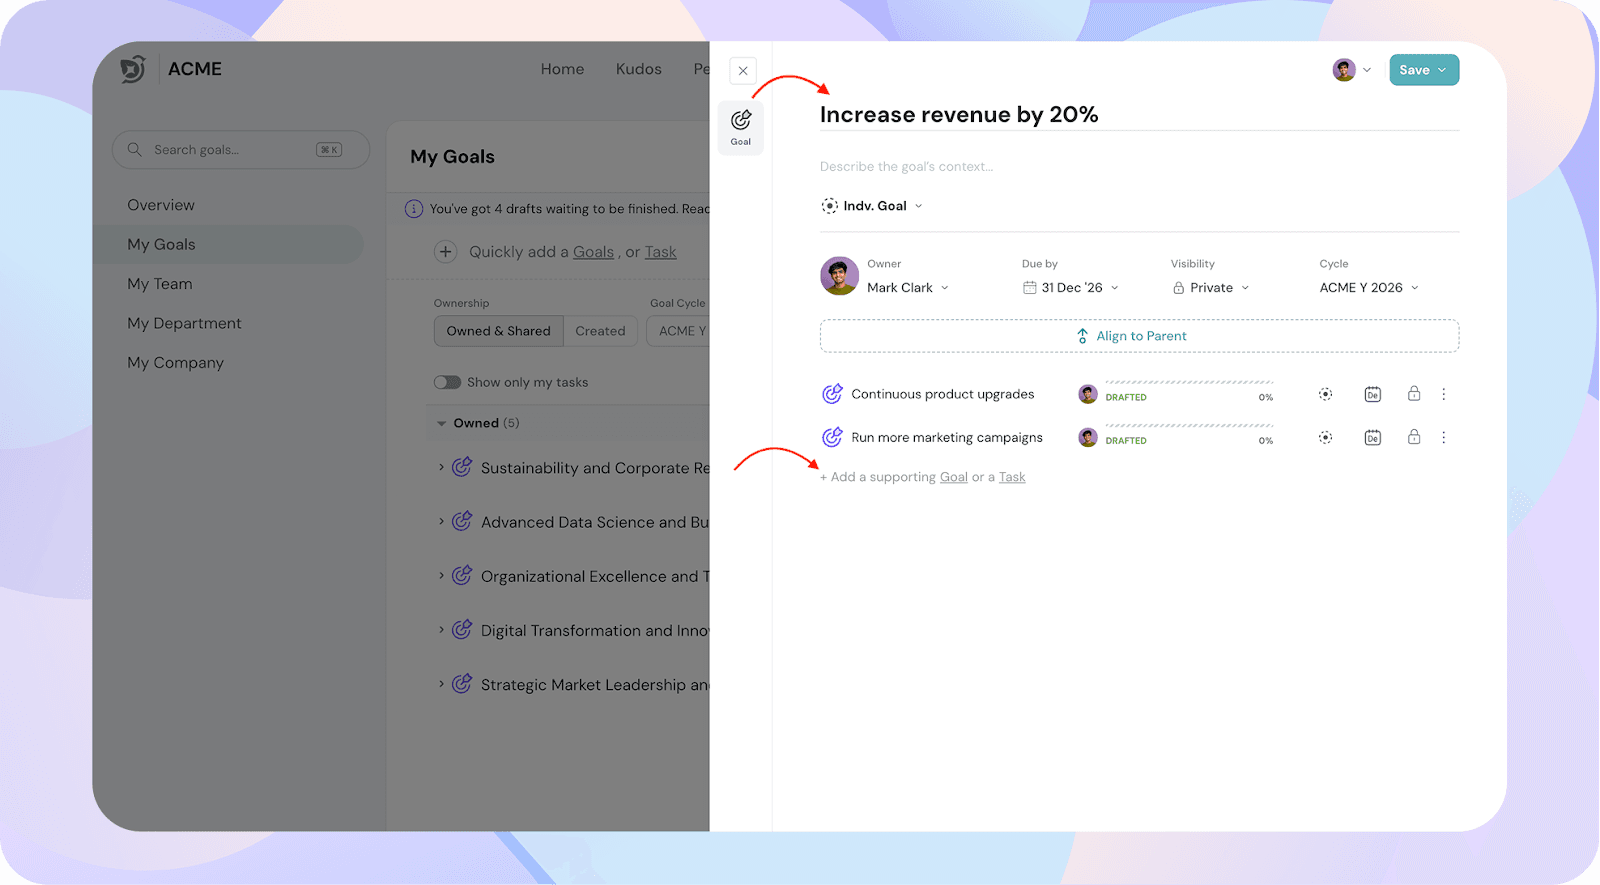
Fill in:
Goal title
Goal level
Goal cycle
Visibility settings
Add supporting goals and tasks if needed.
Click Save.
3. Create a Goal Using Quick Add
Navigate to Goals → My Goals from the left-hand menu.
Click Quickly add a Goals or Task at the top.
Select Goal.
Enter:
Goal title
Goal level
Goal cycle
Measure
Visibility
Add supporting goals or tasks linked to this goal.
4. Add Supporting Goals or Tasks
You can break your main goal down into smaller supporting goals or tasks for better tracking. You can use the Add Supporting Goal or Add Task buttons under your main goals.
Tip: Use Quick Add for Faster Goal Creation
If you’re adding multiple goals at once, click “Quickly Add Goals”. Use keyboard shortcuts like: