Setting up goals in ThriveSparrow is simple and structured to align with your organization's objectives. Follow the steps below to create goals that help track progress and achieve success.
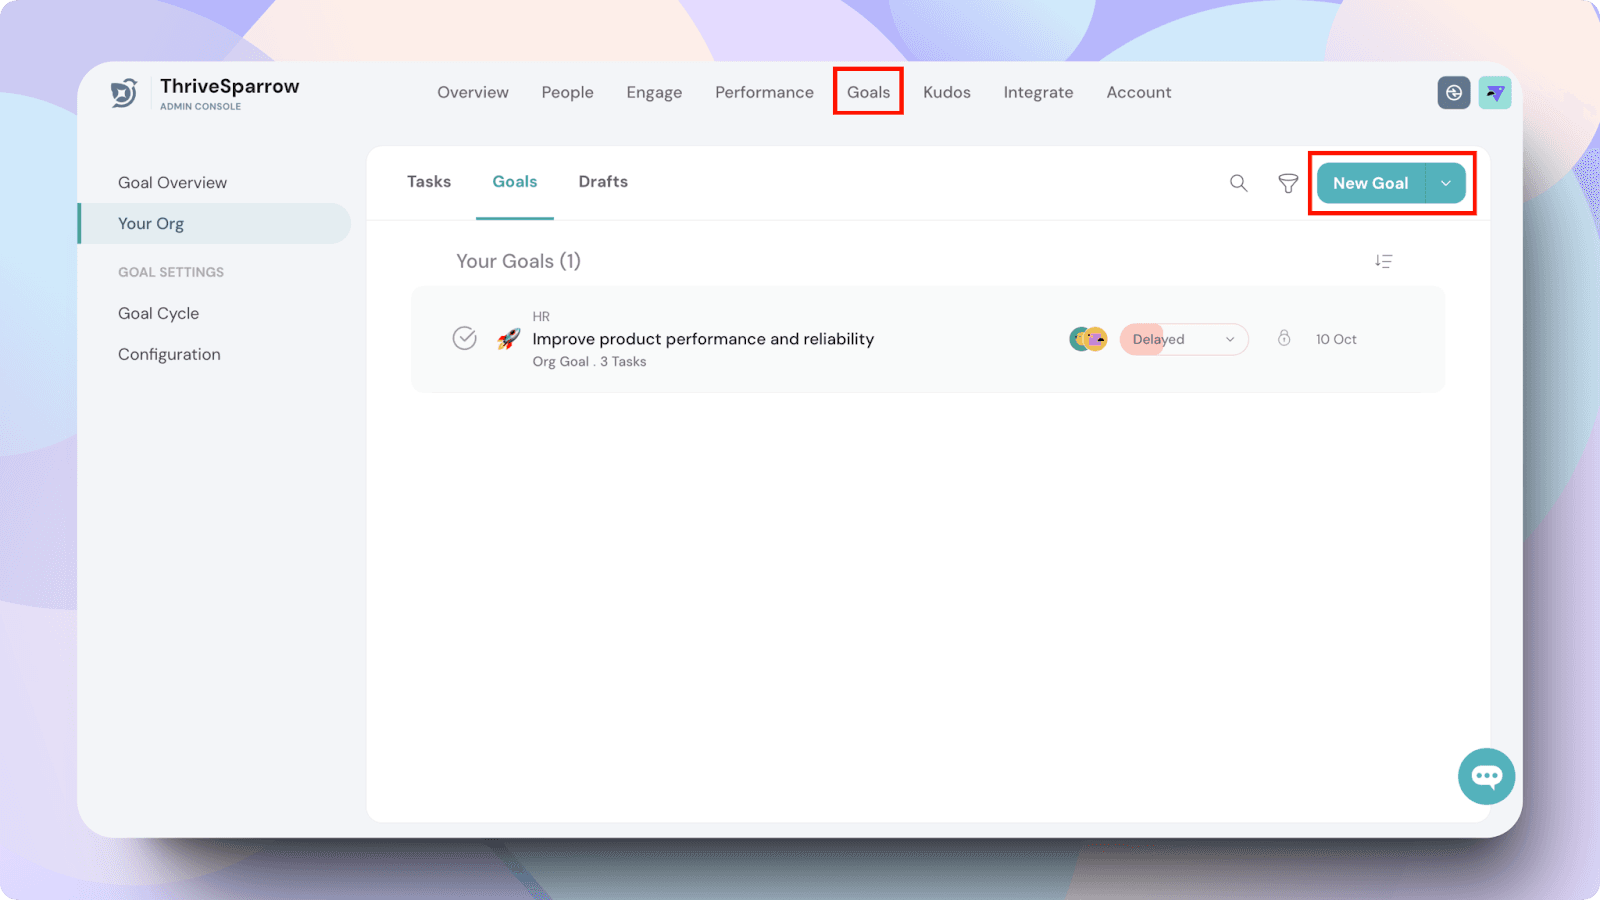
Navigate to the Goals Module
Log in to your ThriveSparrow dashboard and go to the Goals module.
Set Up the Goal Cycle
The first step in setting up a new account is selecting the goal cycle start date, which must be done before moving forward with the rest of the setup.
Click on 'Create a Goal'
Select the Create Goal button to start setting up your goal.
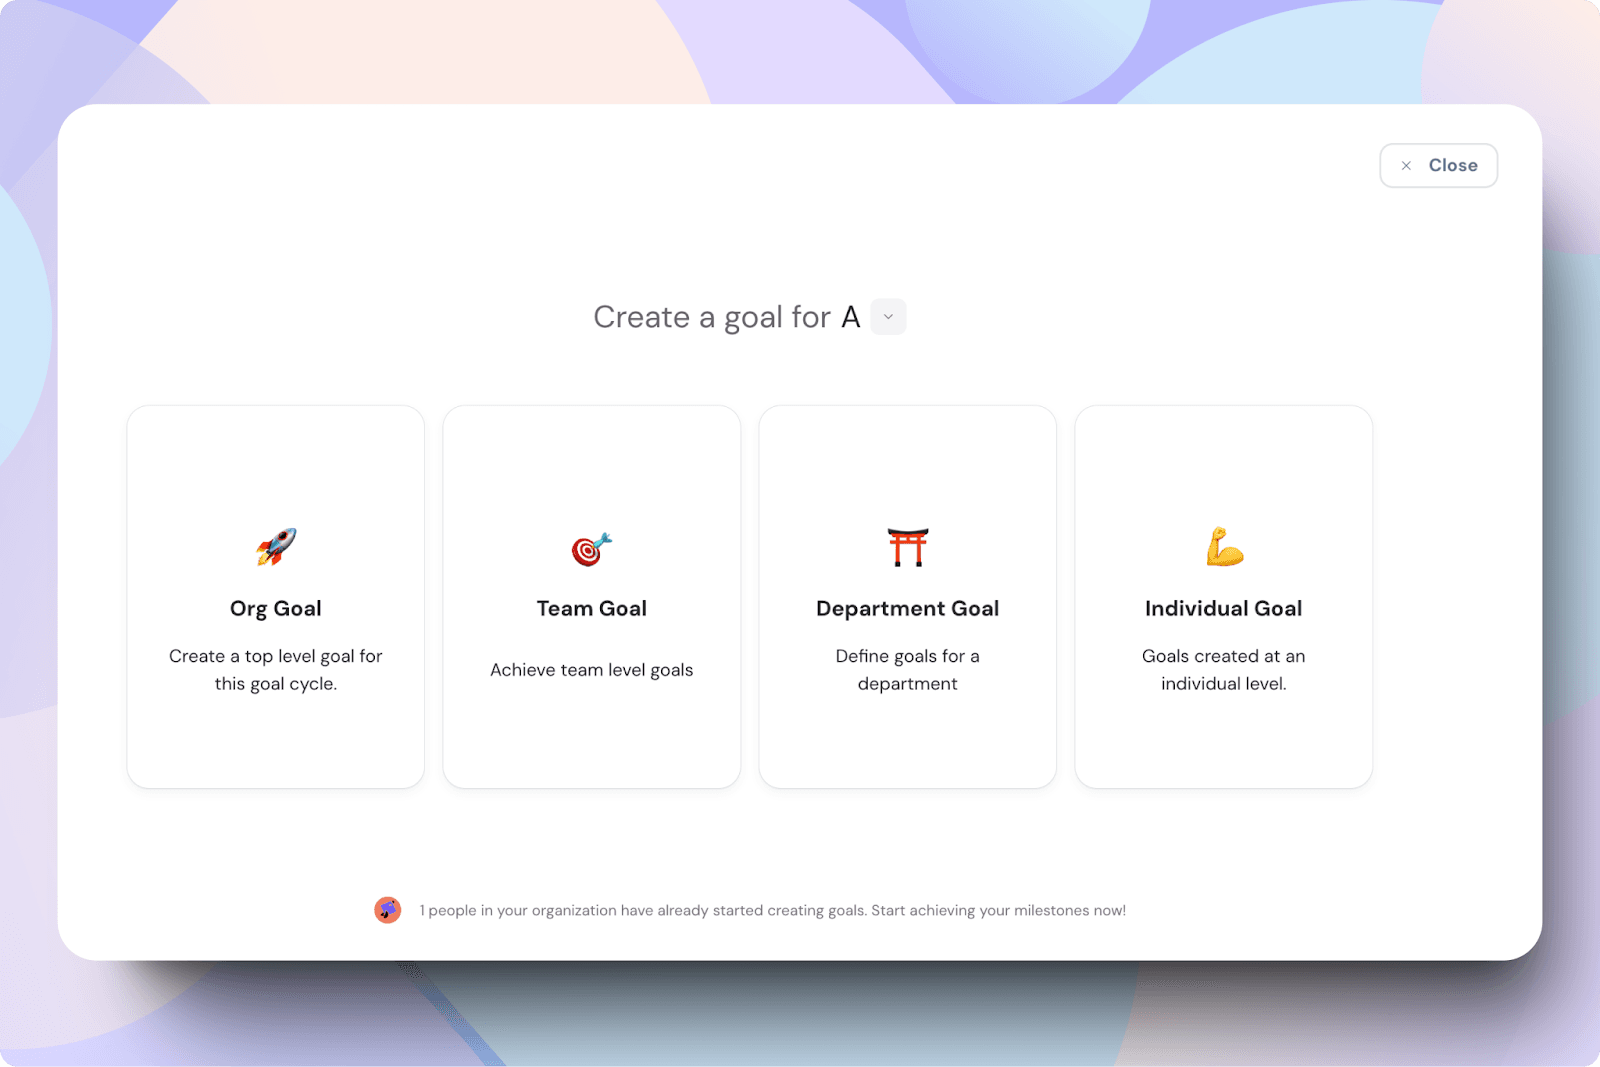
Choose the Goal Type
You can create different types of goals depending on your needs:
Organization Goal: High-level objectives that impact the entire organization.
Department Goal: Targets specific to a department.
Team Goal: Focused on the outcomes of a particular team.
Individual Goal: Personal goals for individual employees that contribute to larger organizational objectives.
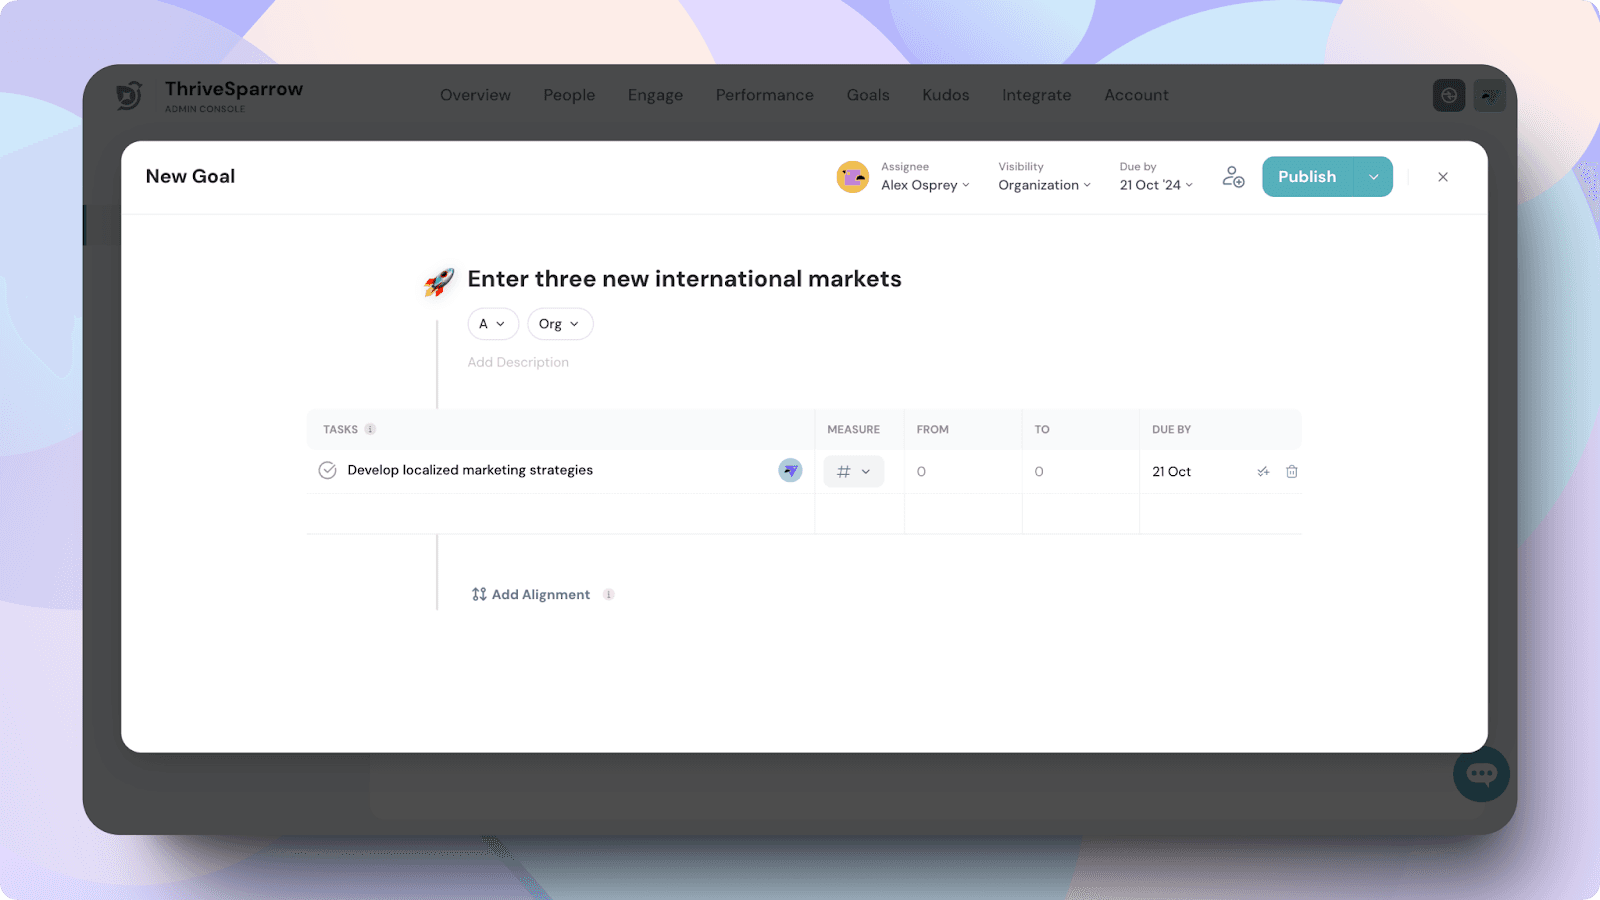
3. Add Basic Details
Goal Title: Give your goal a clear and concise title.
Goal Cycle: Select the appropriate goal cycle (e.g., quarterly or yearly).
Description: Add a detailed description of the goal's purpose and what you aim to achieve.
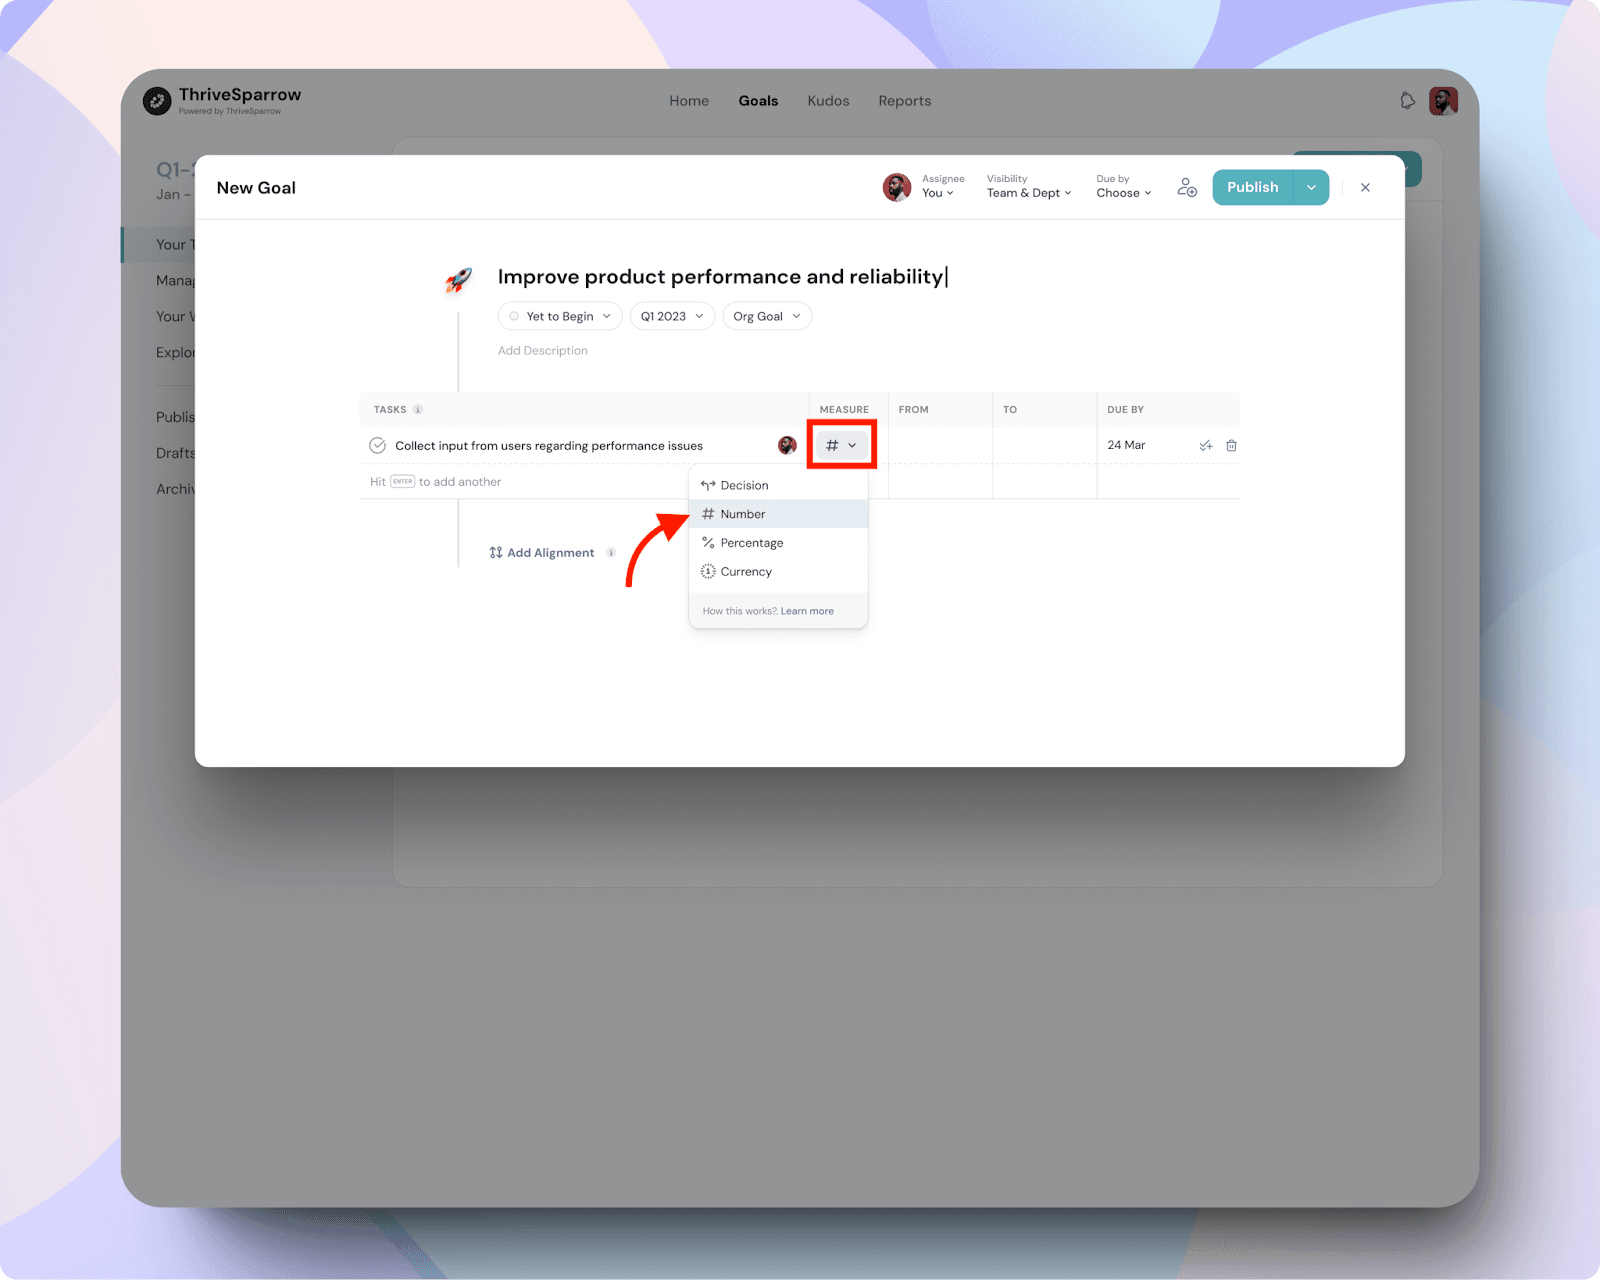
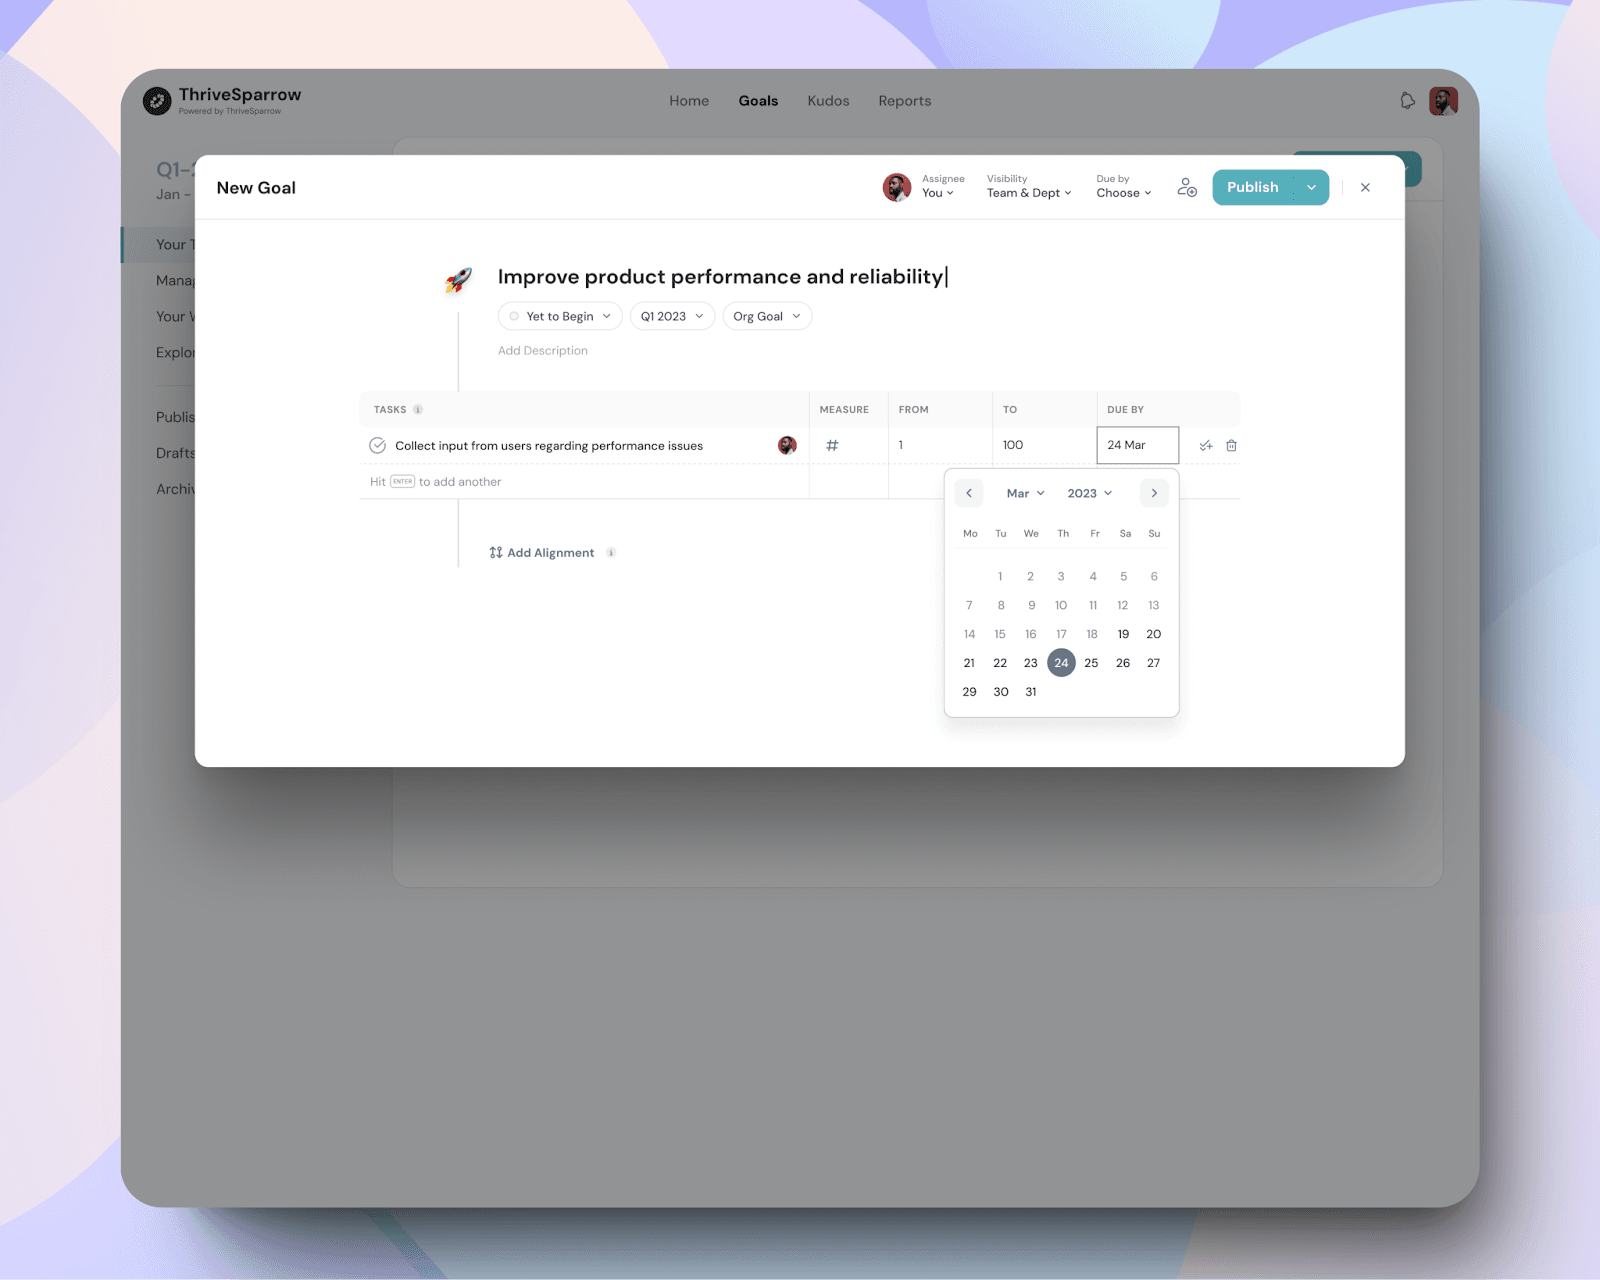
4. Add Tasks (Key Results)
Tasks represent the key results needed to accomplish the goal.
Type Tasks: Enter the tasks or milestones you need to hit. Press 'Enter' to add each one.
Measurement: Choose how you want to measure progress:
Decision (Yes/No): Ideal for binary tasks.
Number, Percentage, or Currency: Add the start and target values to track progress quantitatively.
5. Set Due Dates and Add Initiatives
Goal Due Date: Set a deadline for your goal.
Initiatives: Optionally, you can add initiatives for each task. Initiatives do not directly contribute to progress but help you organize related activities.
6. Assign the Goal
Choose the assignee for the goal—this could be an individual or a team responsible for achieving it.
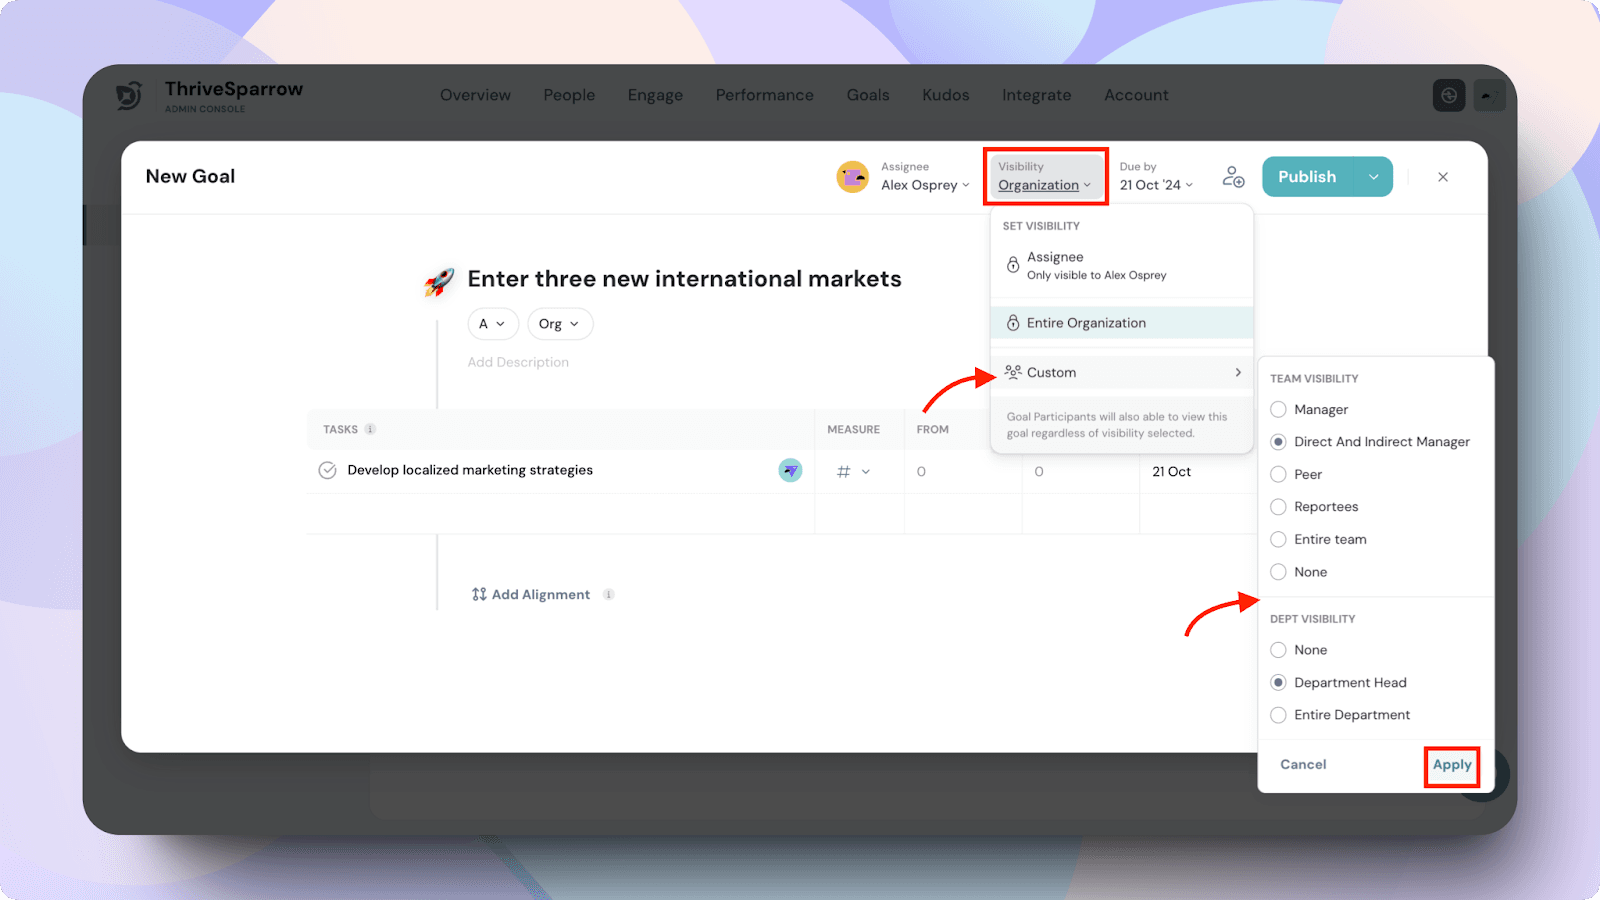
7. Set Visibility
Define who can see the goal:
Assignee: Only the goal owner.
Entire Organization: Everyone in the organization.
Custom: Select specific teams or departments.
For more details on visibility options, check out [this article].
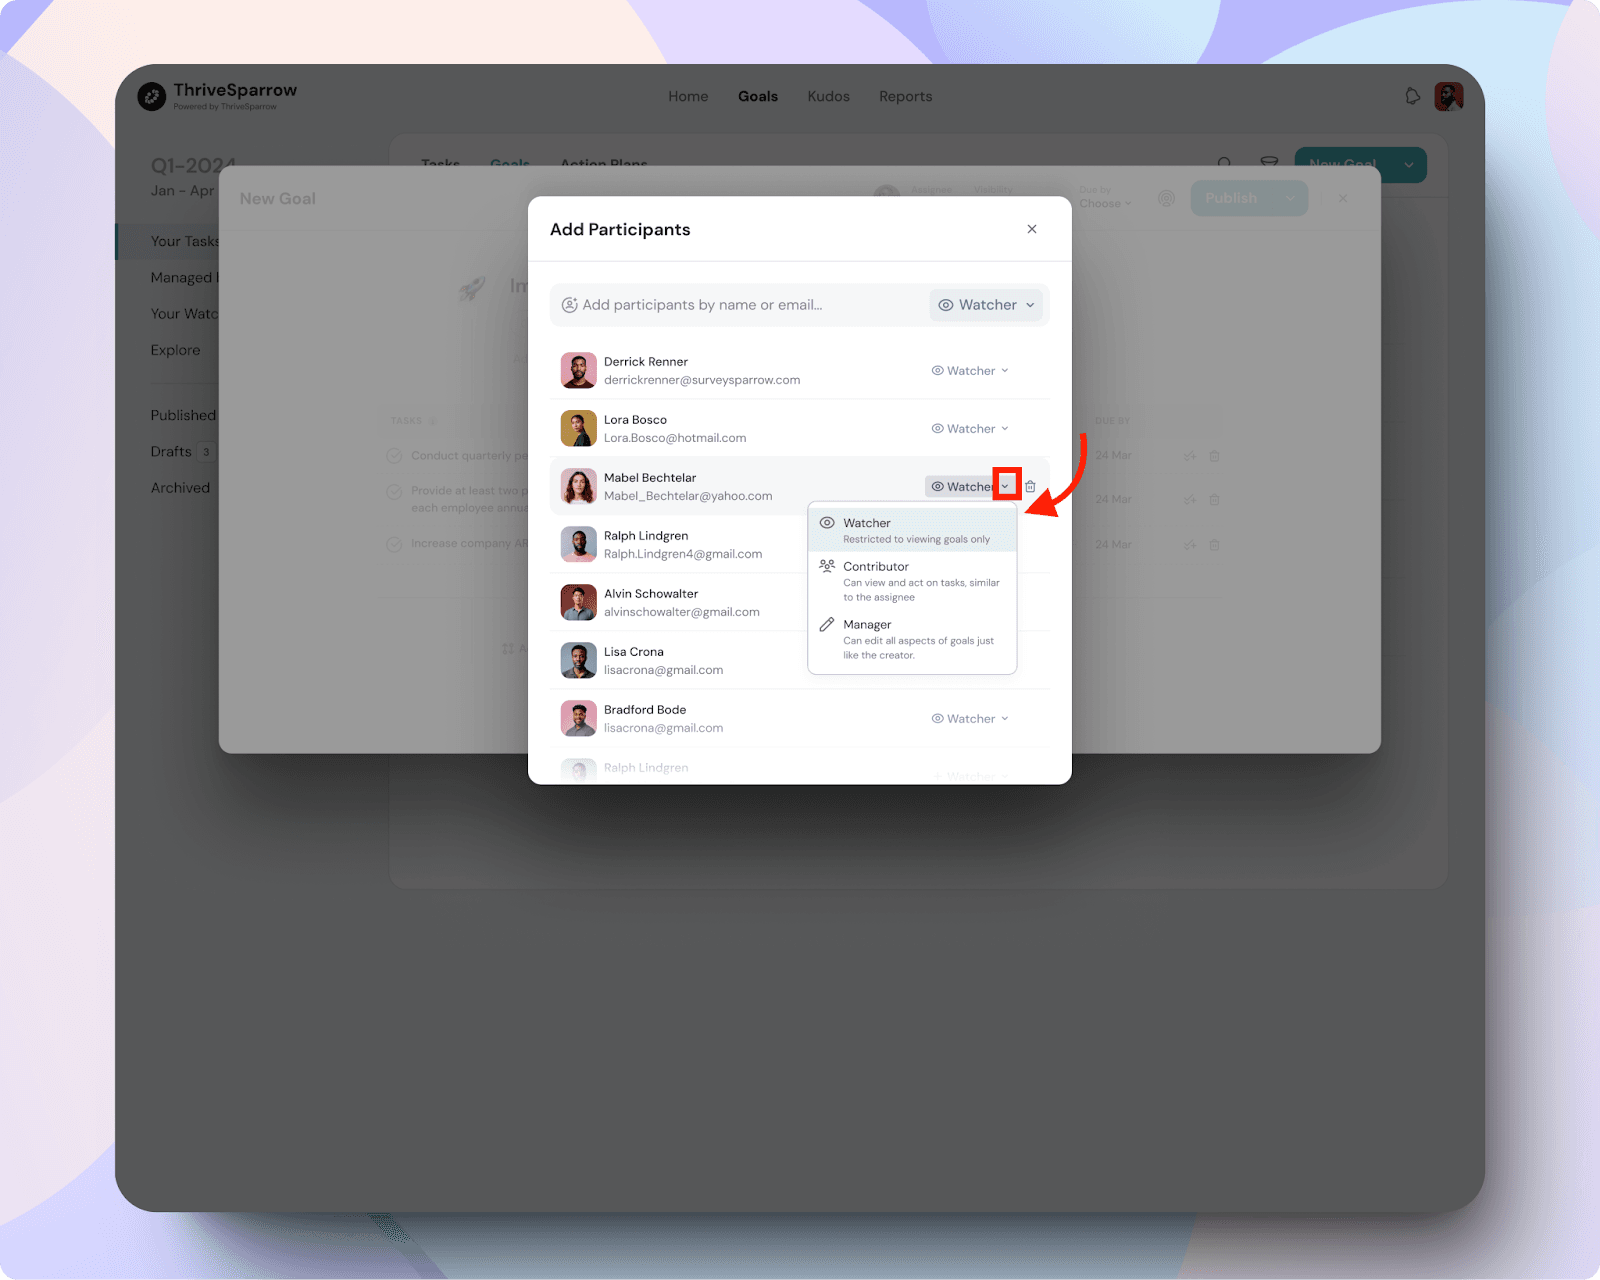
8. Add Participants
Participants can play various roles in supporting the goal:
Contributors: Actively work on the goal.
Watchers: Keep track of progress but don’t contribute directly.
Managers: Oversee the goal and ensure it stays on track.
For more details on participant roles, check out [this article].
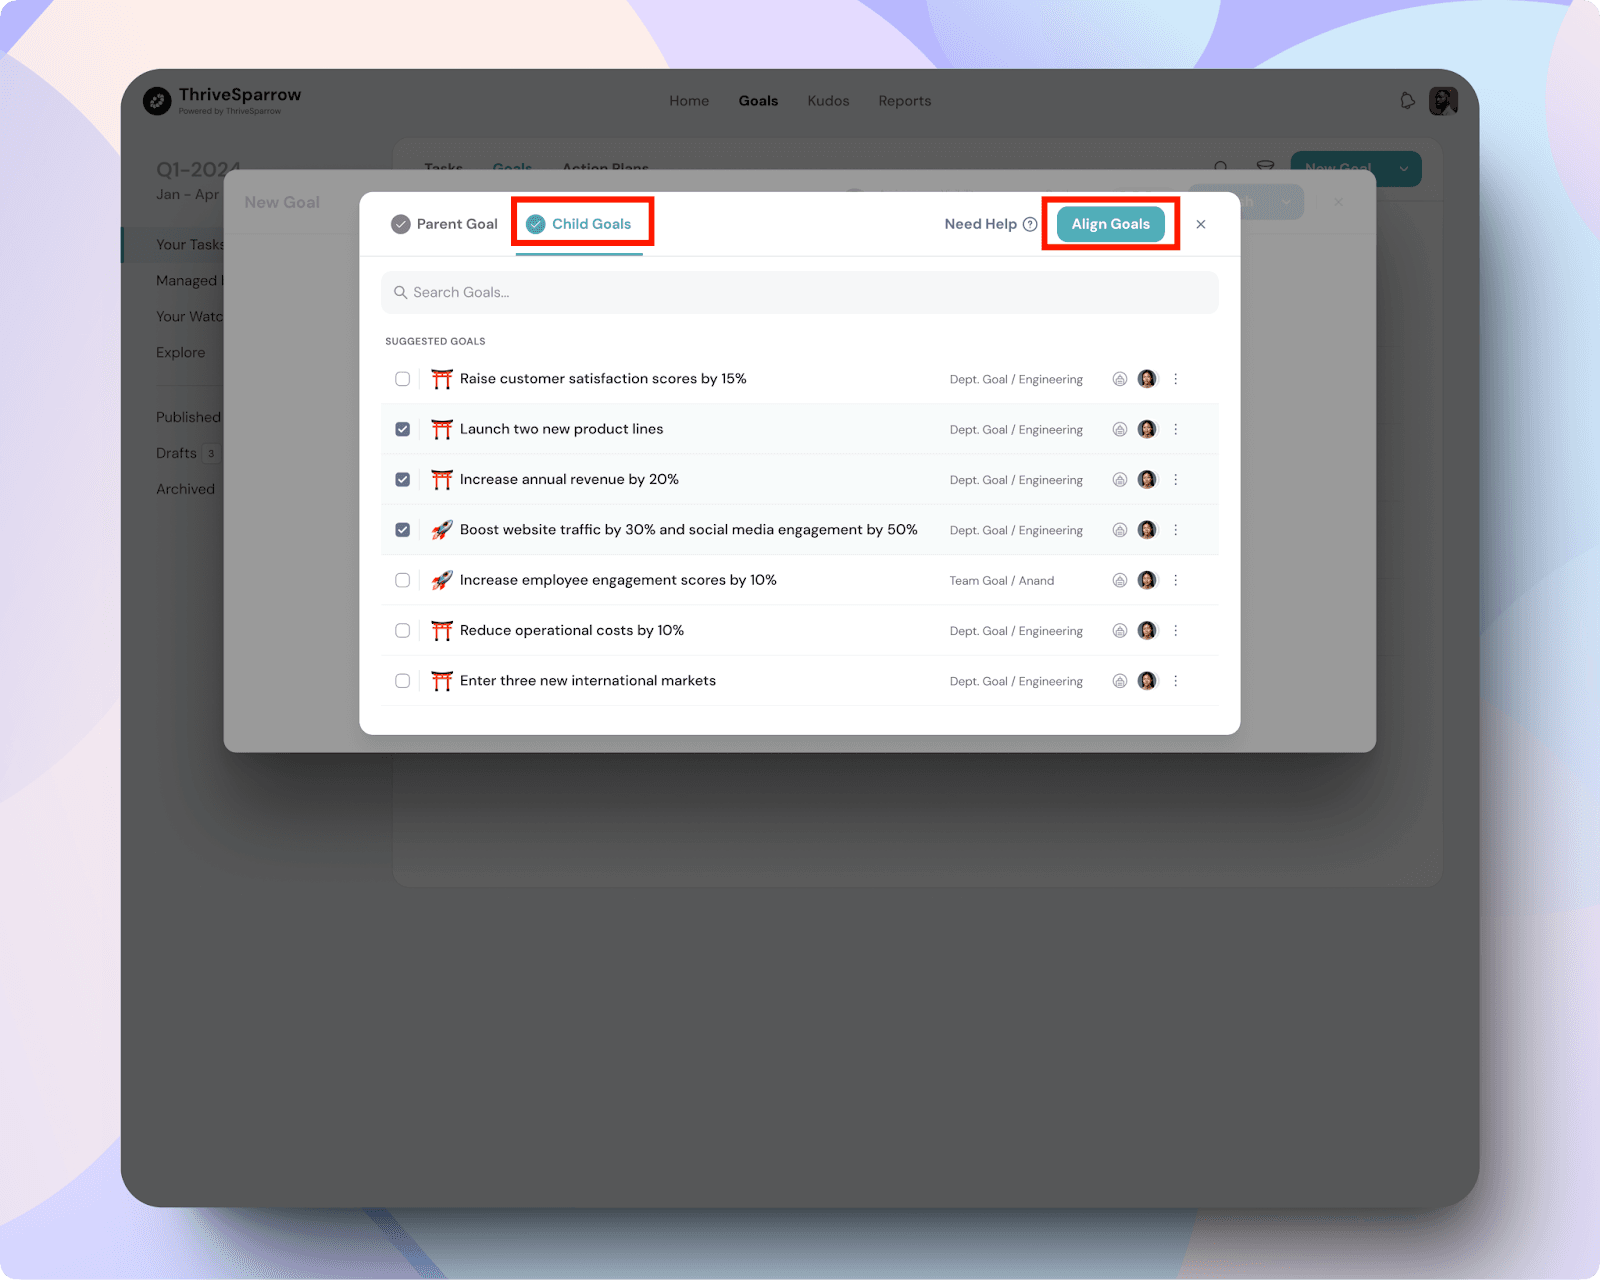
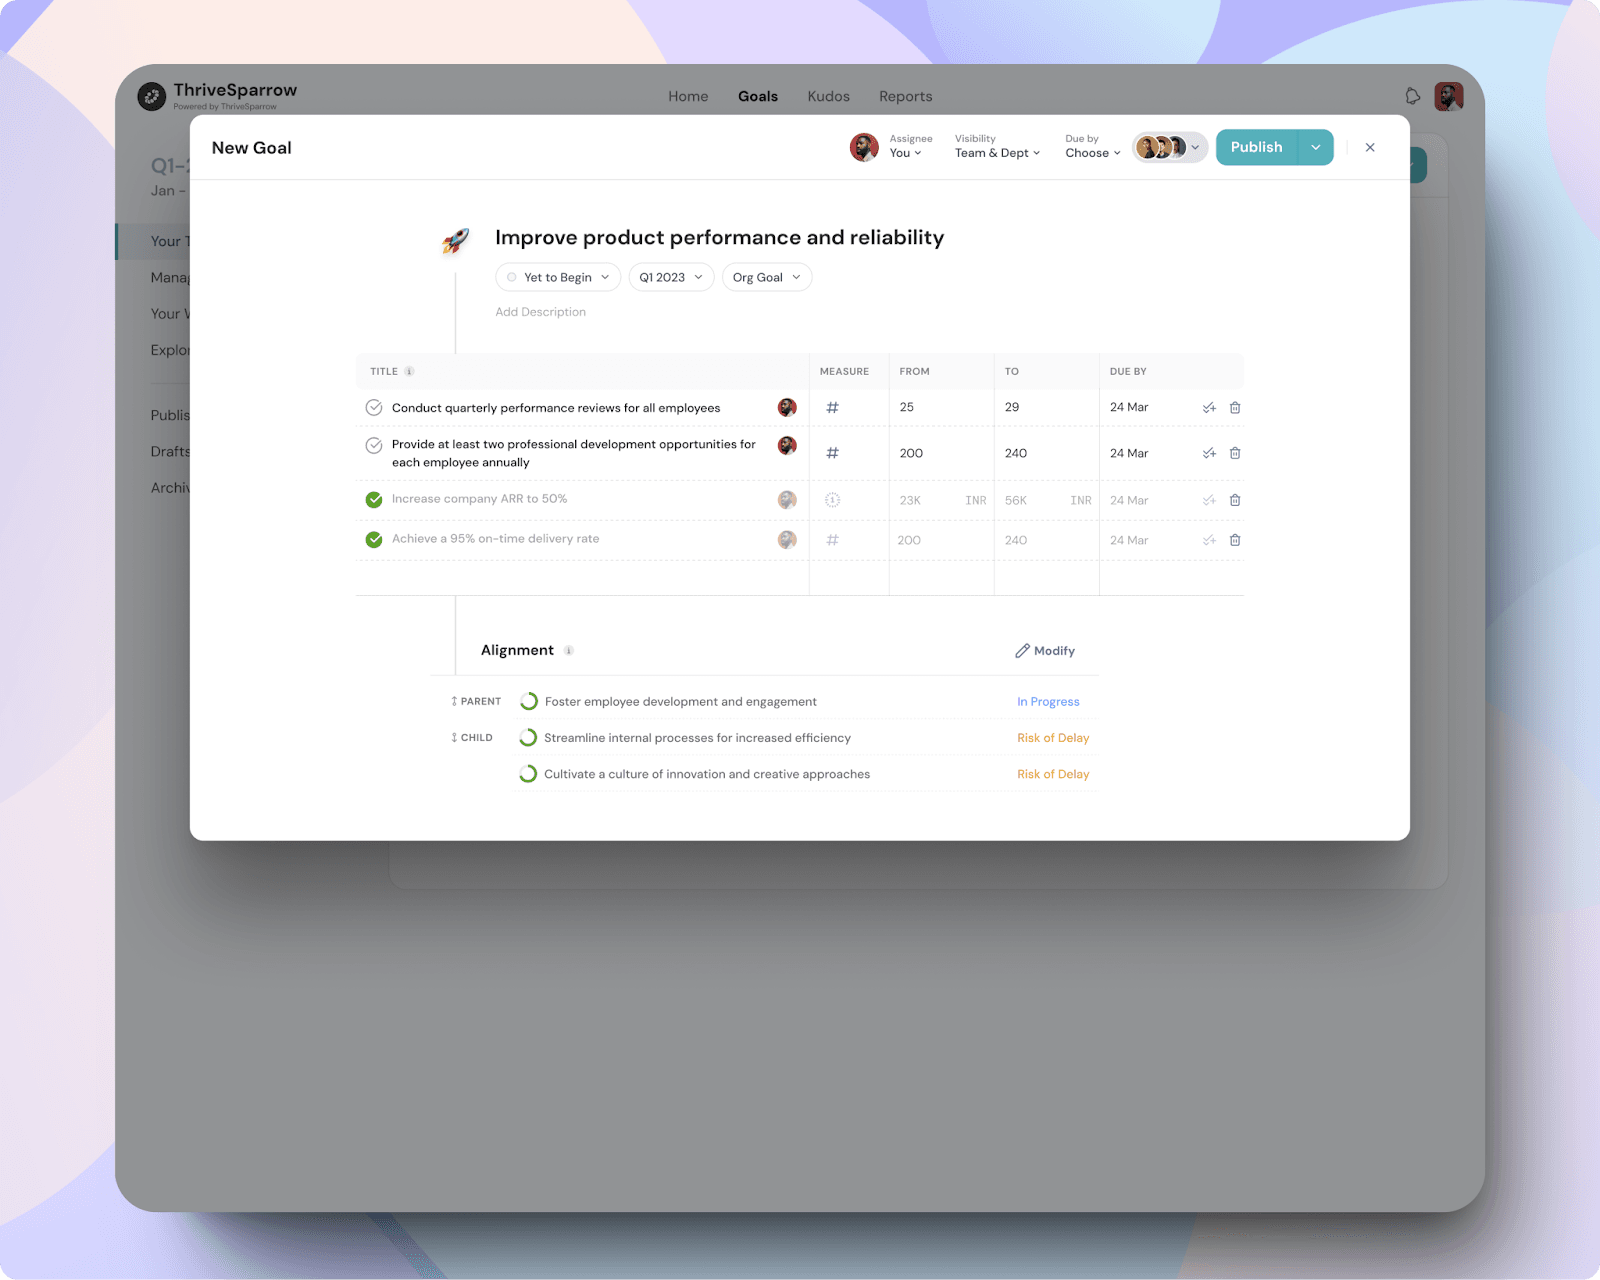
9. Align Goals
Aligning your goal to a parent or child goal helps ensure that all efforts are coordinated. This way, you can track progress toward broader objectives.
Key rules to remember about goal alignment:
A parent goal must be at the same or higher level than its child goals.
Parent goals must have higher visibility than child goals.
A goal cannot be the parent of another goal in its own chain.
Only goals without a parent can be aligned as new parents.
Tasks can only align with goals of equal or higher level and visibility.
Only goals visible to both the assignee and creator will appear in the alignment list.
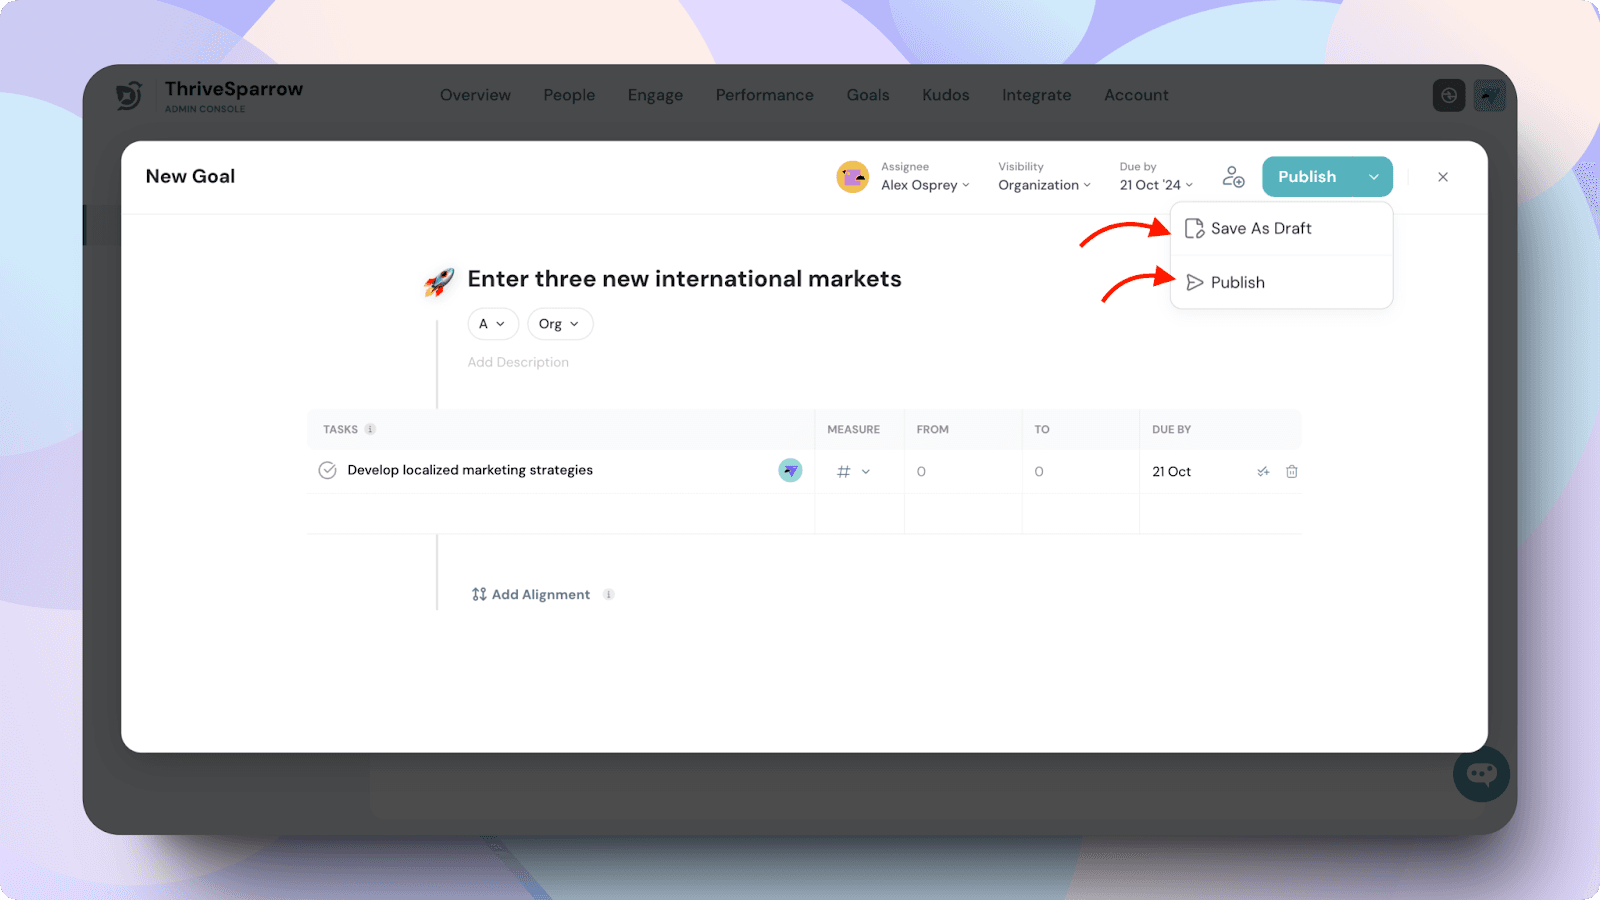
10. Save as Draft or Publish
Once everything is set, you can either:
Save as Draft to make changes later, or
Publish to activate the goal and start tracking progress.
Should you need any help, don't hesitate to contact our support team. Happy thriving!