How to create and manage clusters
This article explains how to create and manage custom organisational hierarchies using Clusters in ThriveSparrow.
Understanding clusters and groups
What is a cluster?
A cluster represents a type of organisational structure in your company.
Examples of clusters:
- Division
- Location
- Cost Center
Each cluster defines how employees are grouped.
What is a group?
A group is a specific unit inside a cluster.
Examples:
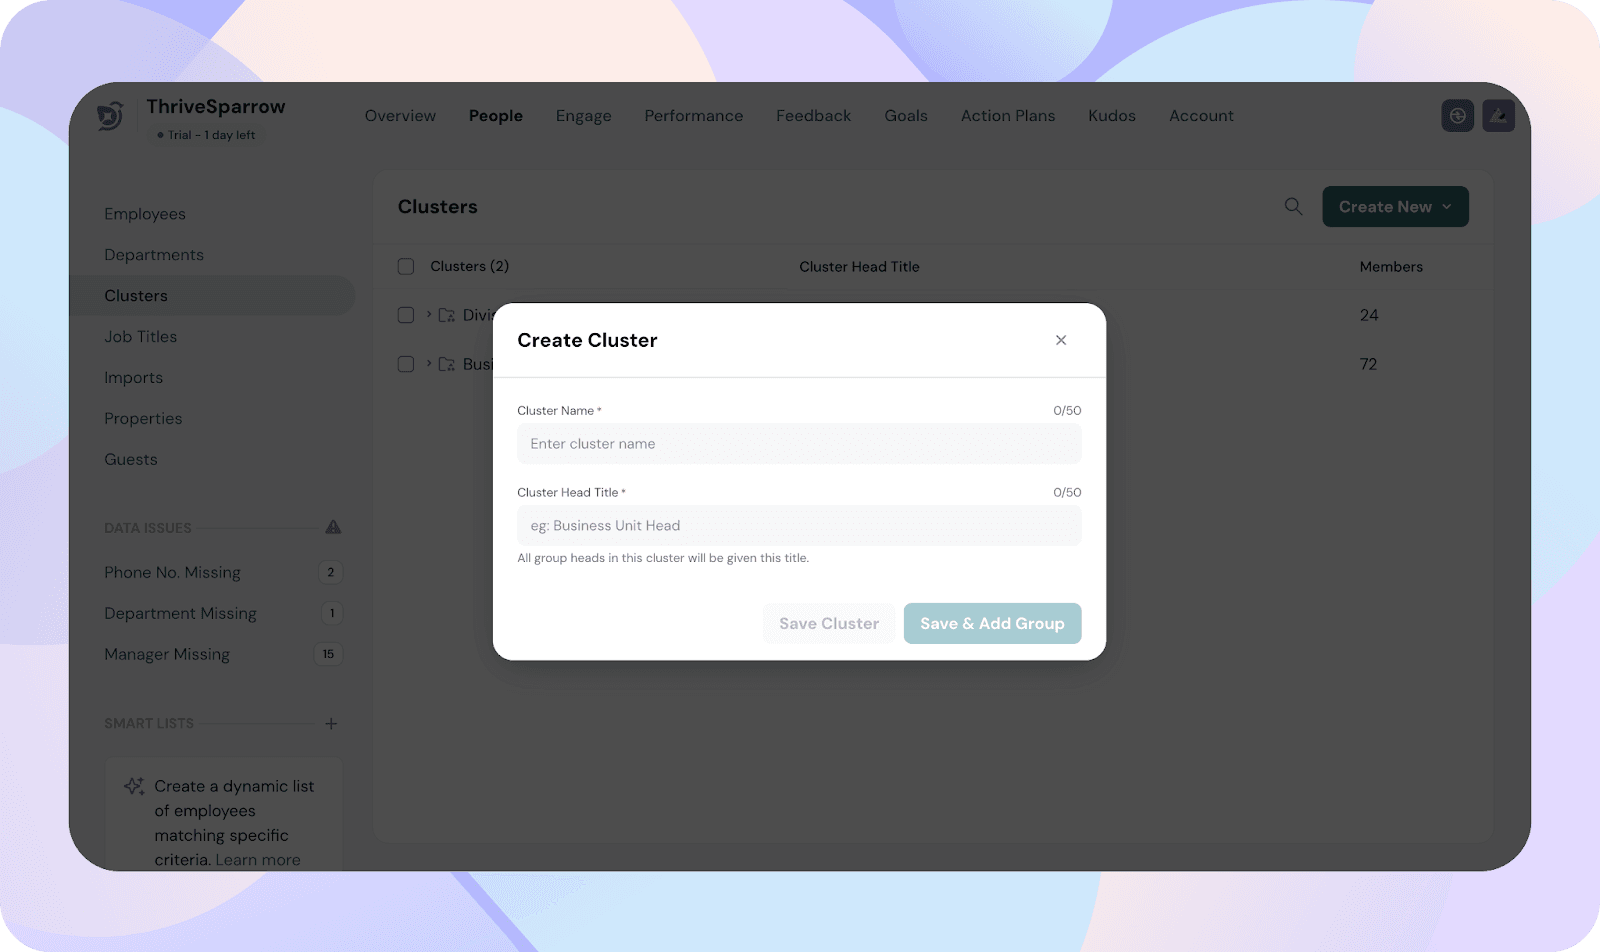
Step 1: Creating a cluster
- From the People Directory, click the Clusters tab.
- Click Create Cluster.
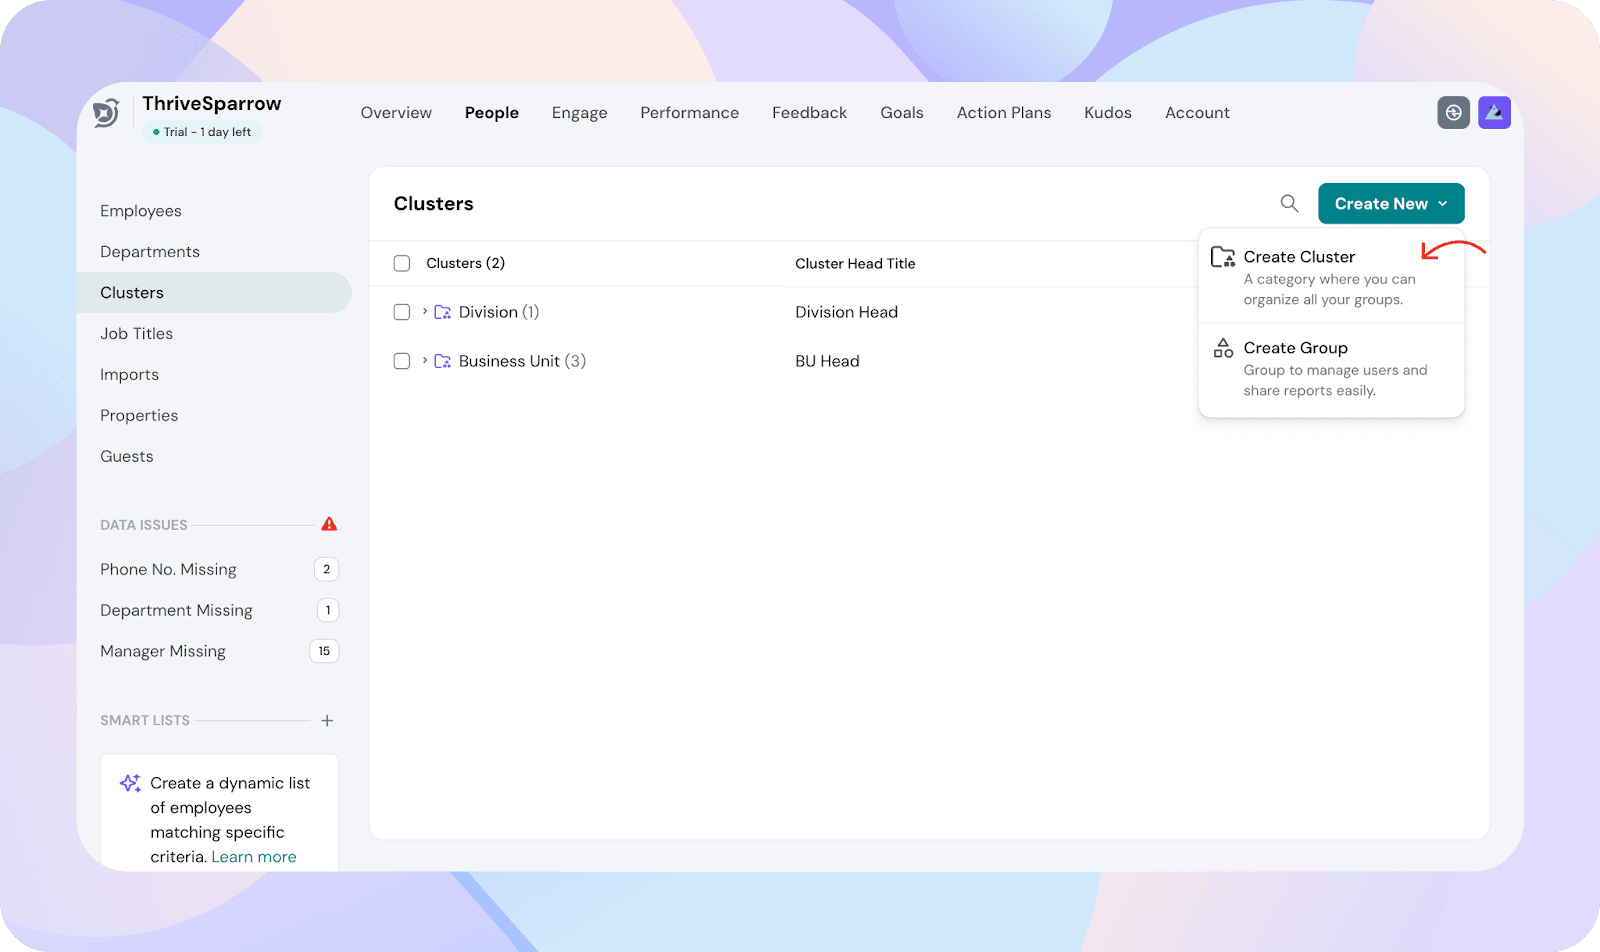
- Enter the Cluster name (for example, Division).
- Enter the Group Head Title (for example, Director).
- Save the cluster.
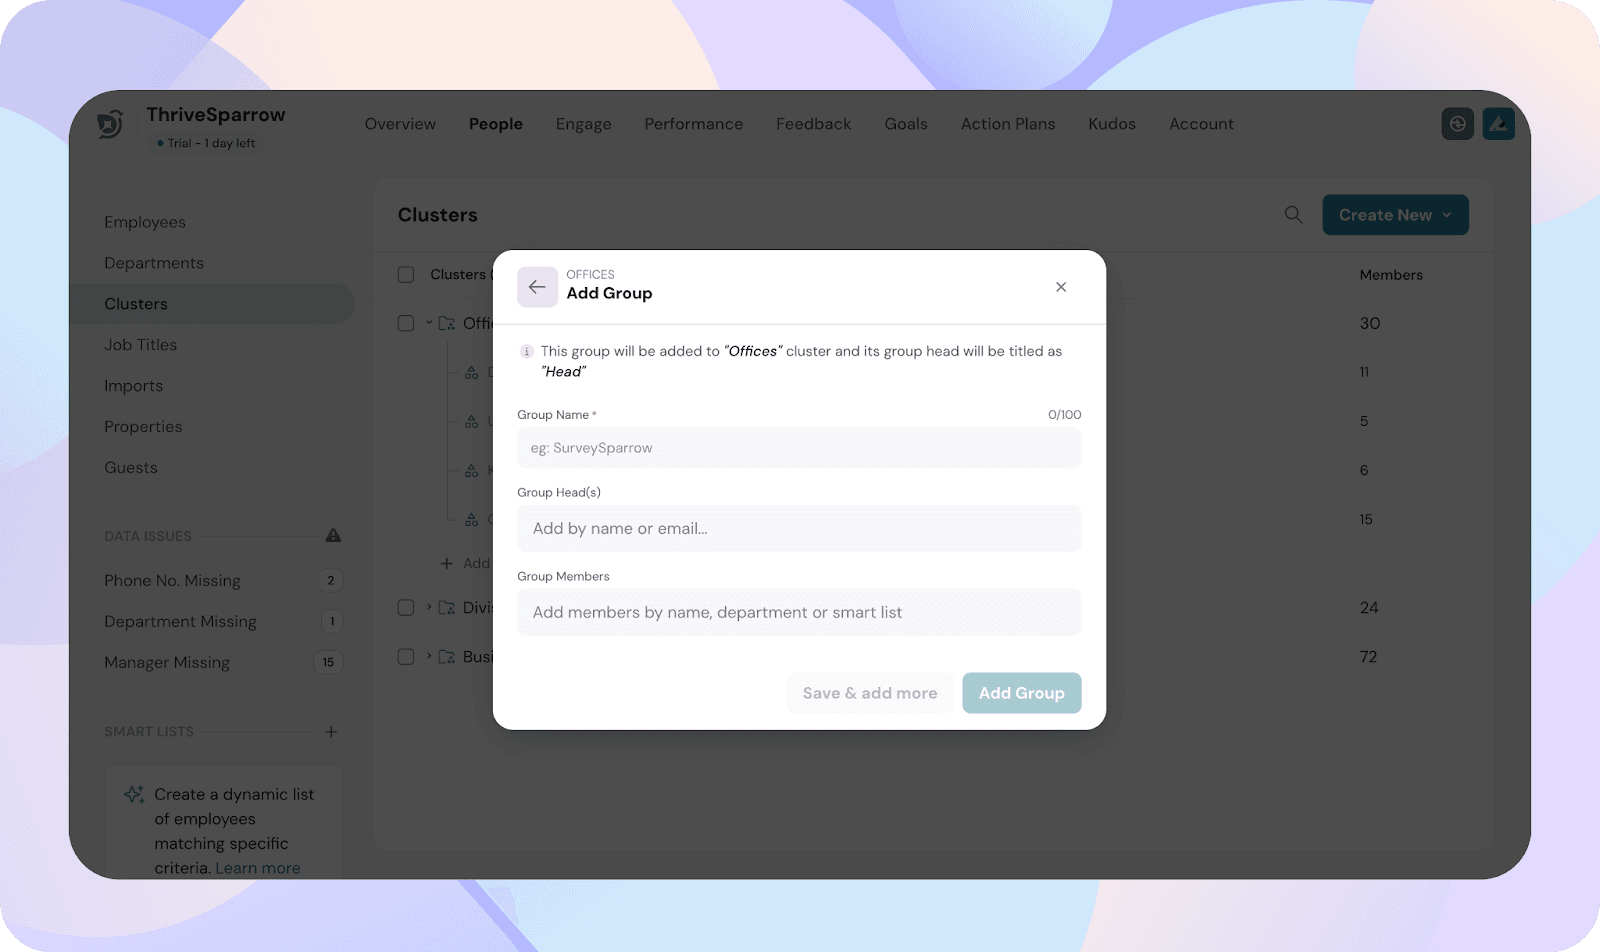
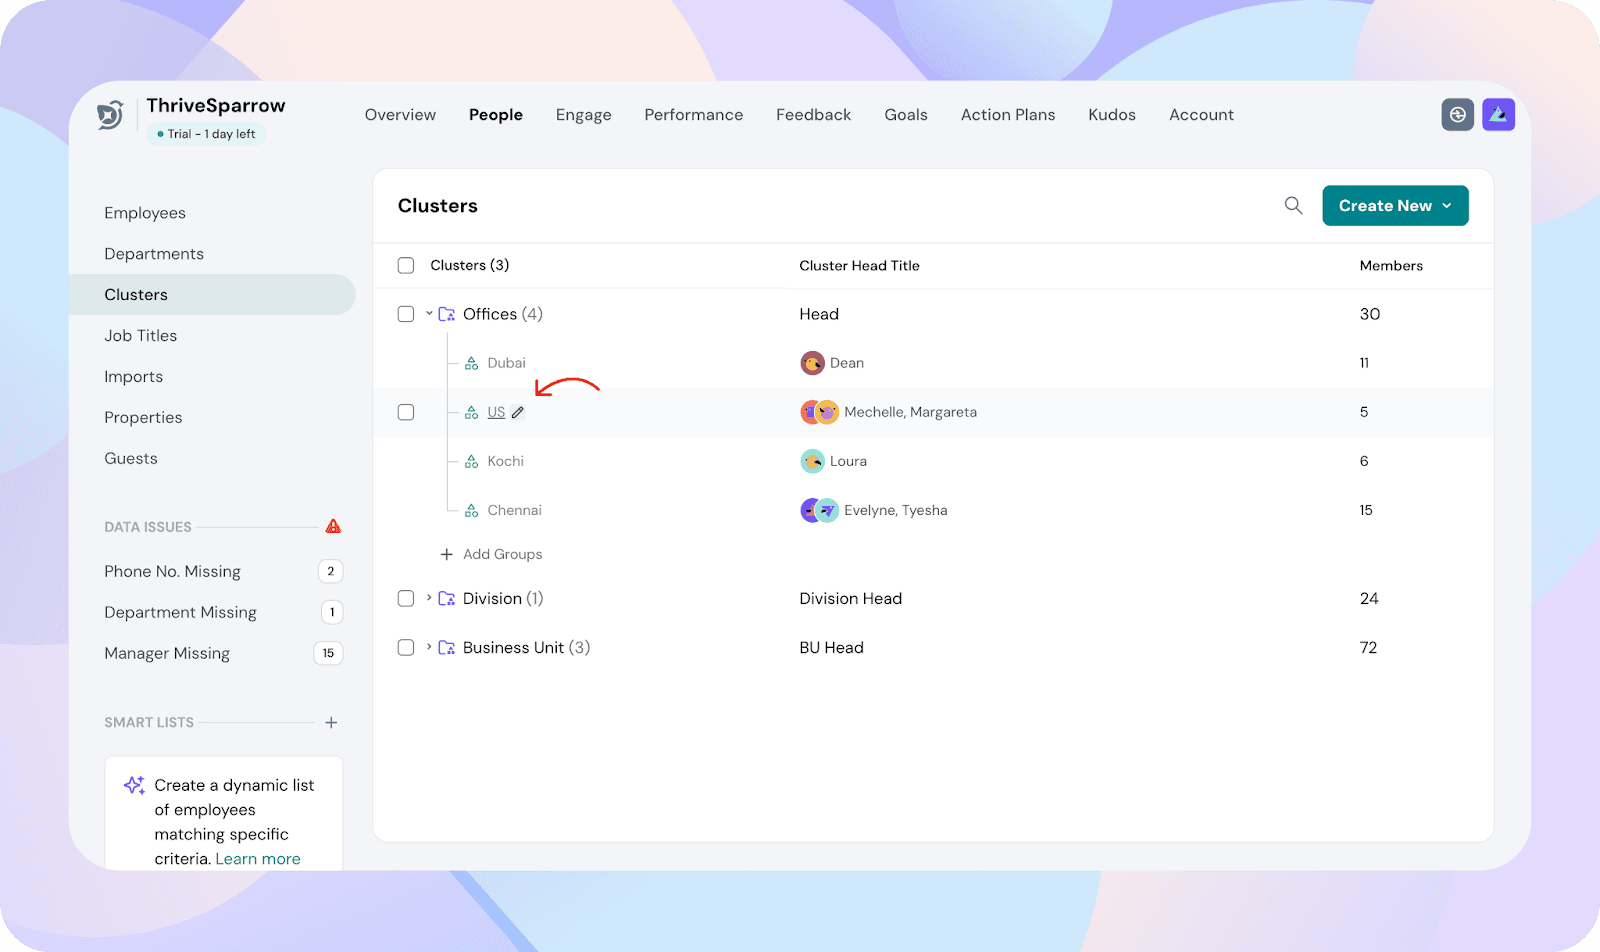
Step 2: Create groups within a cluster
- Click on an existing Cluster.
- You’ll see a list of existing groups, their group heads, and member count.
- Click Create New.
- Enter the Group name.
- Select one or more Group Heads.
- Click Save.
Example:
- Cluster: Division
- Group: Engineering Division
- Group head: Justin (Director)
Multiple group heads can be added to the same group.
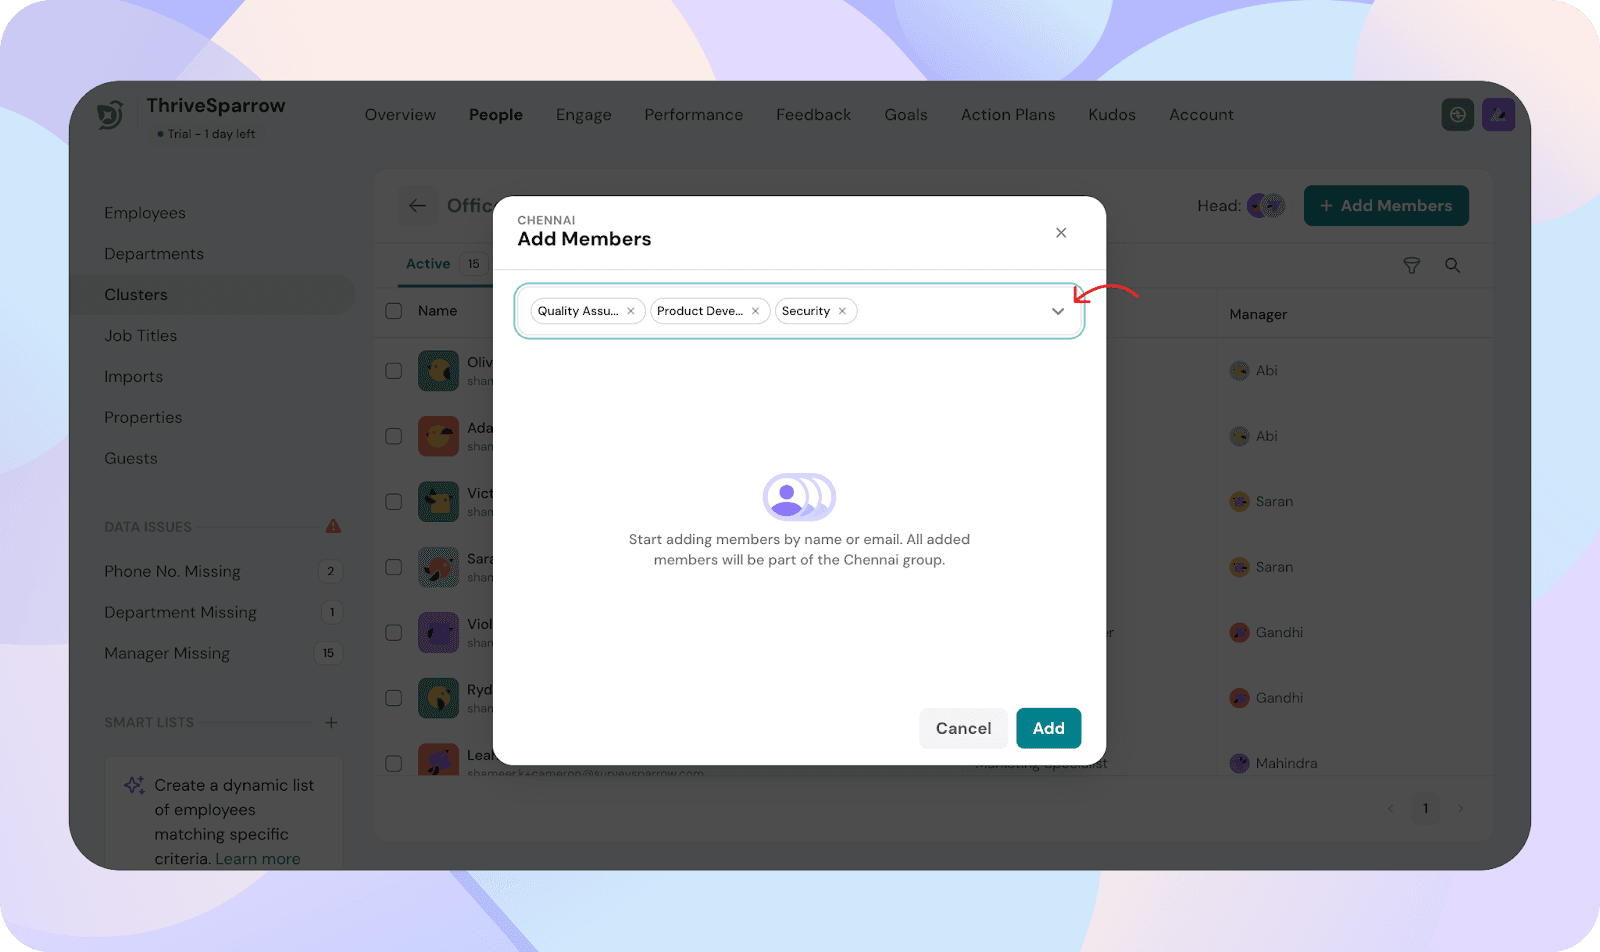
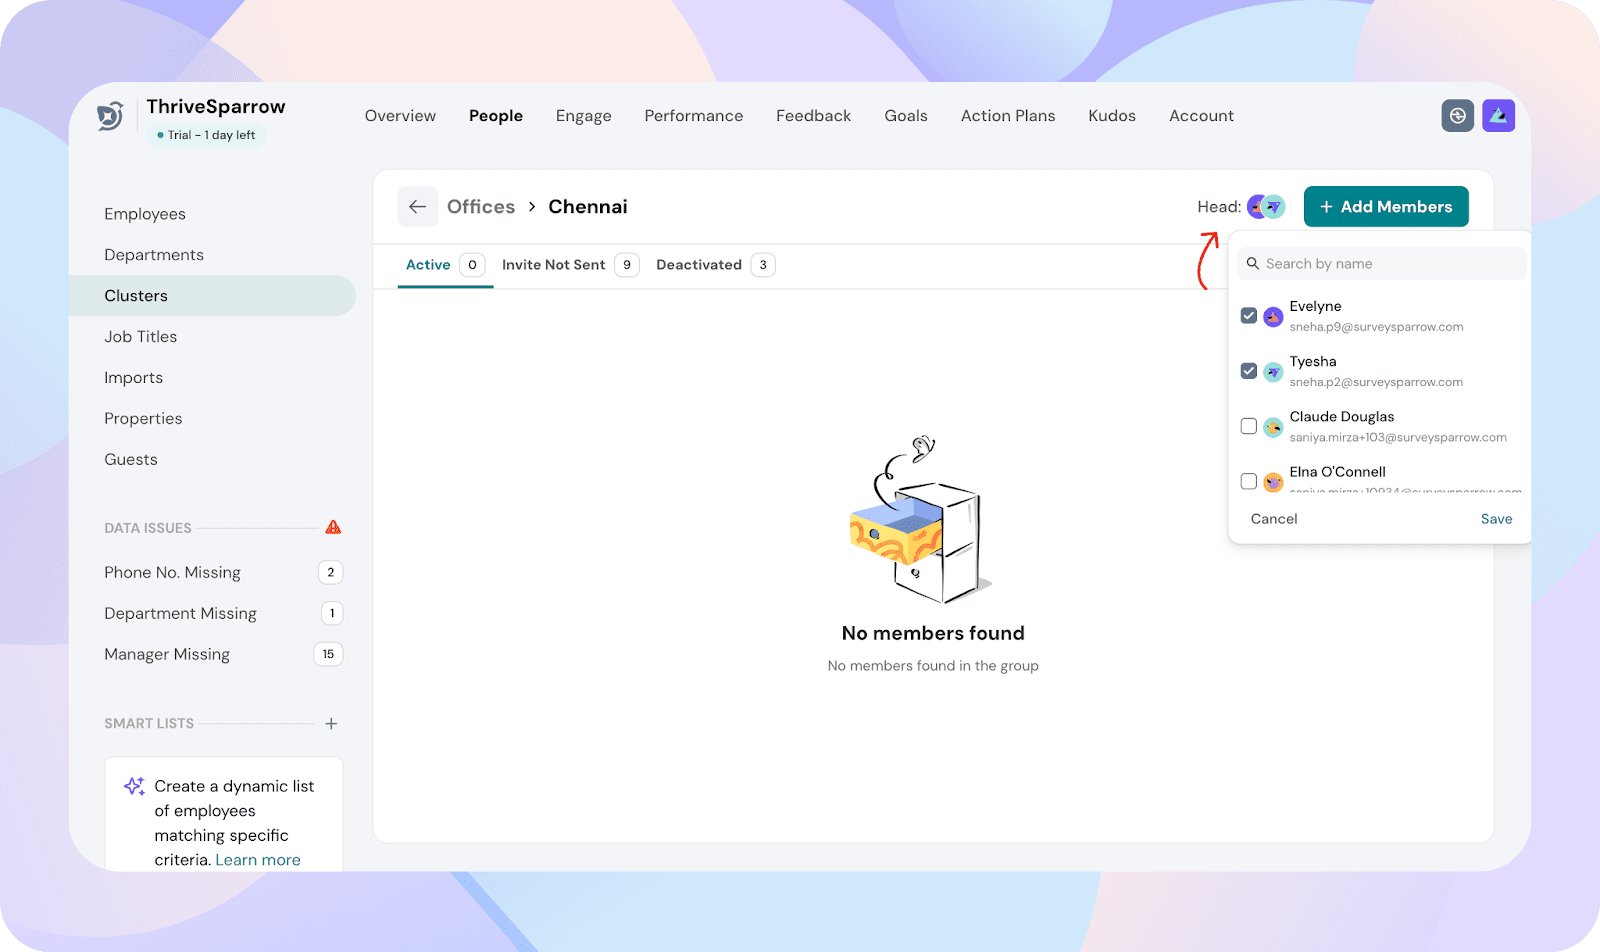
Step 3: Add members to a group
- Open a Group inside a cluster.
- Click Add Members.
- Select employees to add to the group.
Members can also be added later via:
- Bulk CSV upload
- Individual employee profile updates
- HRIS sync through integrations
Add members using bulk CSV upload
You can update group membership for multiple employees using a CSV file from the People Directory.
CSV formatting rules for clusters:
- Each cluster appears as a separate column in the CSV.
- The column header must exactly match the cluster name created in ThriveSparrow (for example, Division).
- Under the cluster column, enter the group name or names the employee belongs to.
Examples: - If an employee belongs to one group, enter the group name directly (for example, Engineering).
- If an employee belongs to multiple groups under the same cluster, enter the group names as a list using square brackets.
Example: ["Engineering", "Research & Development"]
Note:
- Osaka\, Japan - represents a single group named Osaka, Japan
- Osaka, Japan - represents two groups named Osaka and Japan
- If a group name contains quotation marks, escape them using double quotation marks (for example, Engineering ""A"").
- Leaving the cluster column empty will not remove the employee’s existing group values.
Note: Groups must be created in the platform before uploading the CSV. Group creation is not supported via CSV.
Rules for group membership
- An employee can belong to multiple groups within the same cluster.
- An employee can belong to multiple clusters.
- A group can have multiple group heads.
- A group head does not appear in group data unless they are also added as a member.
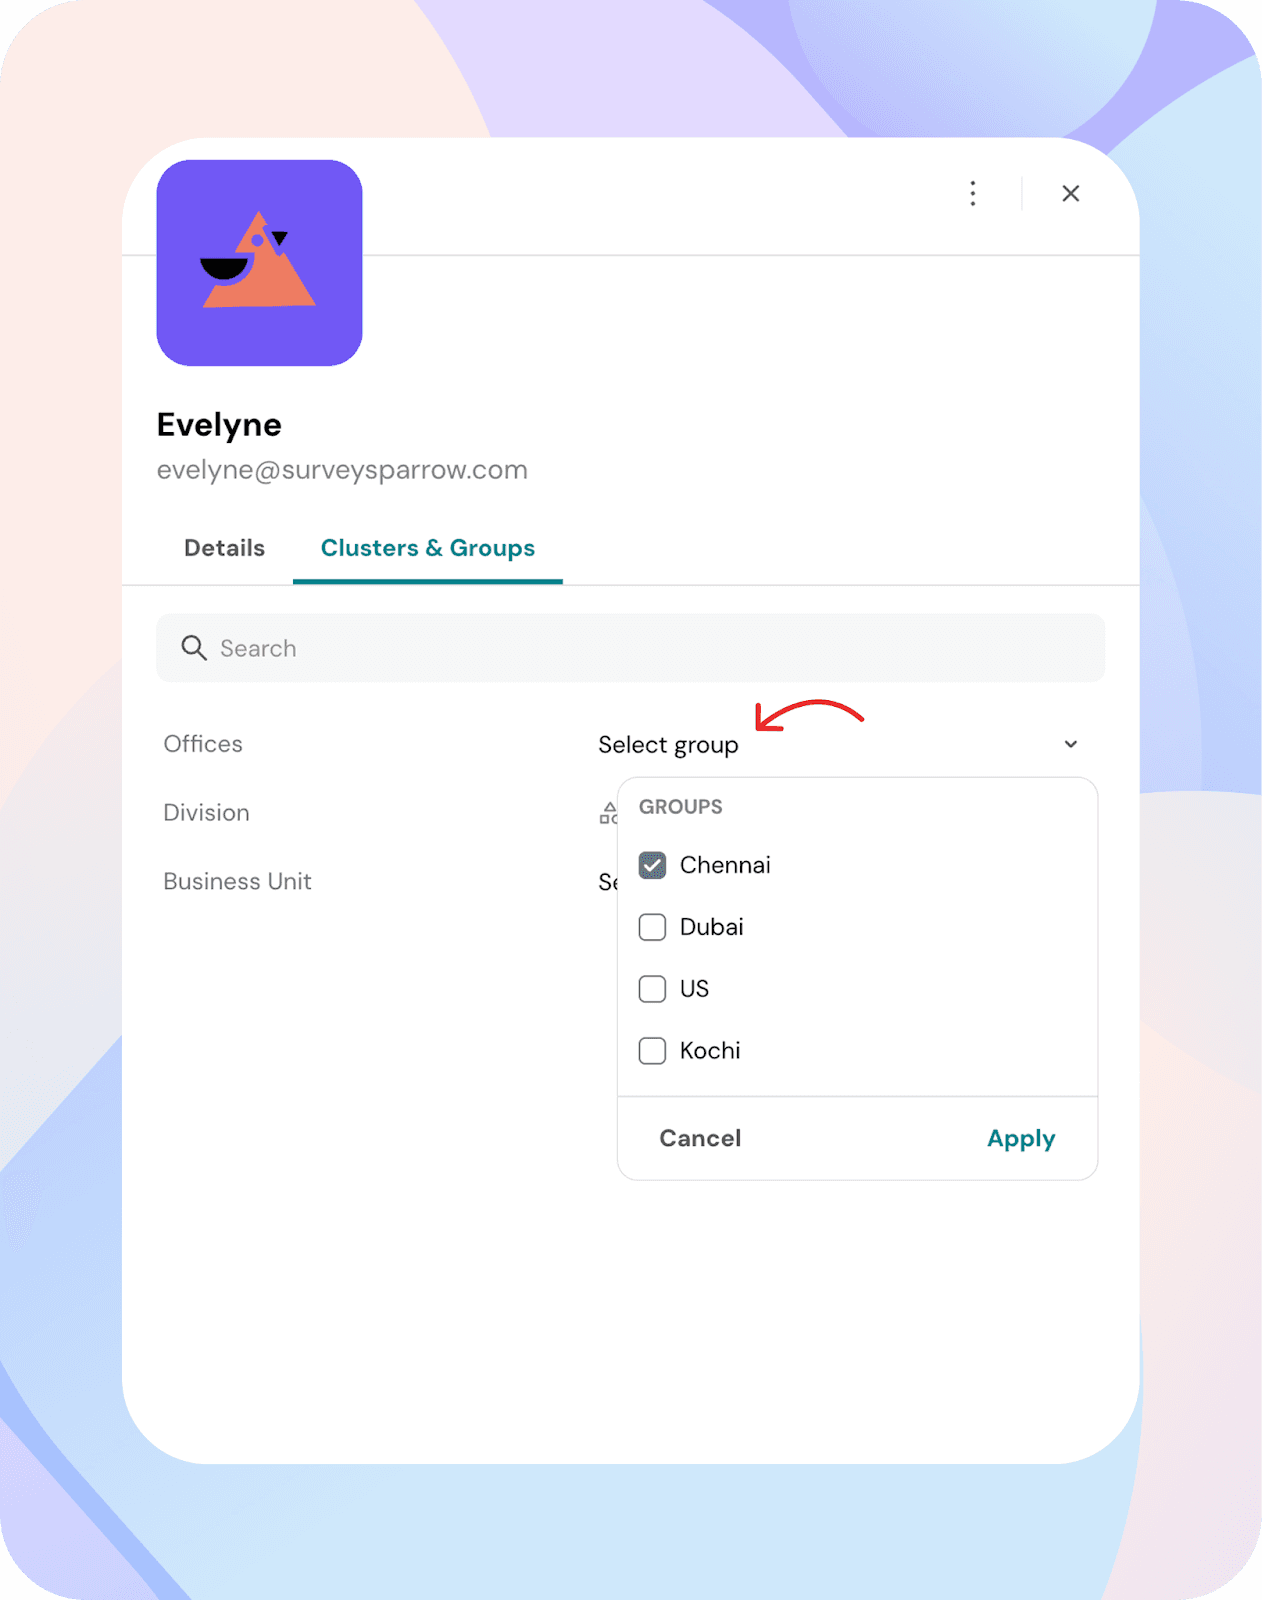
Updating a single employee’s groups
- Go to People Directory.
- Open an employee profile.
- Click the Edit icon.
- Select groups under each cluster using multi-select fields.
- Save changes.
Editing clusters
- From People Directory → Clusters, locate the cluster.
- Click the pencil icon next to the cluster.
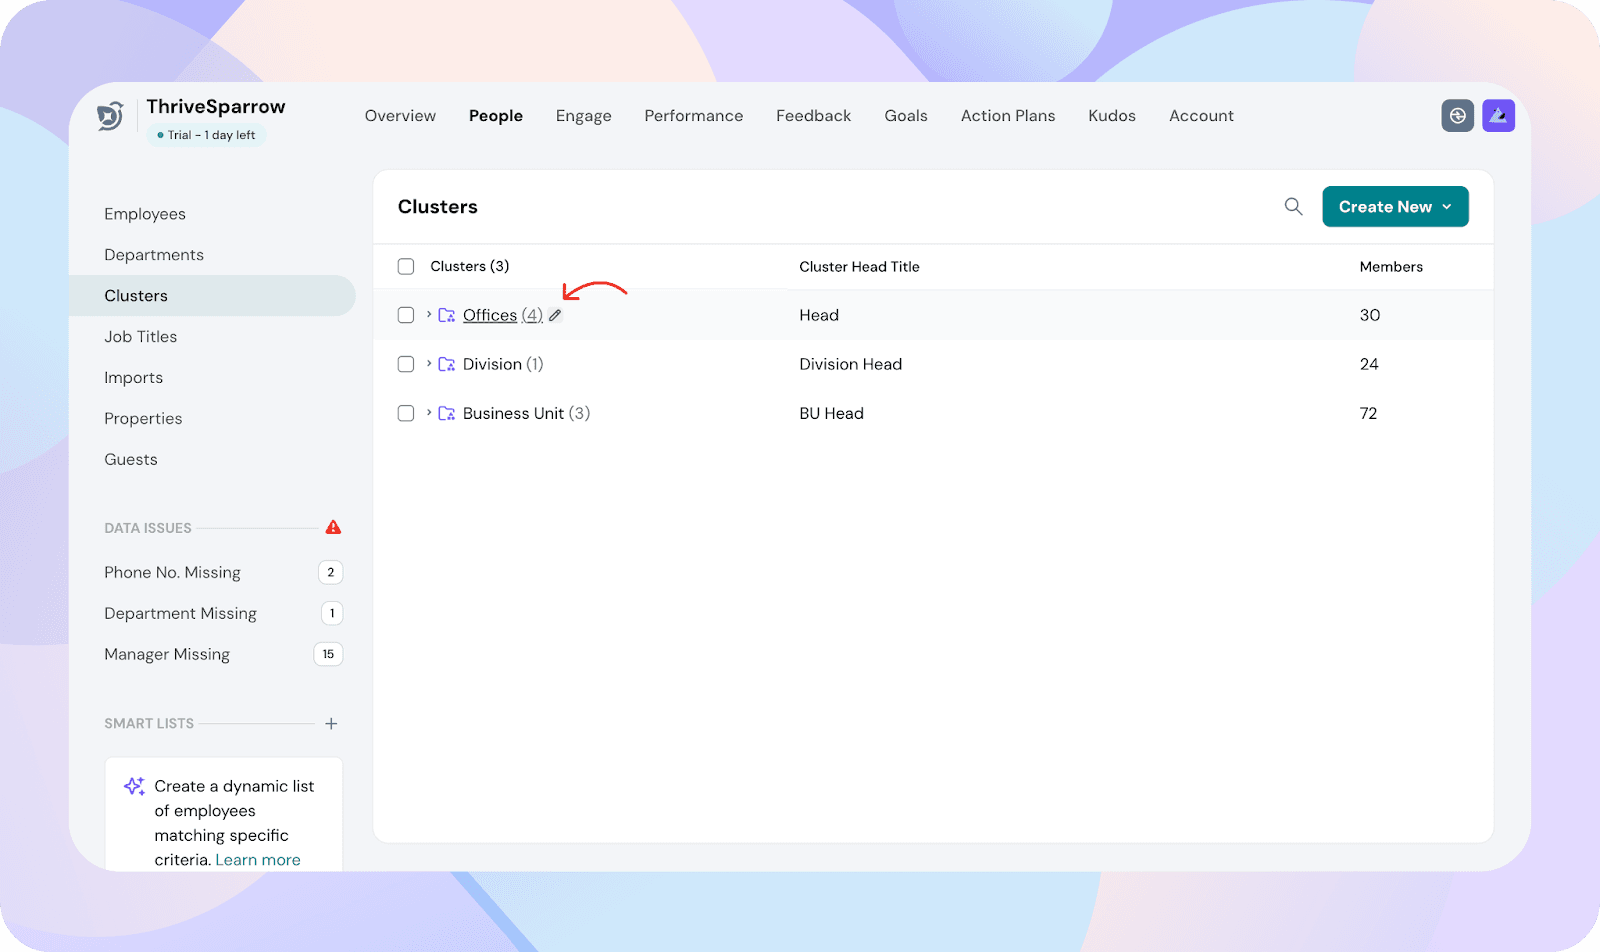
- Select Edit.
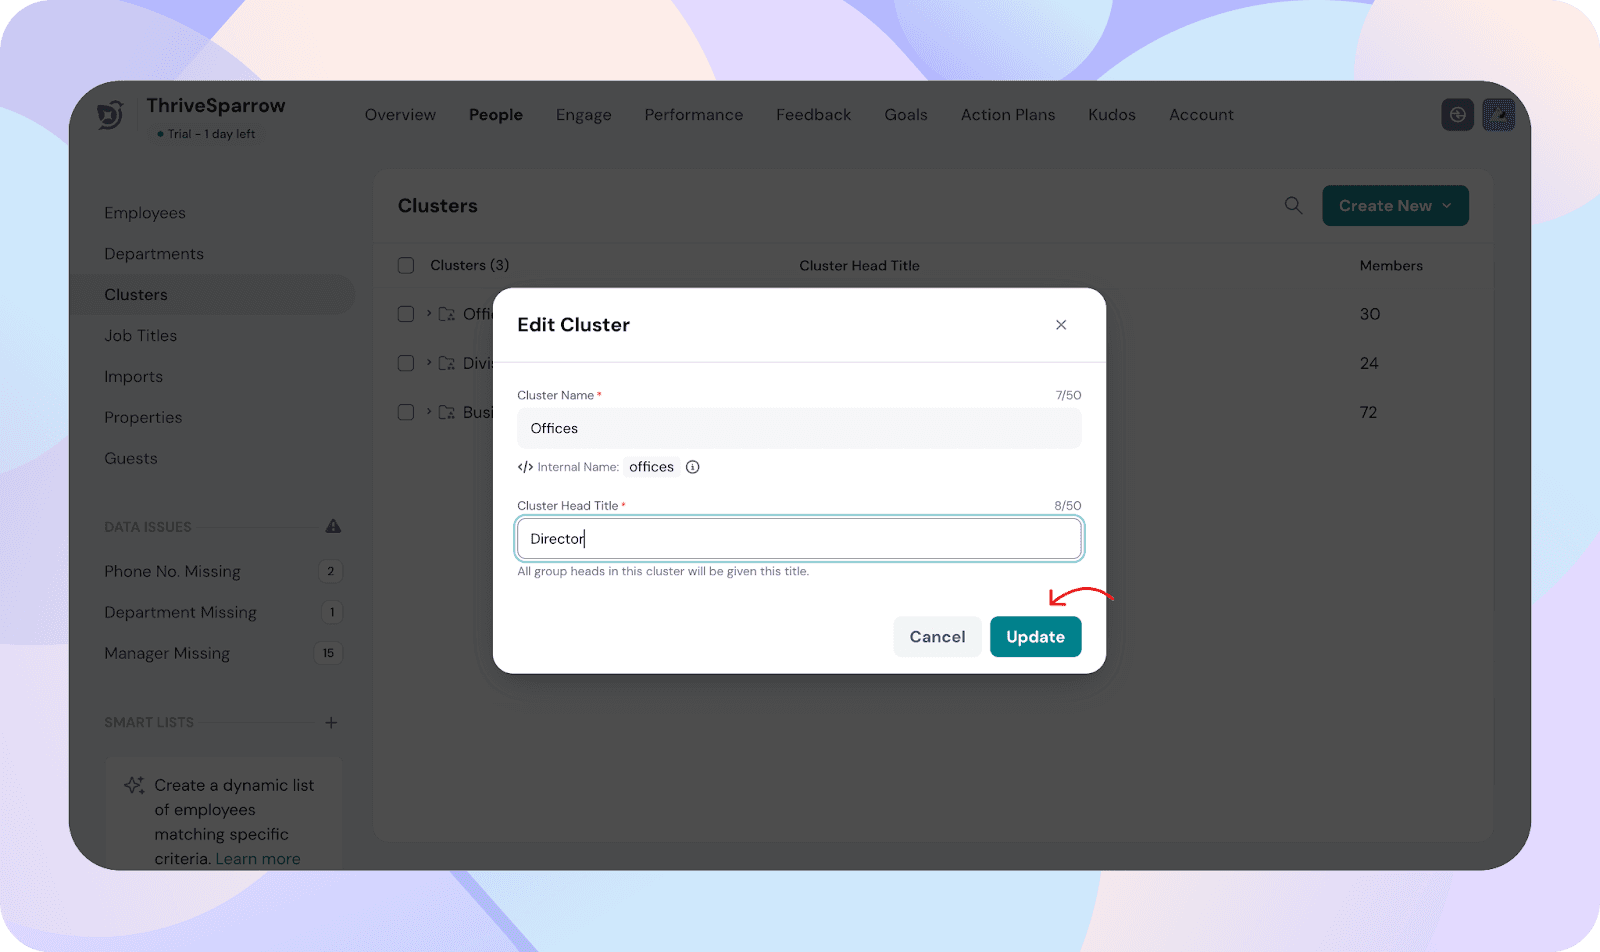
- Update the Cluster name or Group Head Title.
- Save changes.
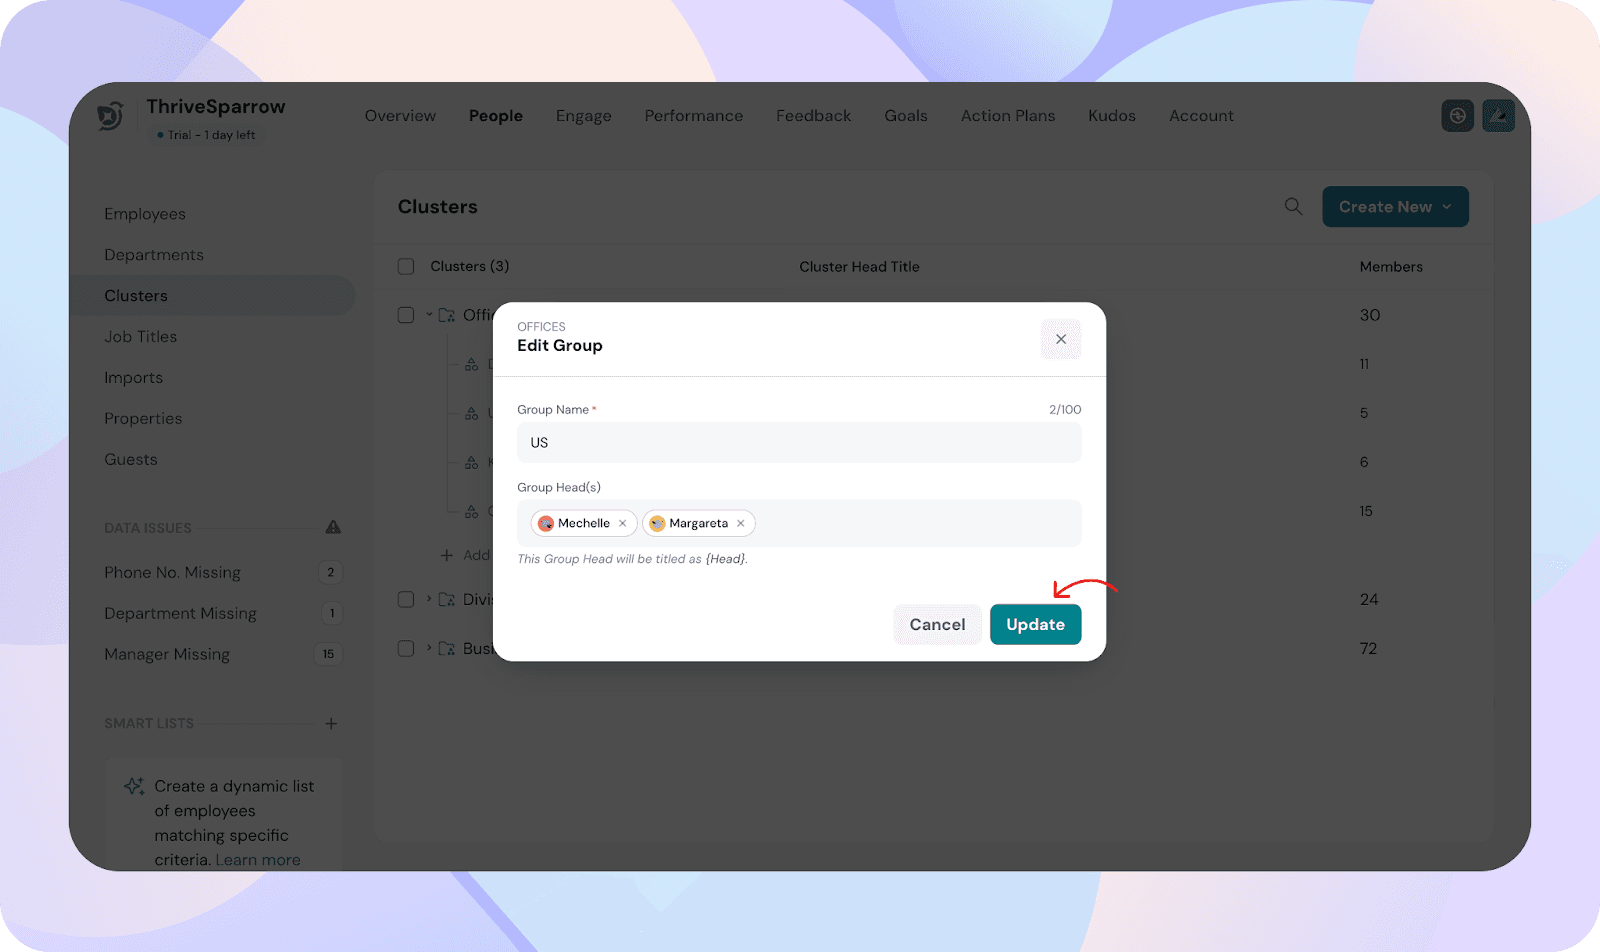
Editing groups
You can edit a group in two ways:
From the cluster view
- Open the Cluster.
- Click the edit icon next to a group.
- Edit the Group name or Group heads.
- Save changes.
From inside the group
- Open the Group.
- Access the group settings from the member list.
- Make changes and save.