Setting up QR Code Share for Surveys
QR Codes provide a seamless way to facilitate anonymous survey participation, making it easier and faster for respondents to engage. Particularly valuable for blue-collar workers who may not have access to email, QR codes enable quick access to surveys, ensuring everyone can share their feedback effortlessly.
1. Anonymity configuration
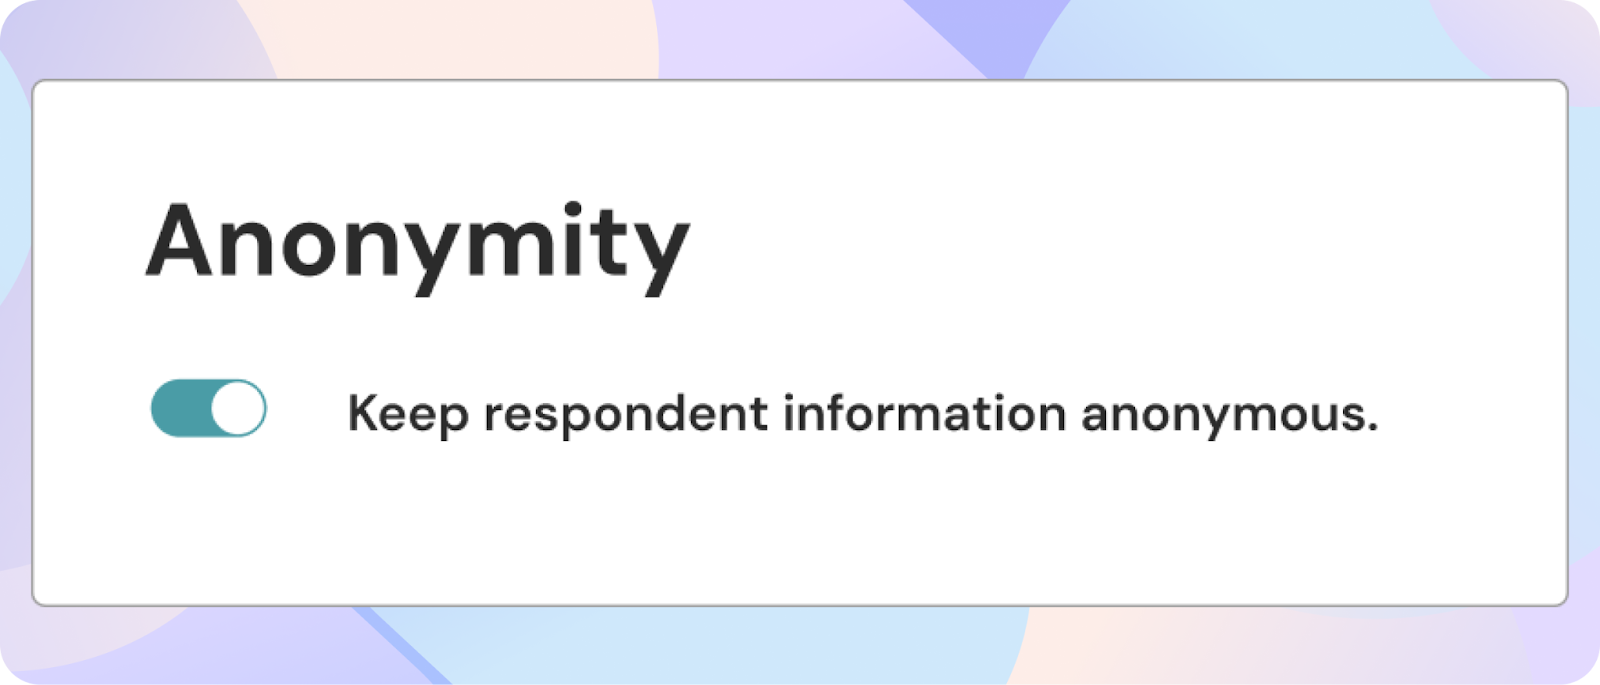
- Once you've created your survey, head to the configuration settings.
- Ensure to toggle the anonymity option, as QR codes are exclusively used for anonymous surveys.
2. Opting for the QR code option
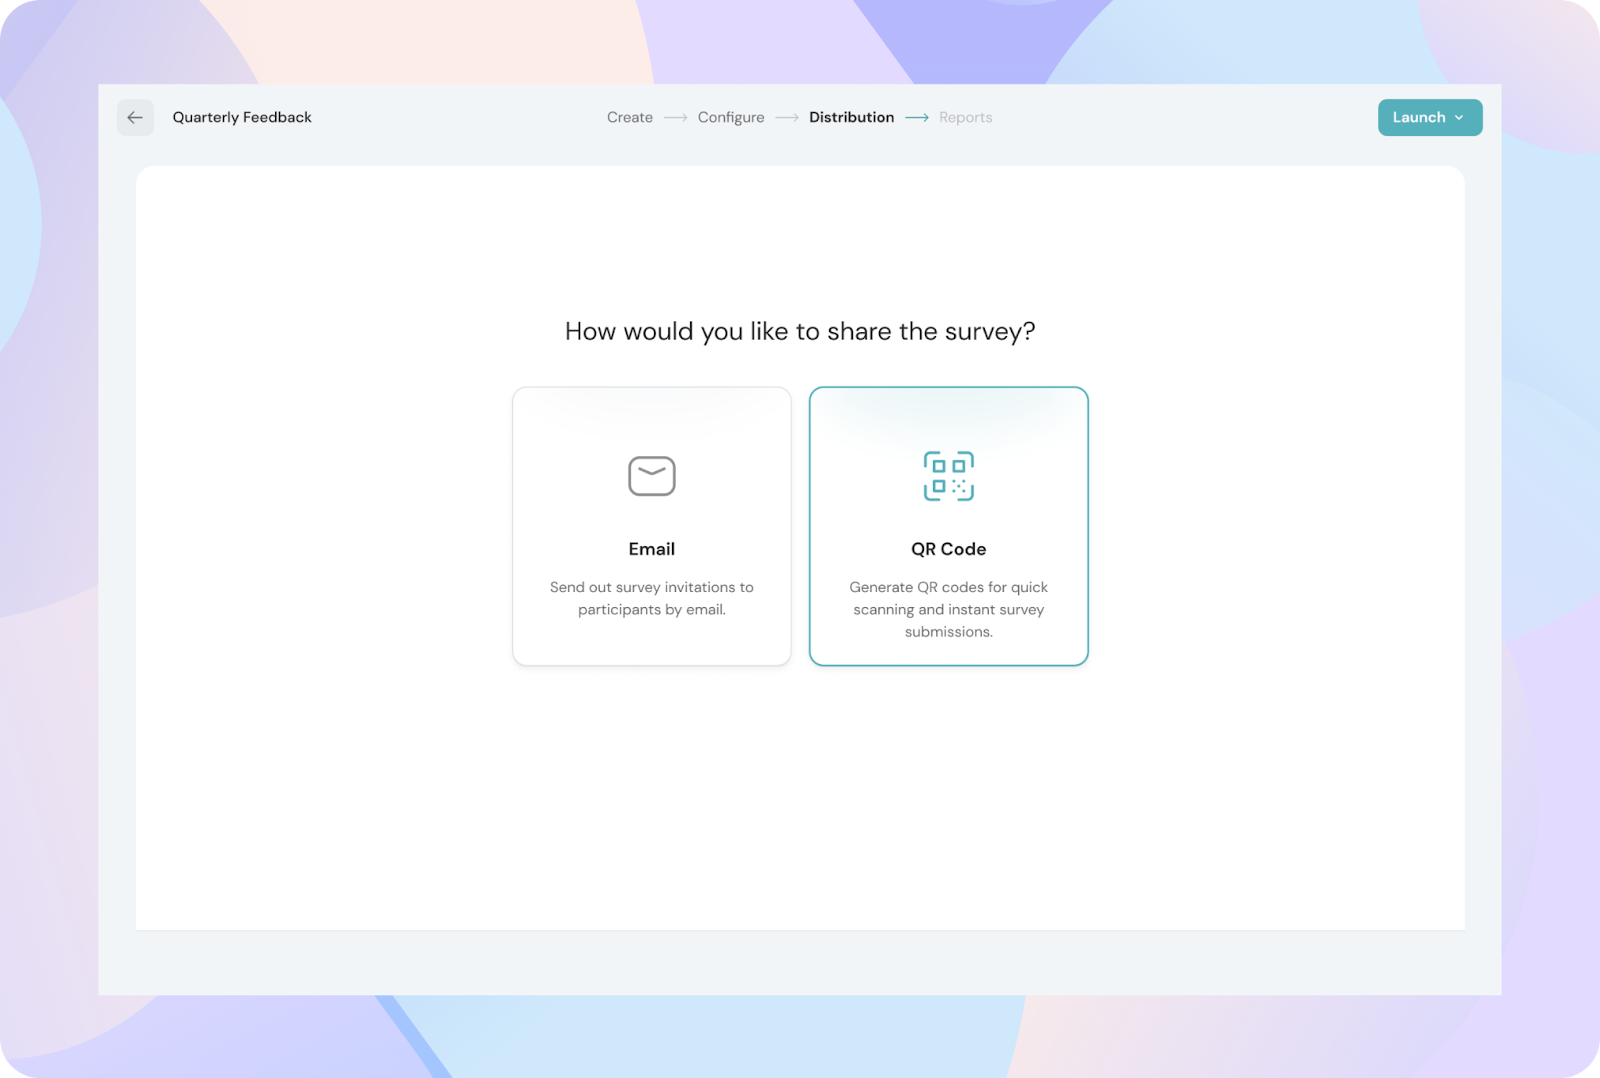
- After configuring the settings, move on to the distribution page.
- Here, you'll be prompted to choose how you'd like to share your survey by email or QR Code.
- Simply select the QR code option to proceed.
3. Setting the QR Code
- A QR code will automatically generate and display on the listing page without configuration/ employee properties.
- To set the properties and other configurations, simply click the edit icon.
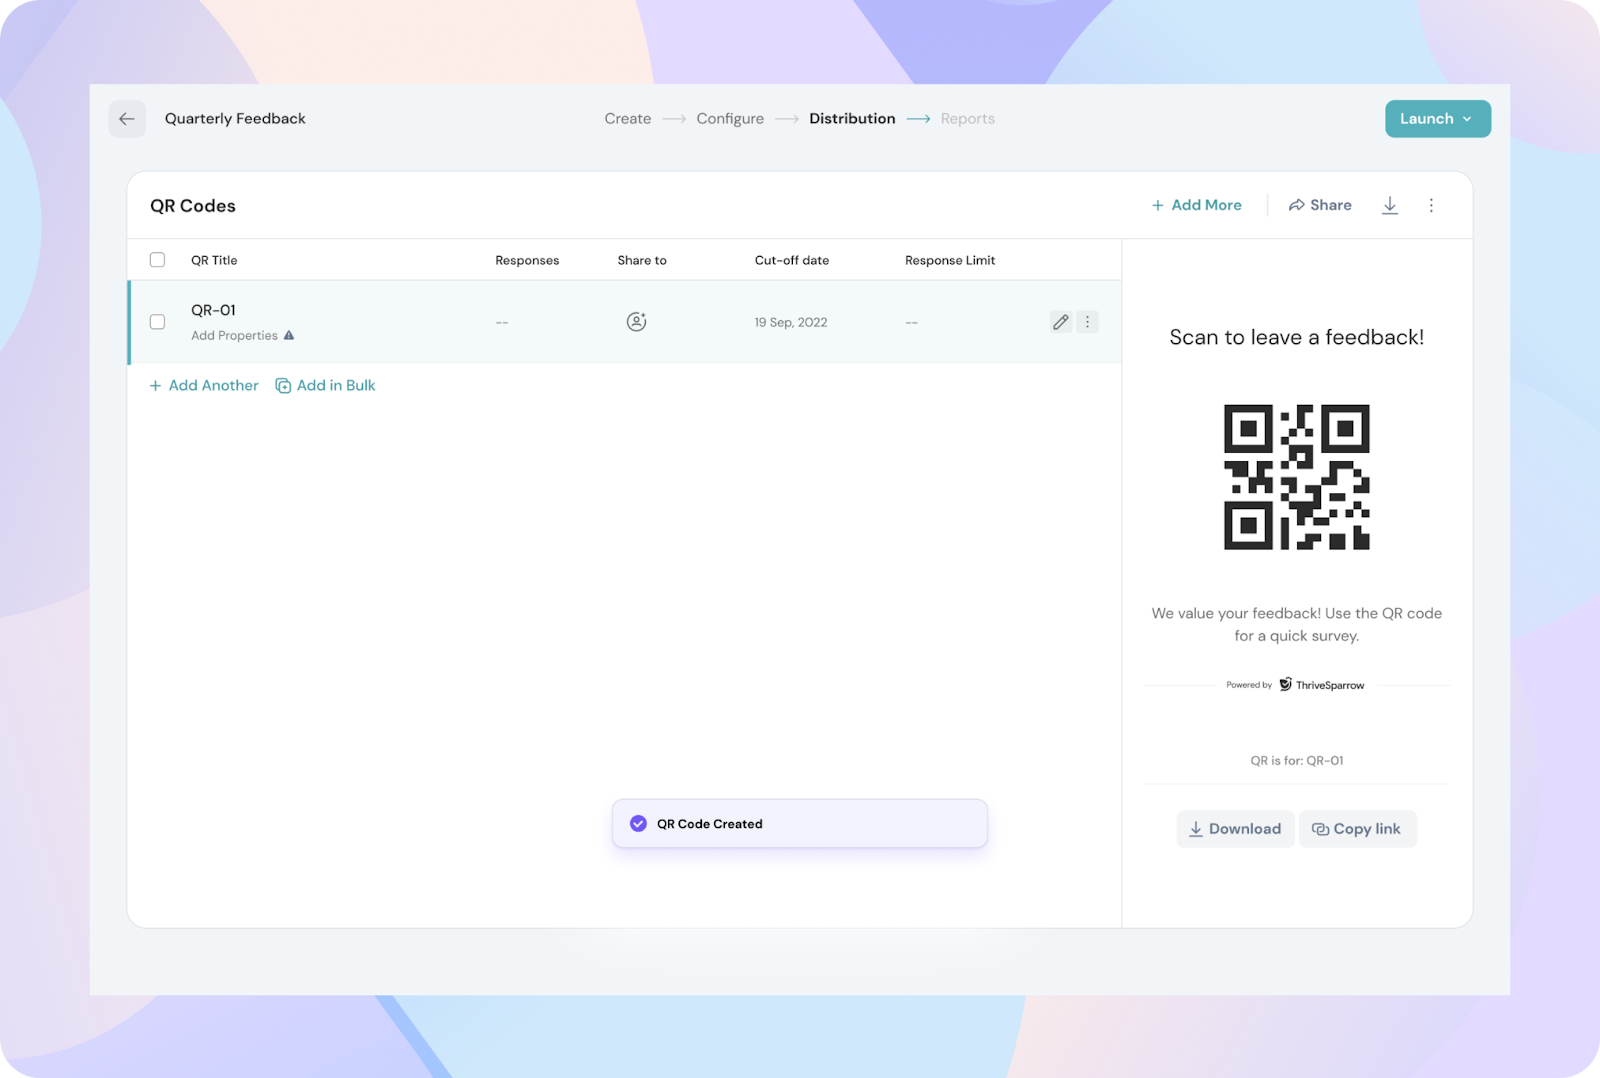
Note: For each QR code in the list, a preview will appear on the side. You can edit individual QR codes or multiple codes in bulk as needed.
4. Configuring the QR code
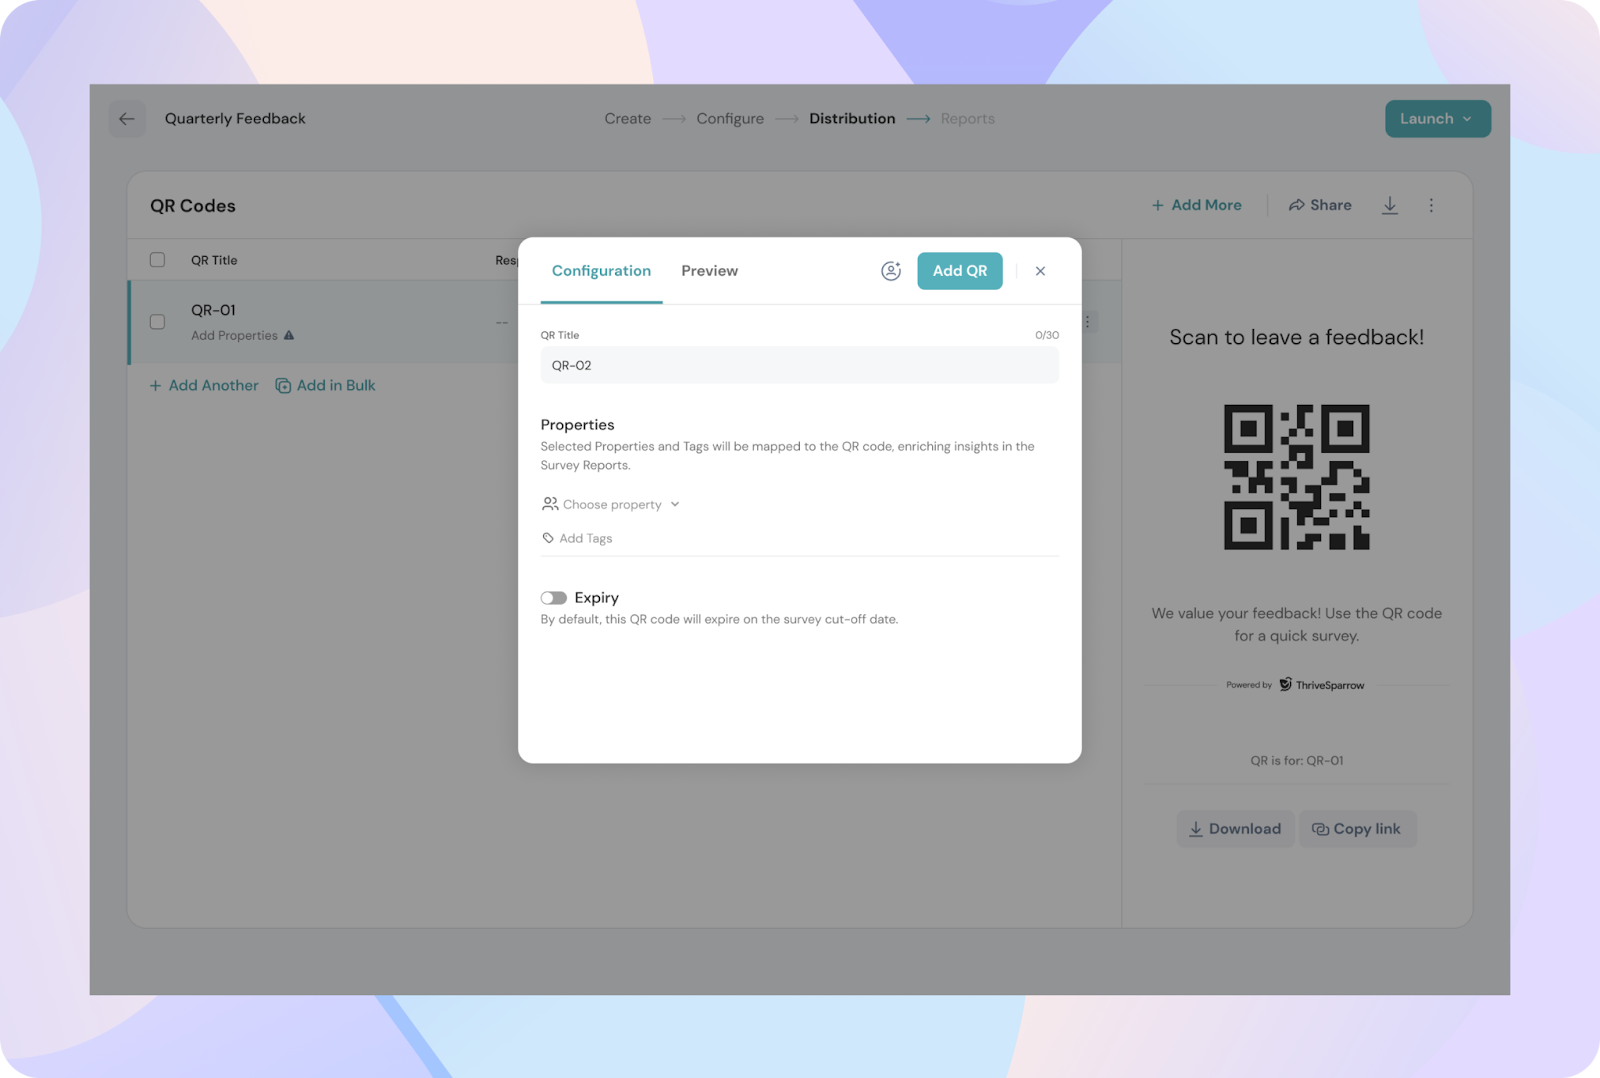
- A pop-up window will appear where you can configure the QR code.
- Start by assigning a title for easy identification. Then, set employee properties such as department, gender, and location using the drop-down menu, which includes both default and any custom dropdown property from the employee directory.
- You can also add tags to label the QR code for better organization and analysis, especially in the reports.
5. Setting Employee Properties
- When configuring employee properties for your QR code, keep in mind that if you select a property like "Location," you can only choose one specific option, such as "Spain".
- This restriction is in place because selecting multiple options would make it impossible to track which location the responses are coming from.
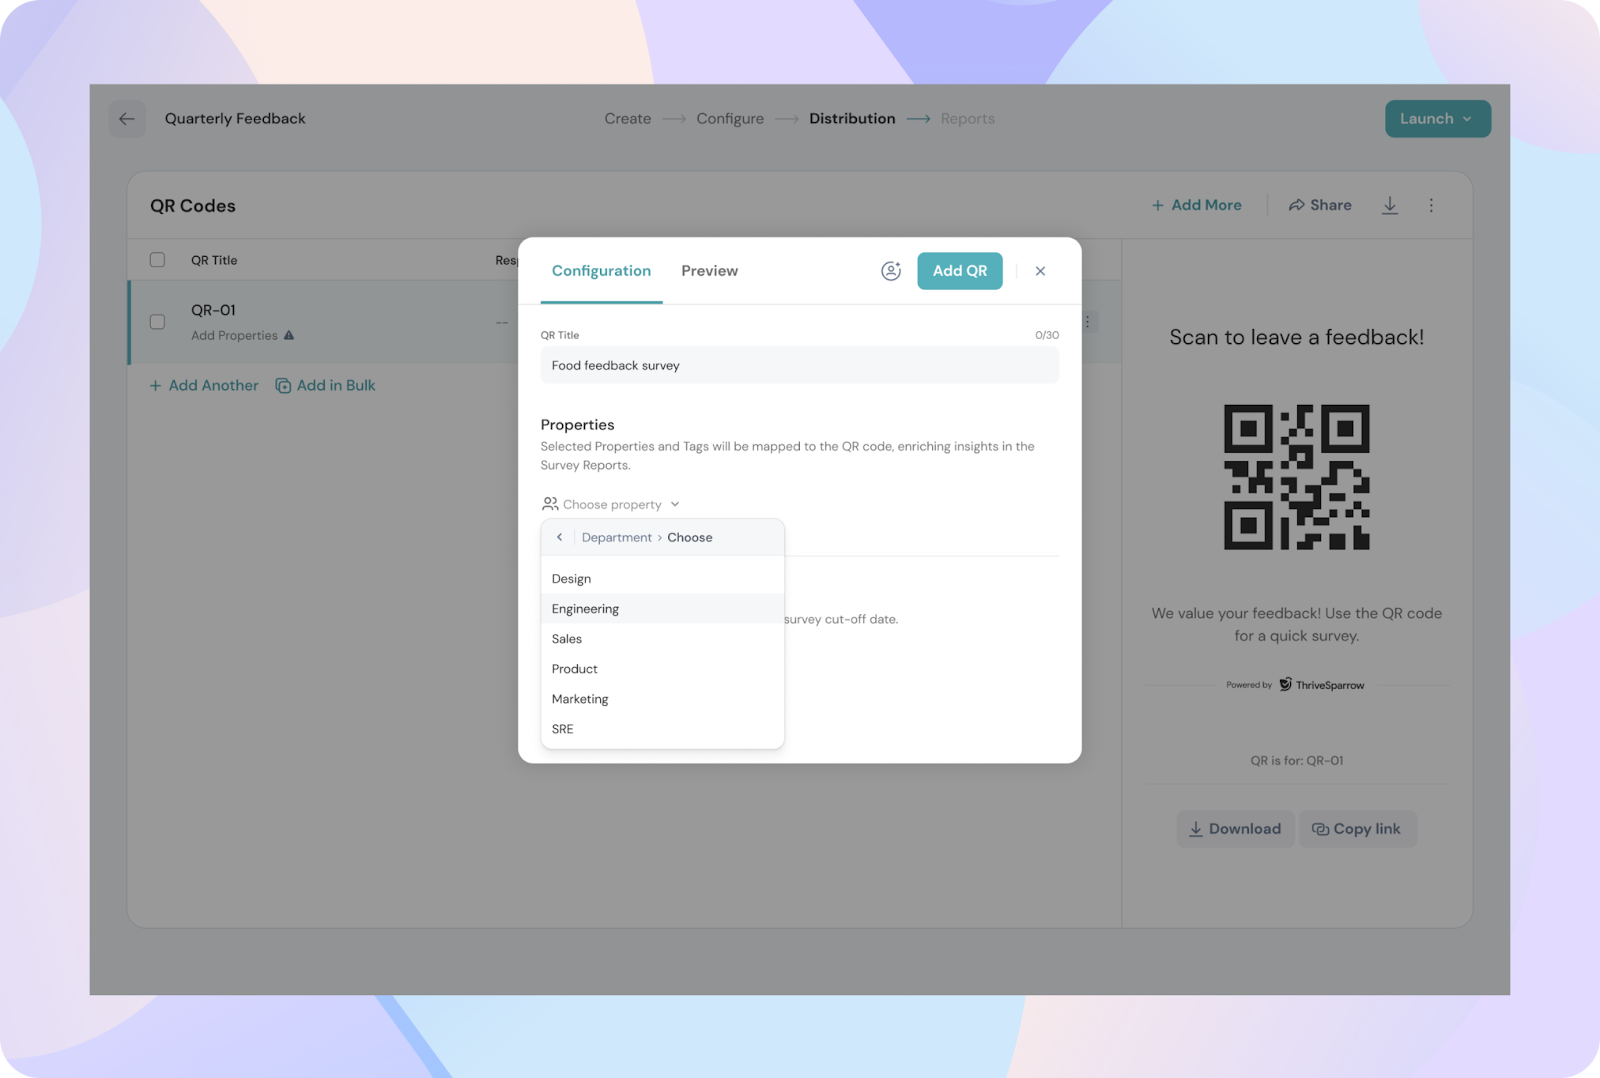
- While you can add multiple properties (e.g., department, location), each property can only have one selected option.
- To track responses for different departments, create a separate QR code for each one.
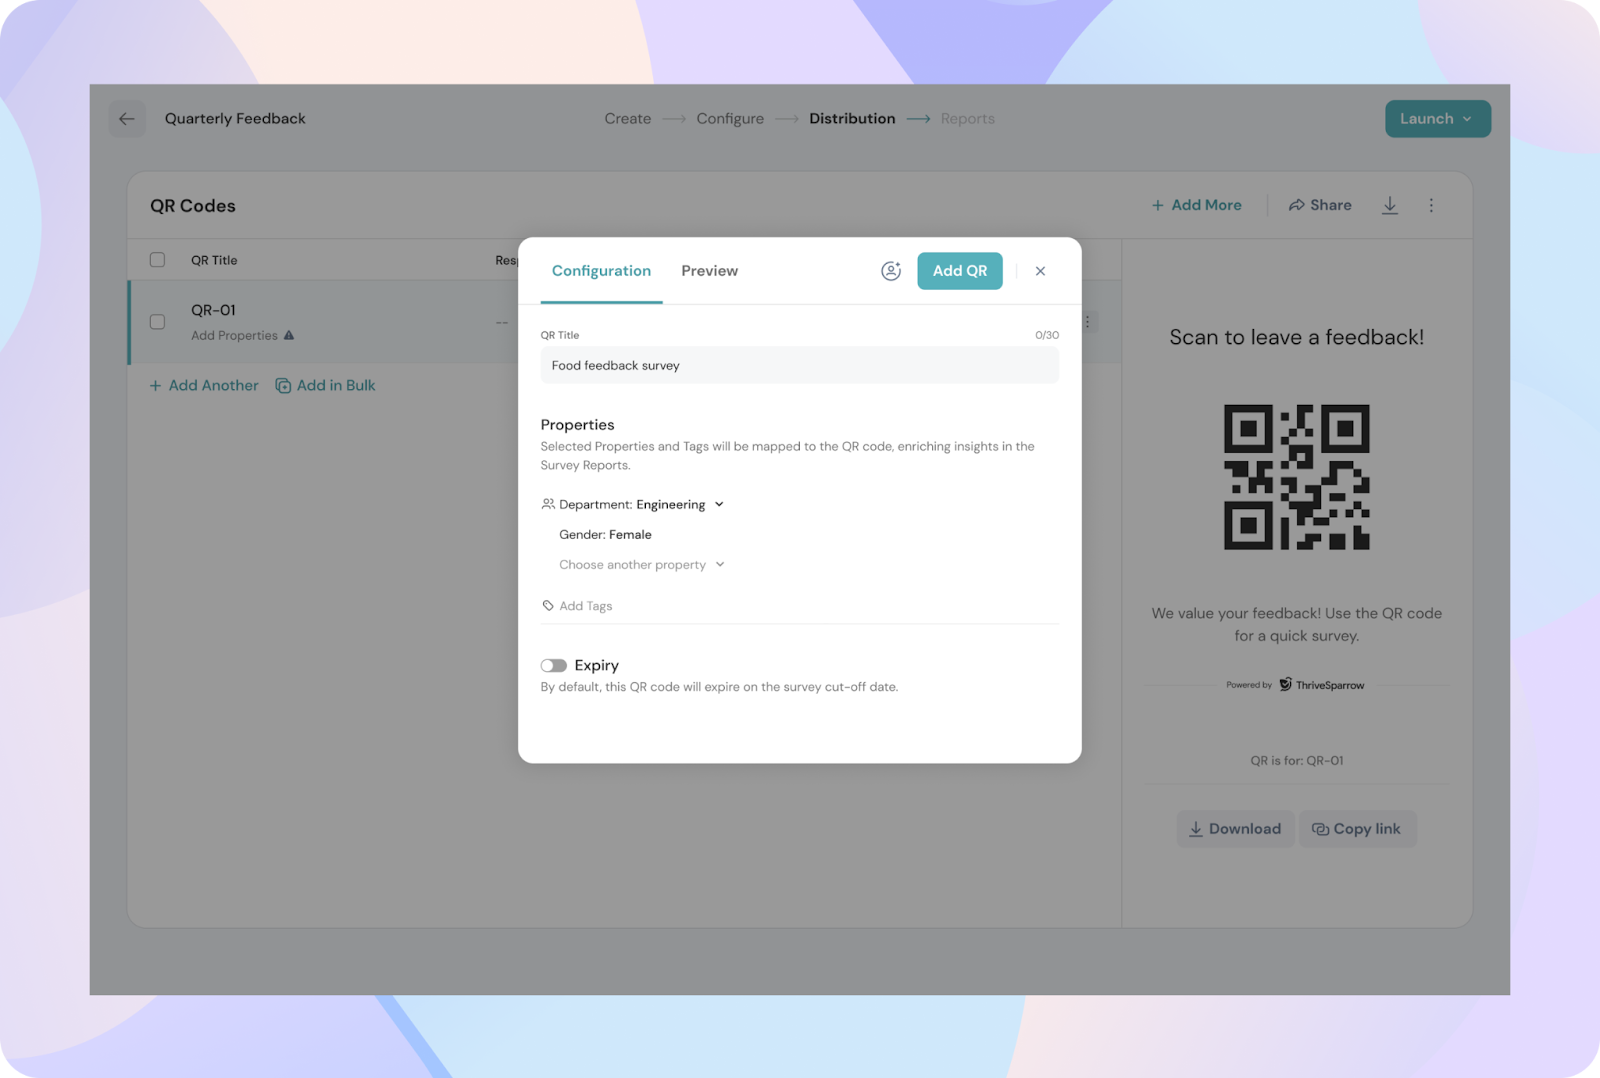
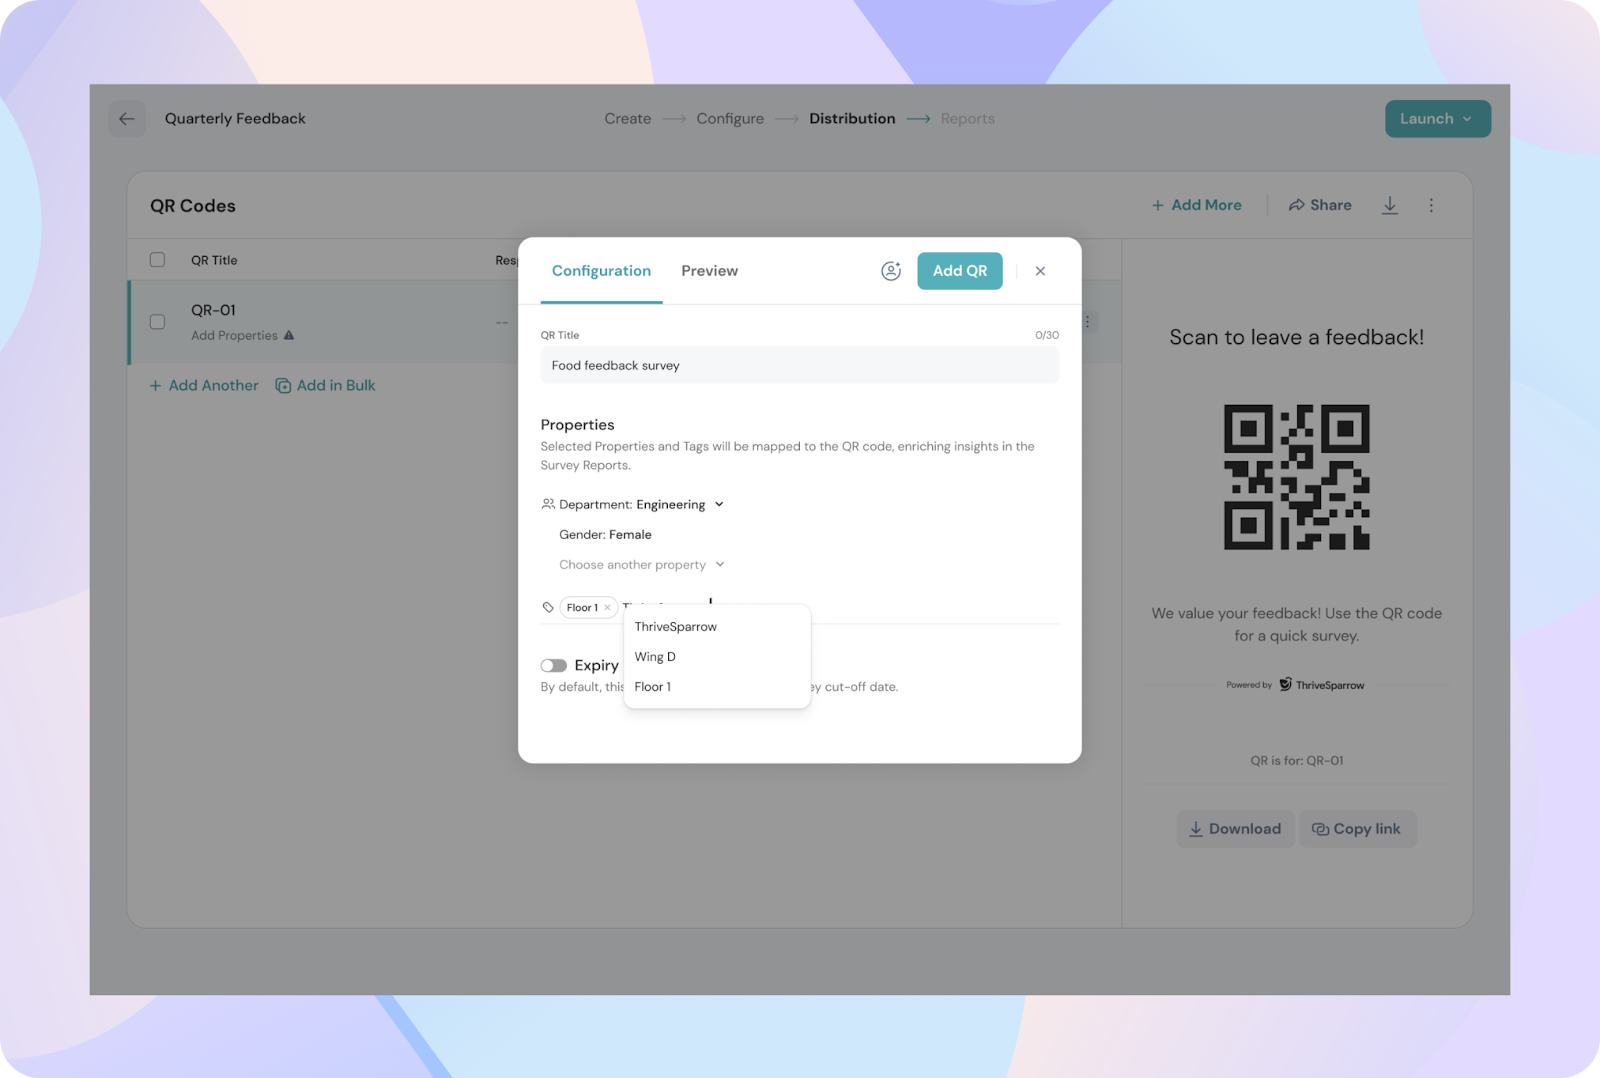
- Tags help with identifying and organizing QR codes in the reports.
- All tags you create for a particular survey will be available across all QR codes associated with that survey.
- If you use the same tag for multiple QR codes, the responses will be grouped together under that tag in the reports.
- You can also assign multiple tags to a single QR code, allowing responses to be tracked across different tags in the reports.
7. Expiry and Response Limits
- You can set an expiry date for each QR code by toggling on the expiry option.
- By default, the survey’s cut-off date will be applied to the QR code, but you can customize the expiry date for each QR code individually.
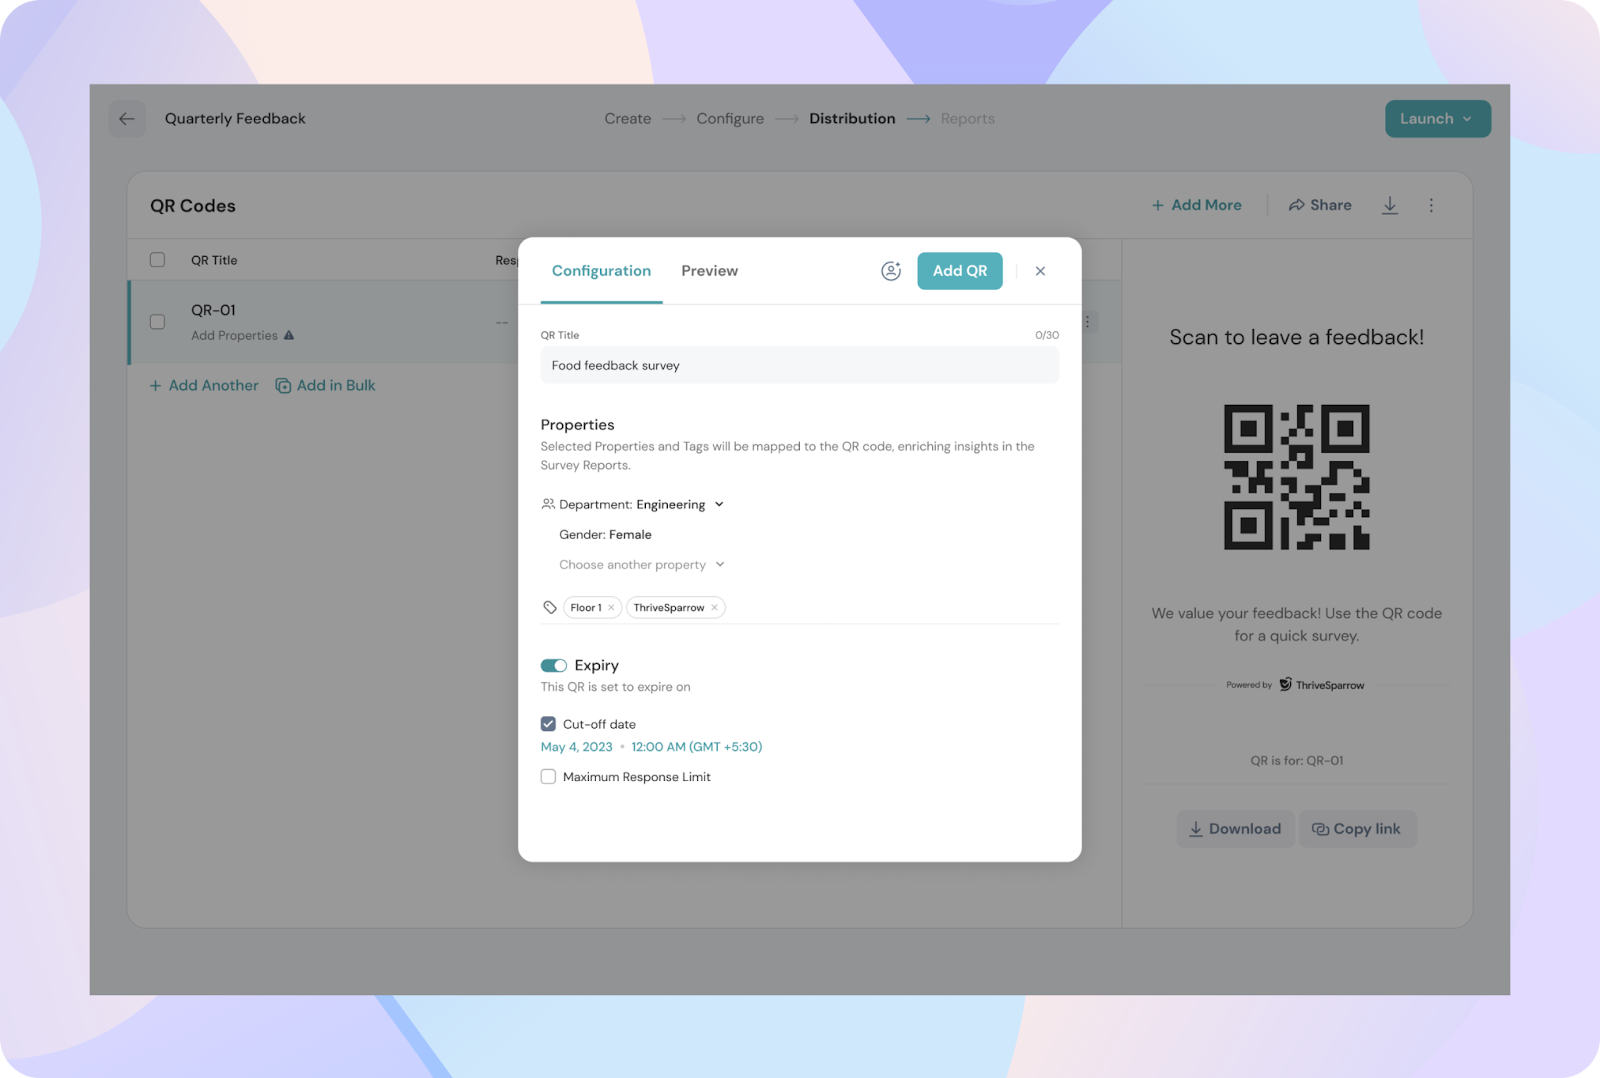
- Additionally, you can set a maximum response limit for each QR code.
- Once this limit is reached, the QR code will automatically deactivate.
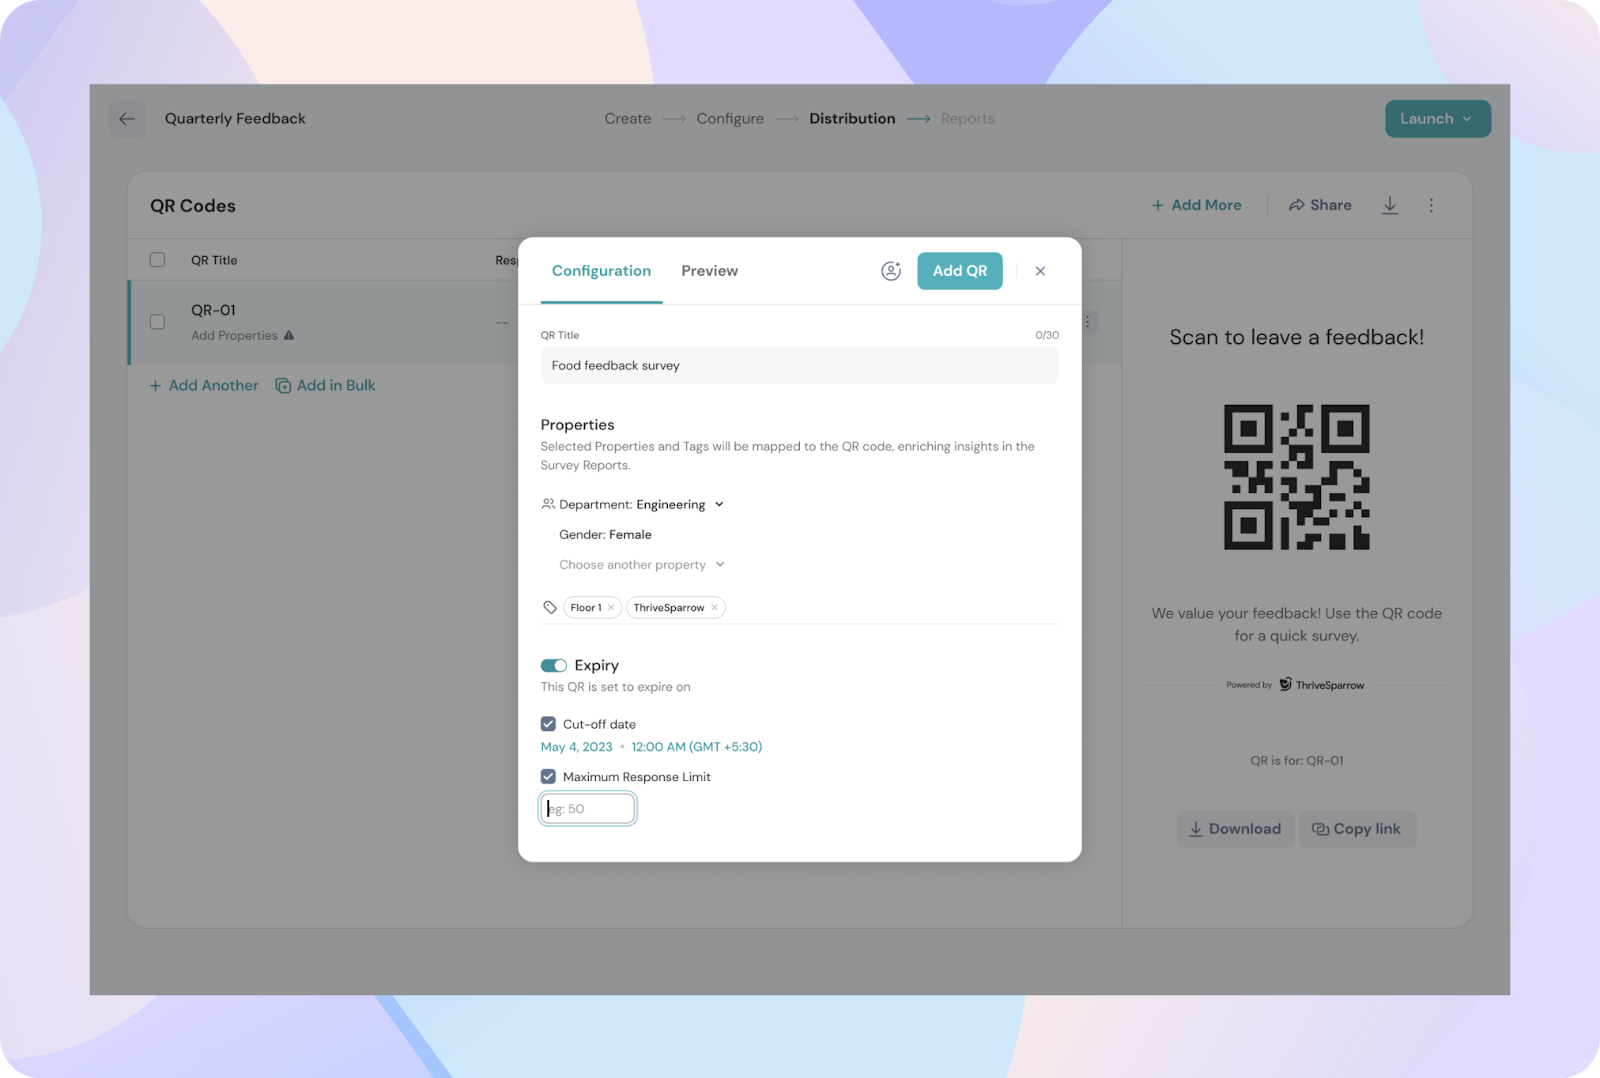
Note: If either the cut-off date is reached or the maximum response limit is hit, the QR code will be deactivated. But you’ve the liberty to prepone or postpone the expiry date even after the survey is launched.
8. Assigning QR Code Distributors
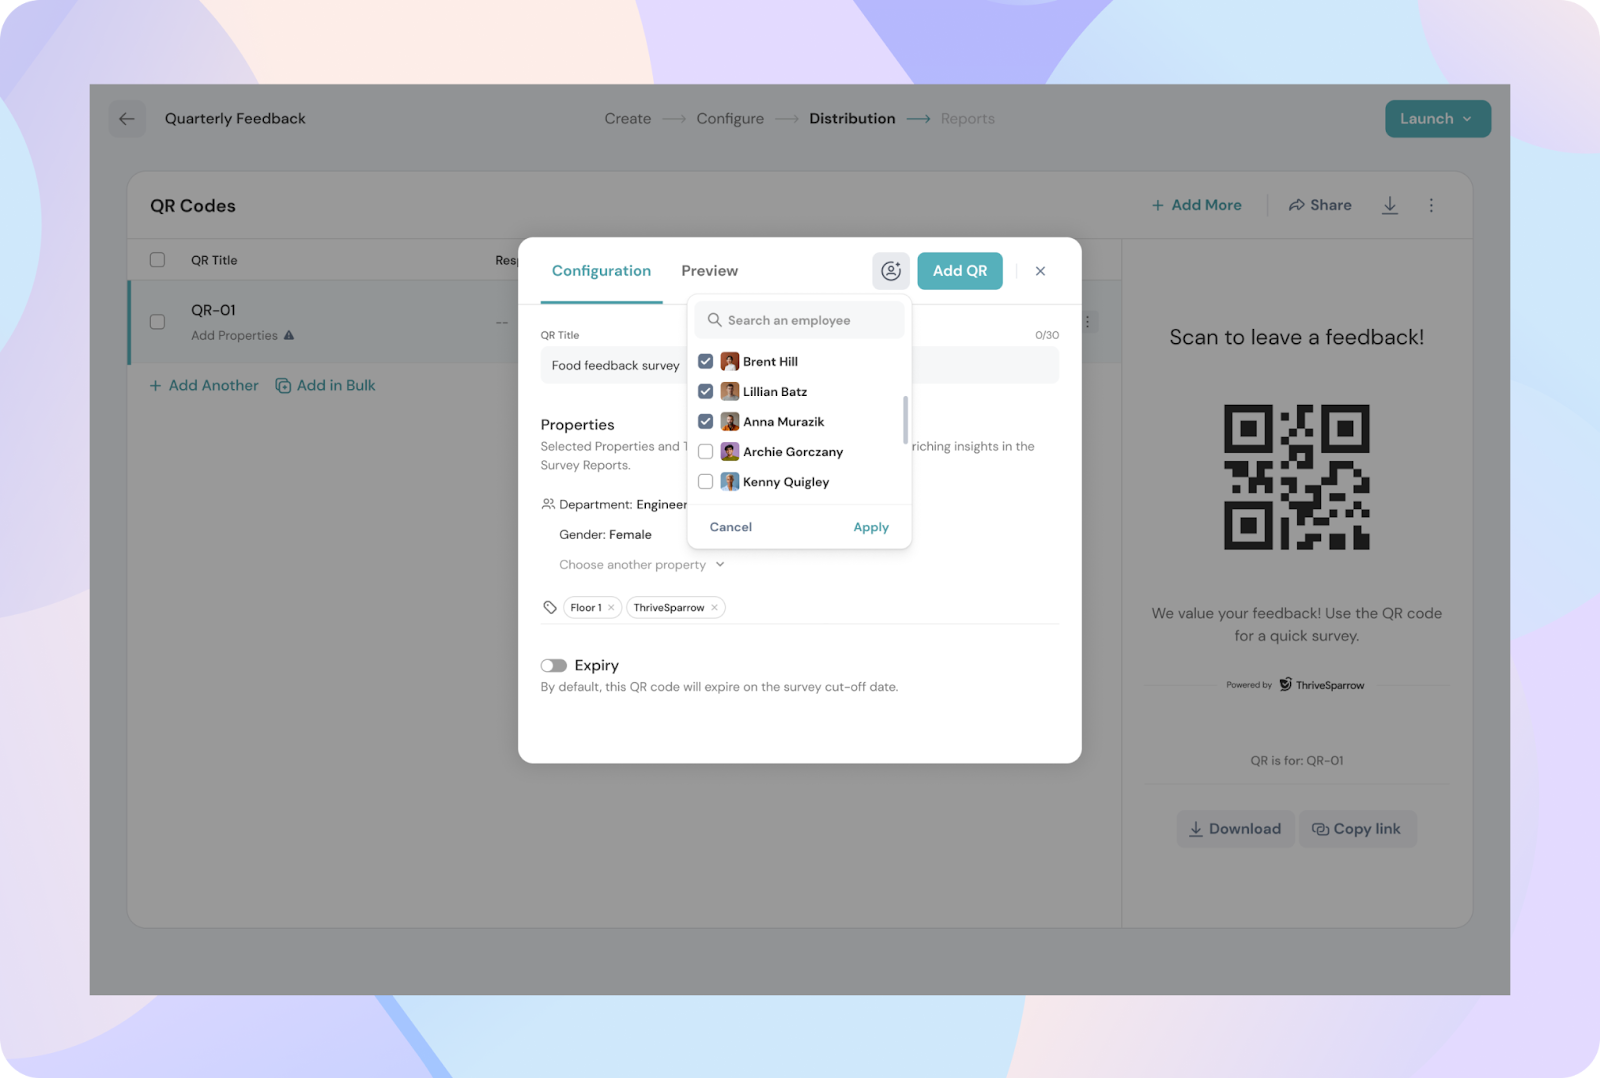
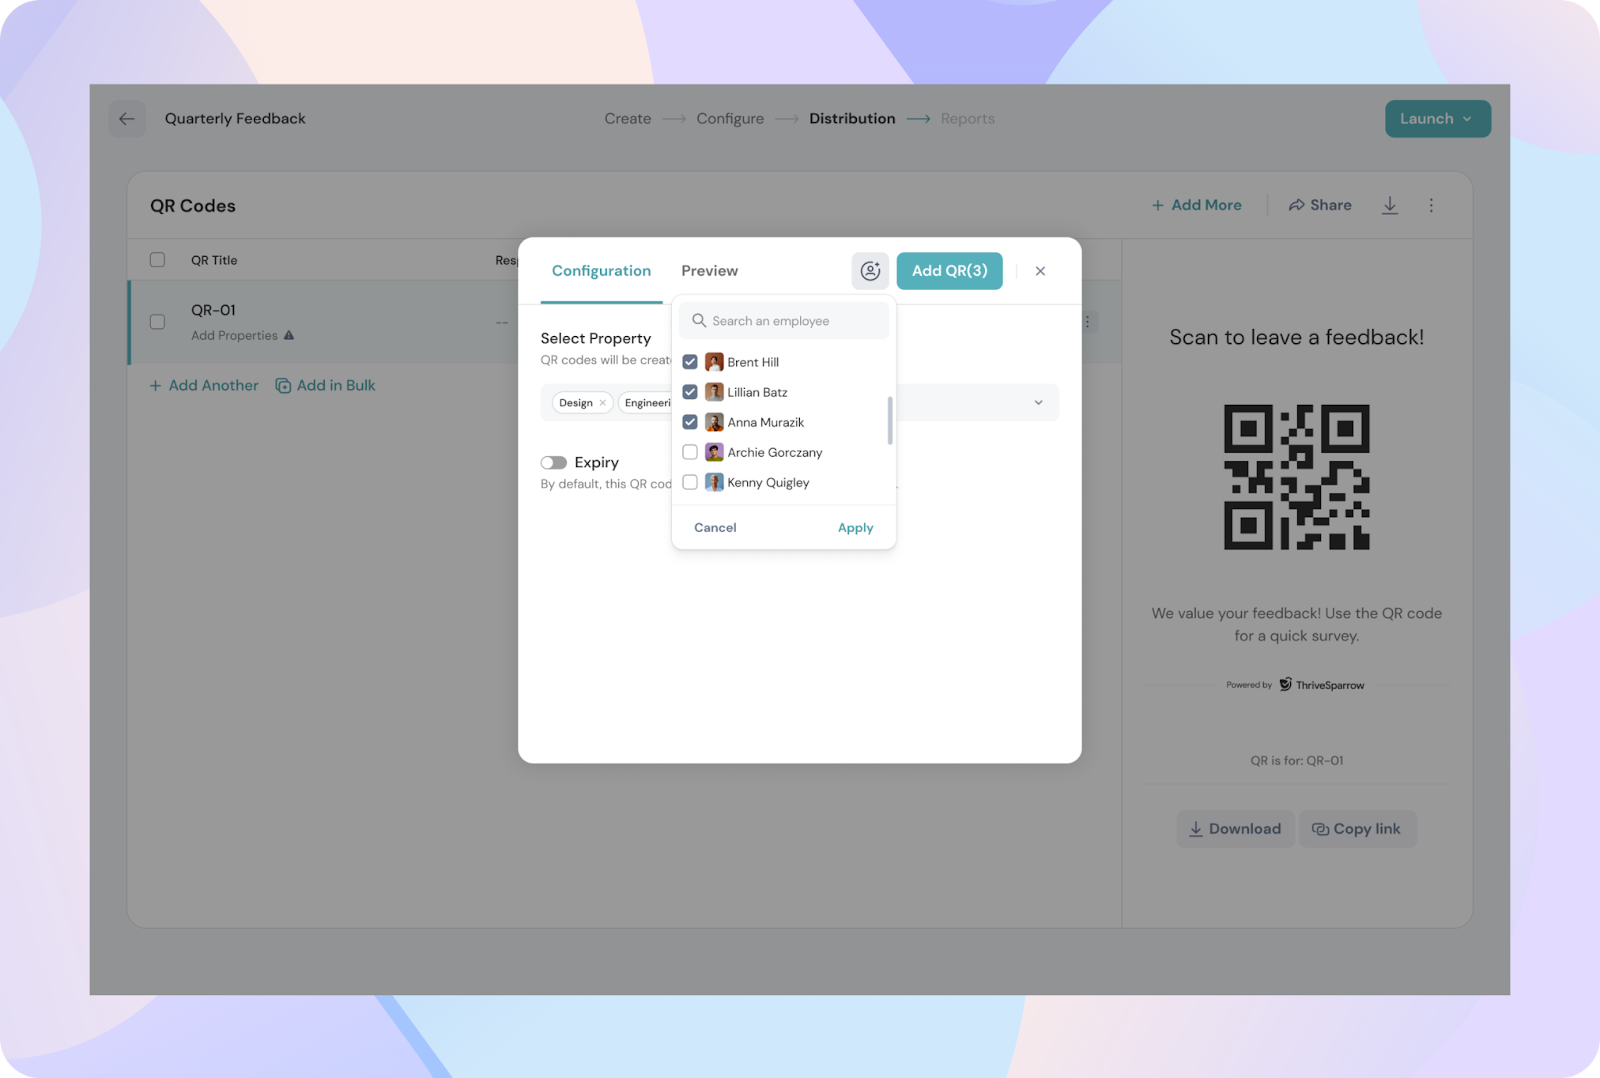
- In the configuration pop-up, use the share icon to add employees who will be responsible for distributing the QR code.
- You can select the people you want to share the QR code with, ensuring that the right people have access to it.
- These individuals will receive an email with the QR code images attached.
9. Customizing QR Code Display
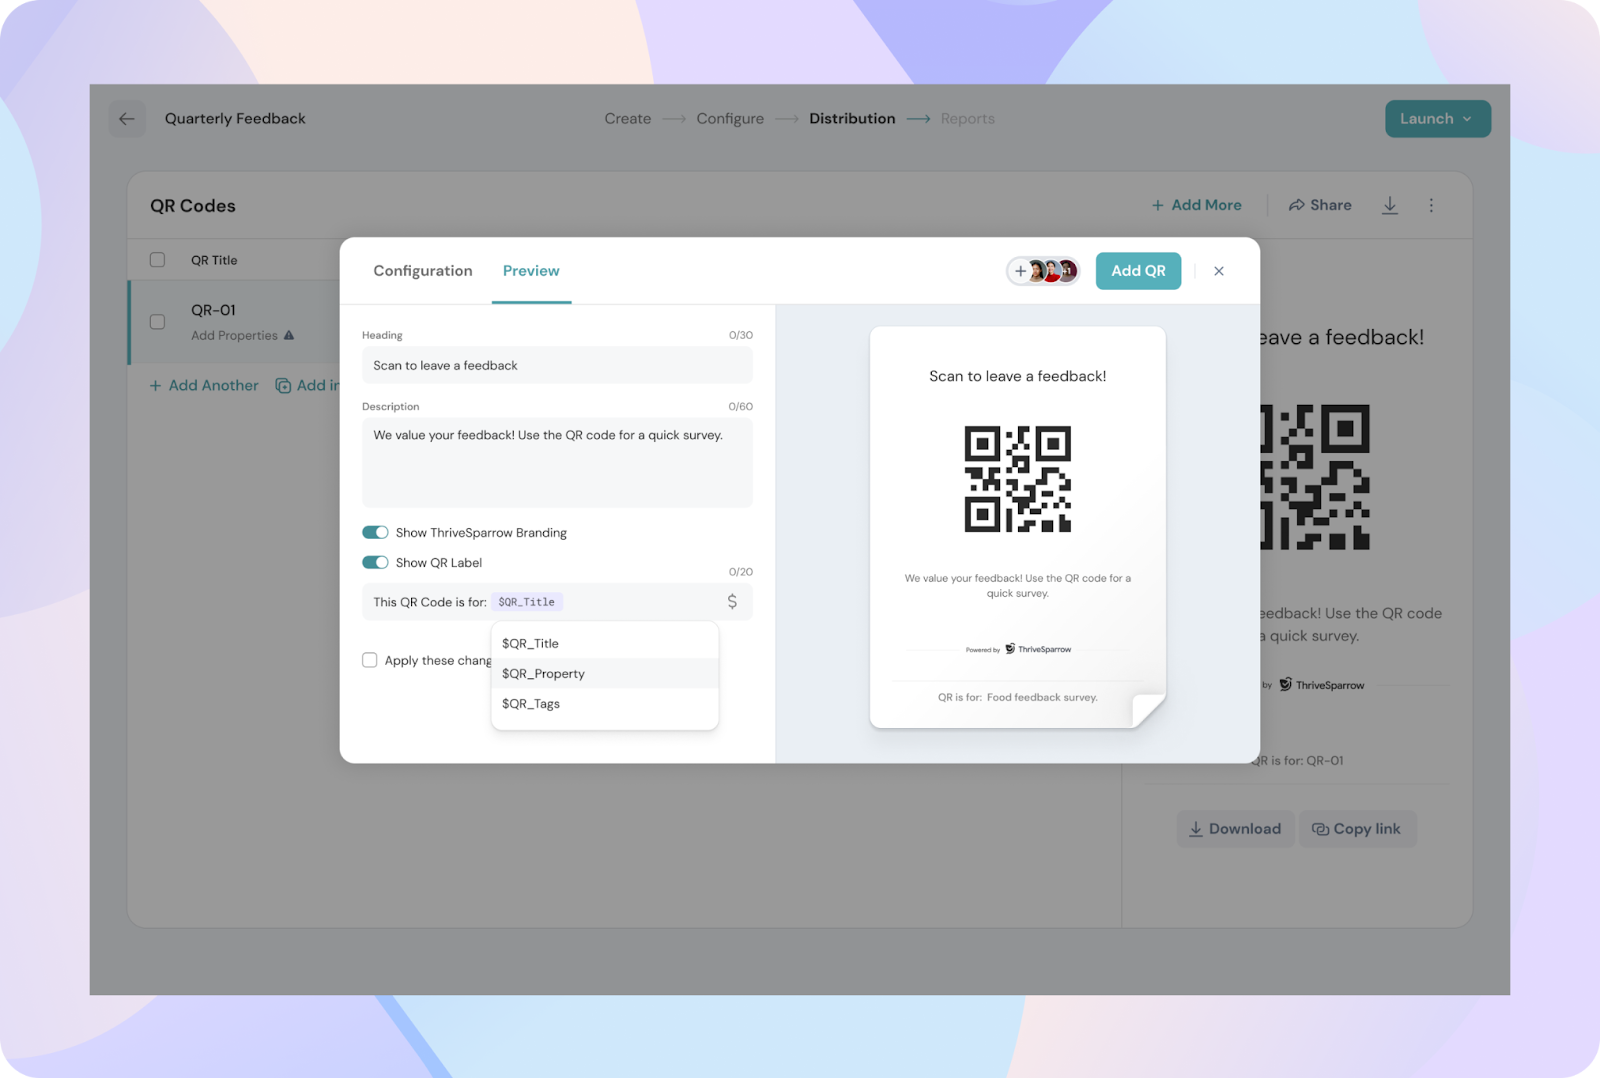
- In the preview section, you can customize how the QR code will be displayed.
- You have the option to add a heading, description, or a QR label for easy identification.
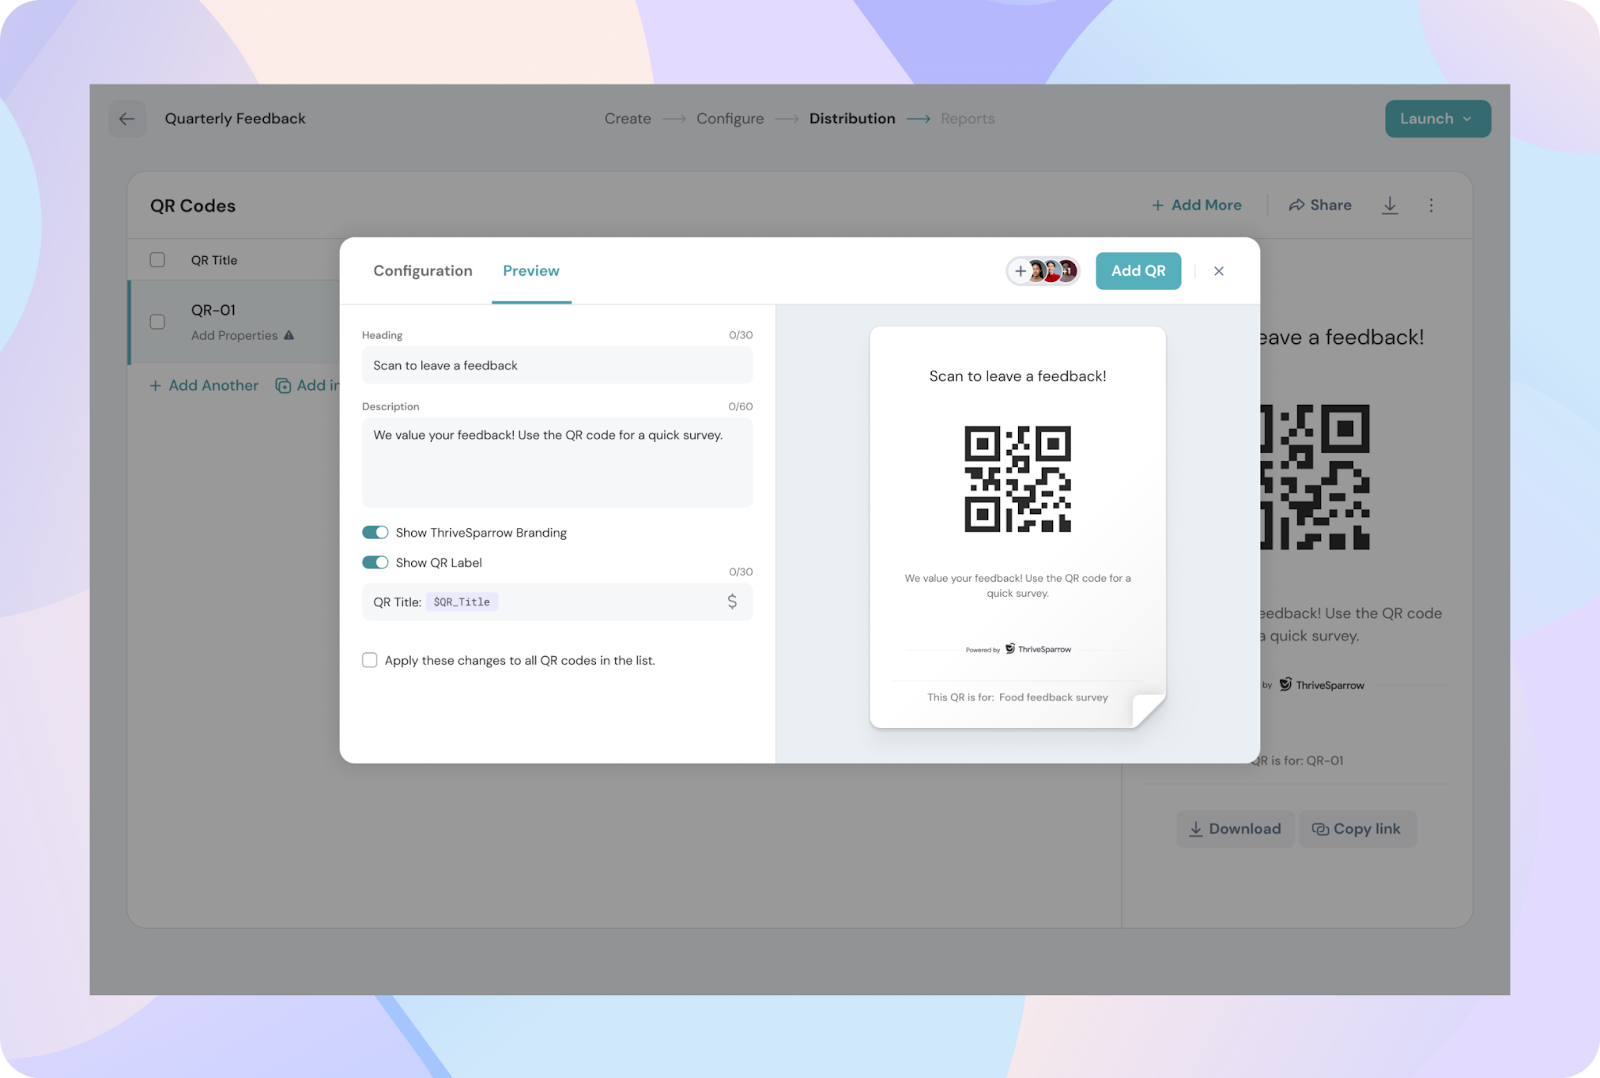
- You can choose to display either the title, a specific property, or tags, but only one of these can be shown at a time. This customization helps in making the QR code easily recognizable for those scanning it.
10. Single or Bulk Creation
- You can create QR codes either one by one or in bulk.
- If you're creating them individually, simply add each one and repeat the entire process mentioned above as needed.
- For bulk creation, you'll first be prompted to select an employee property with multiple options. Each selection will appear as a "pill," representing a distinct group.
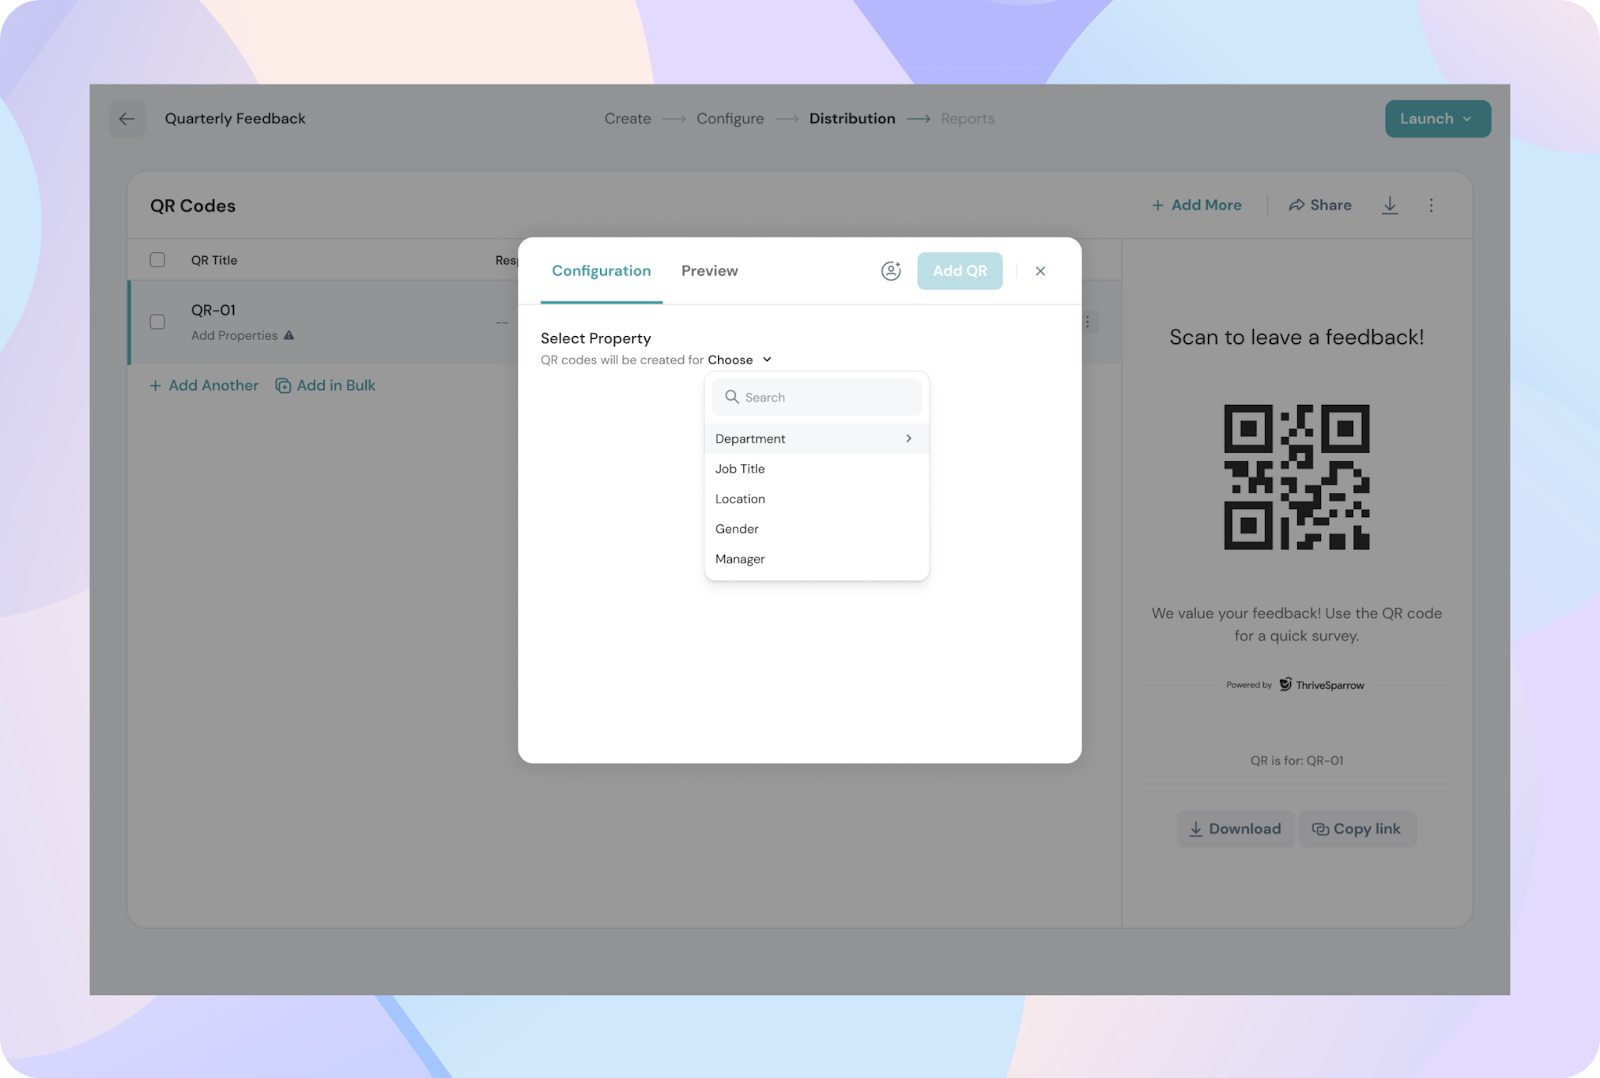
- Initially, you can add a single employee property with multiple options, like location with the ability to select multiple options such as different cities, and automatically generate different QR codes for each unique group based on these properties.
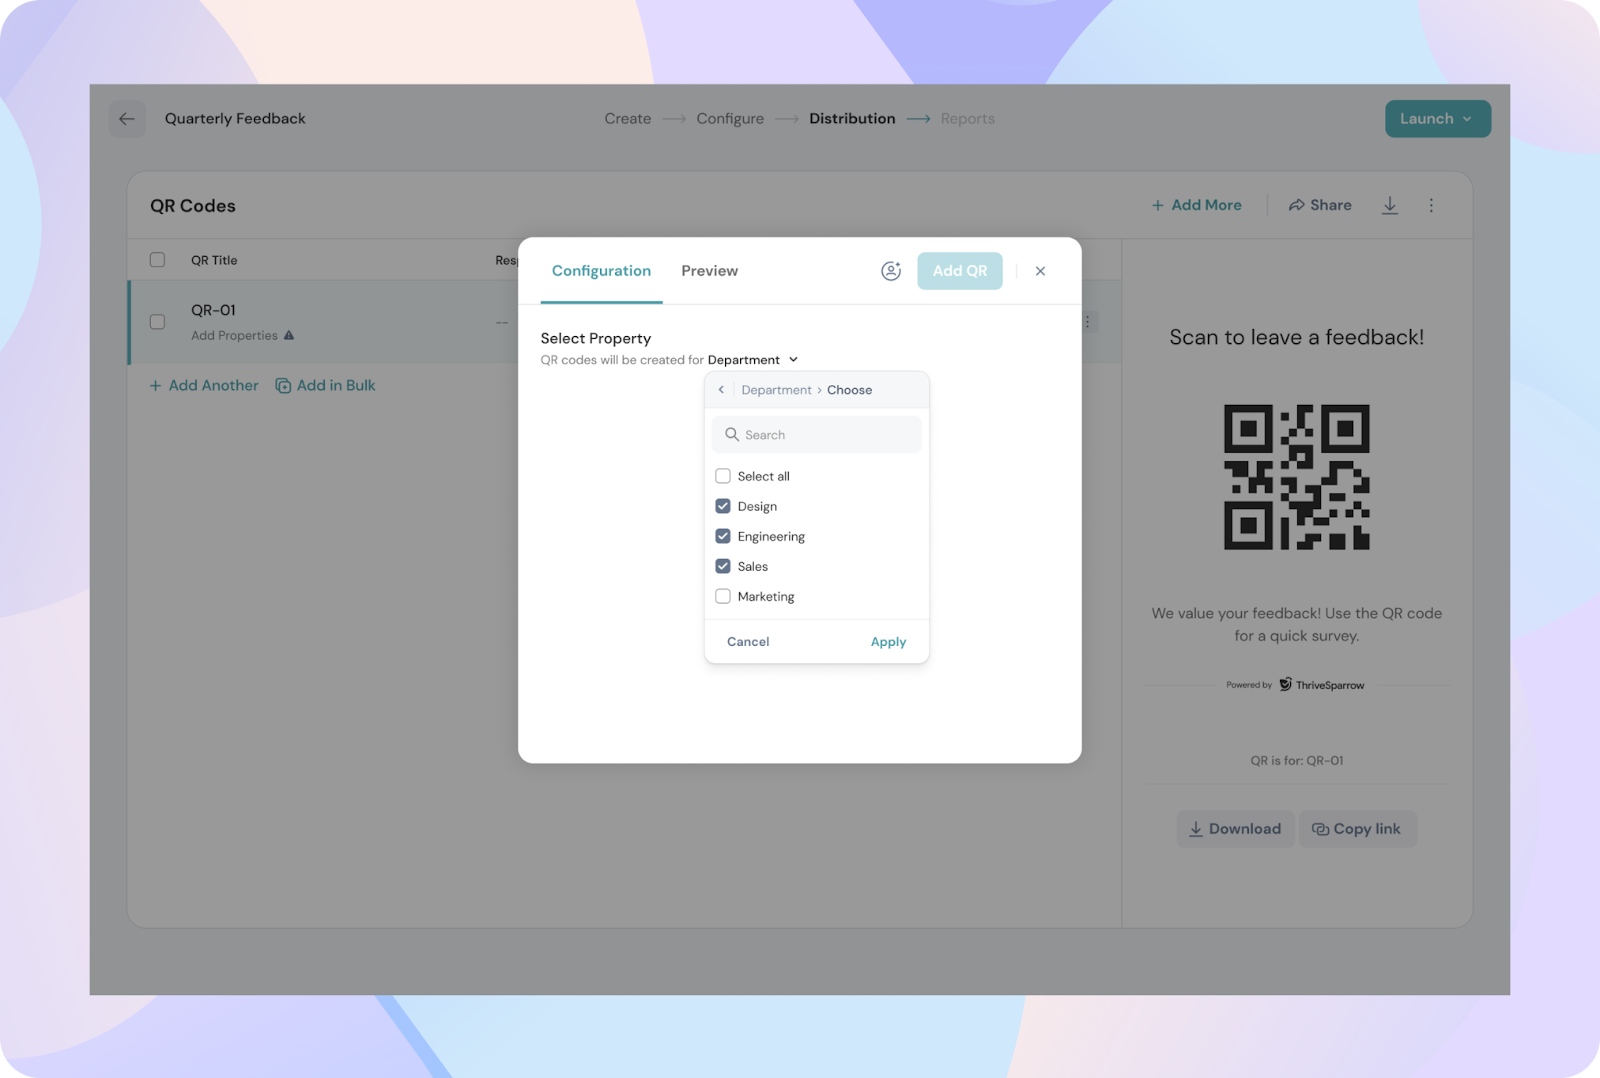
- After creation, you can individually edit each QR code to add multiple properties to it.
- During bulk creation, you'll also have the option to set the expiry, share and preview settings, which will apply to all the QR codes in that batch.
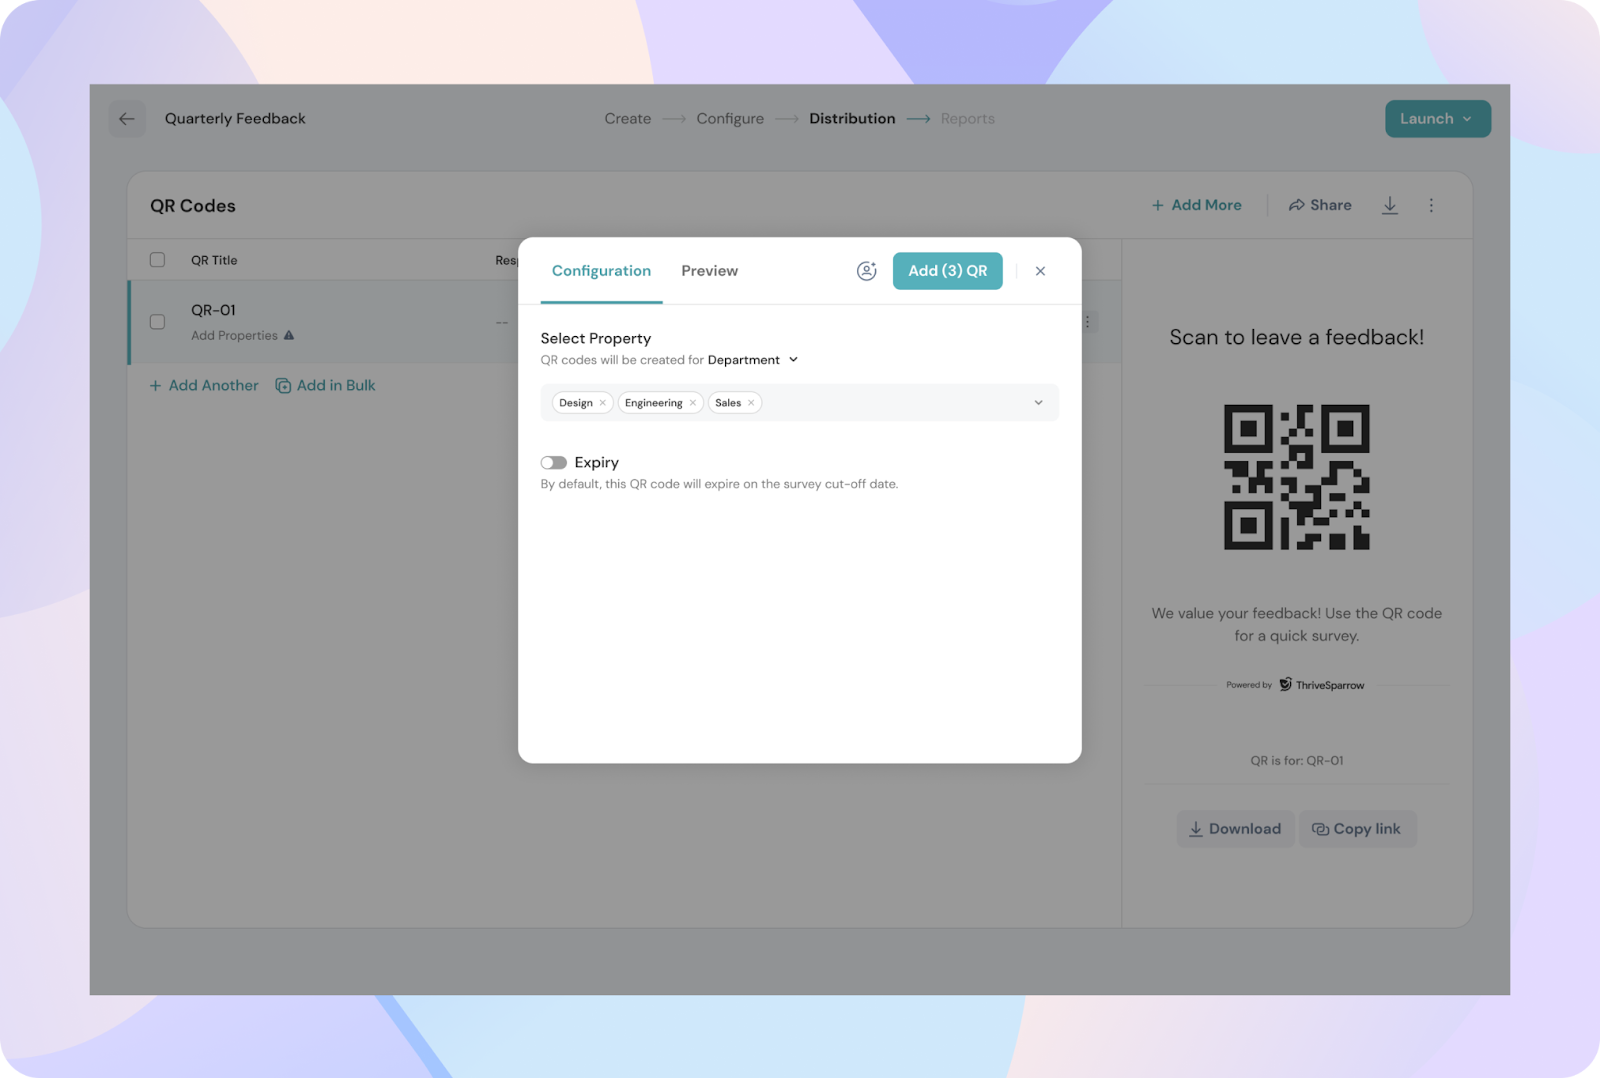
- All the generated QR codes will be sent to the same set of people, but you can individually edit each QR code after creation to further customize them.
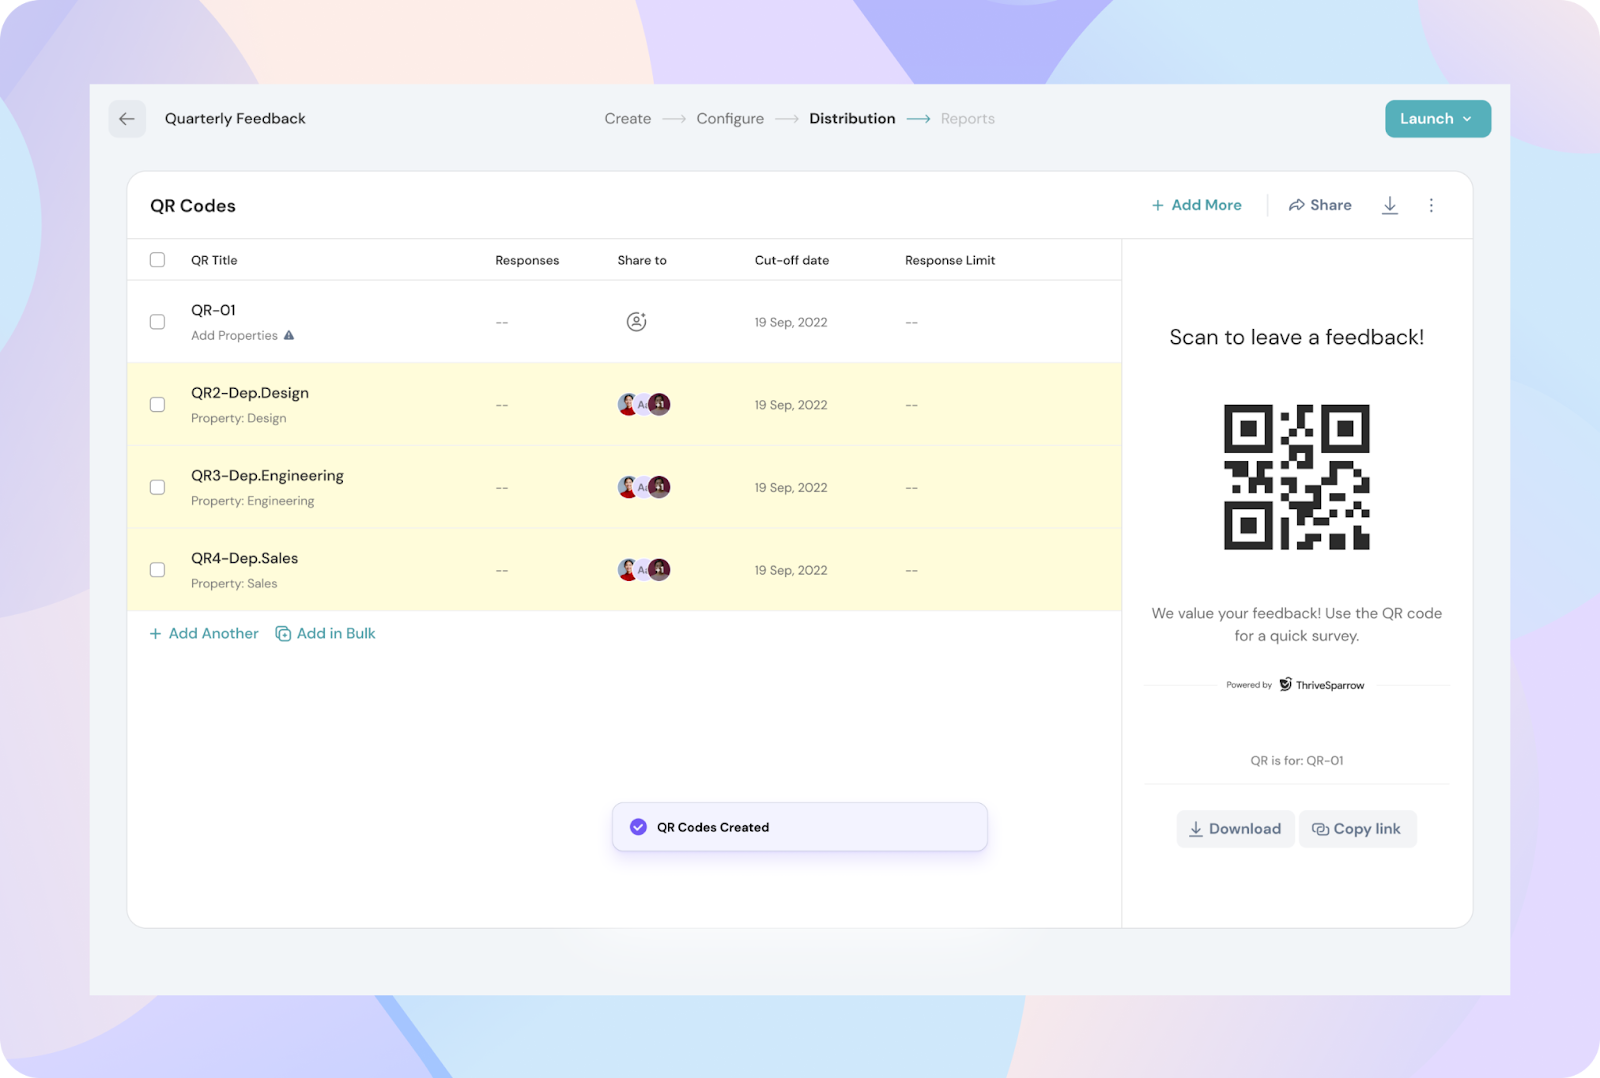
11. Sharing QR Codes
- Before launching the survey, you can share all selected QR codes with a single person or multiple people using the global share feature.
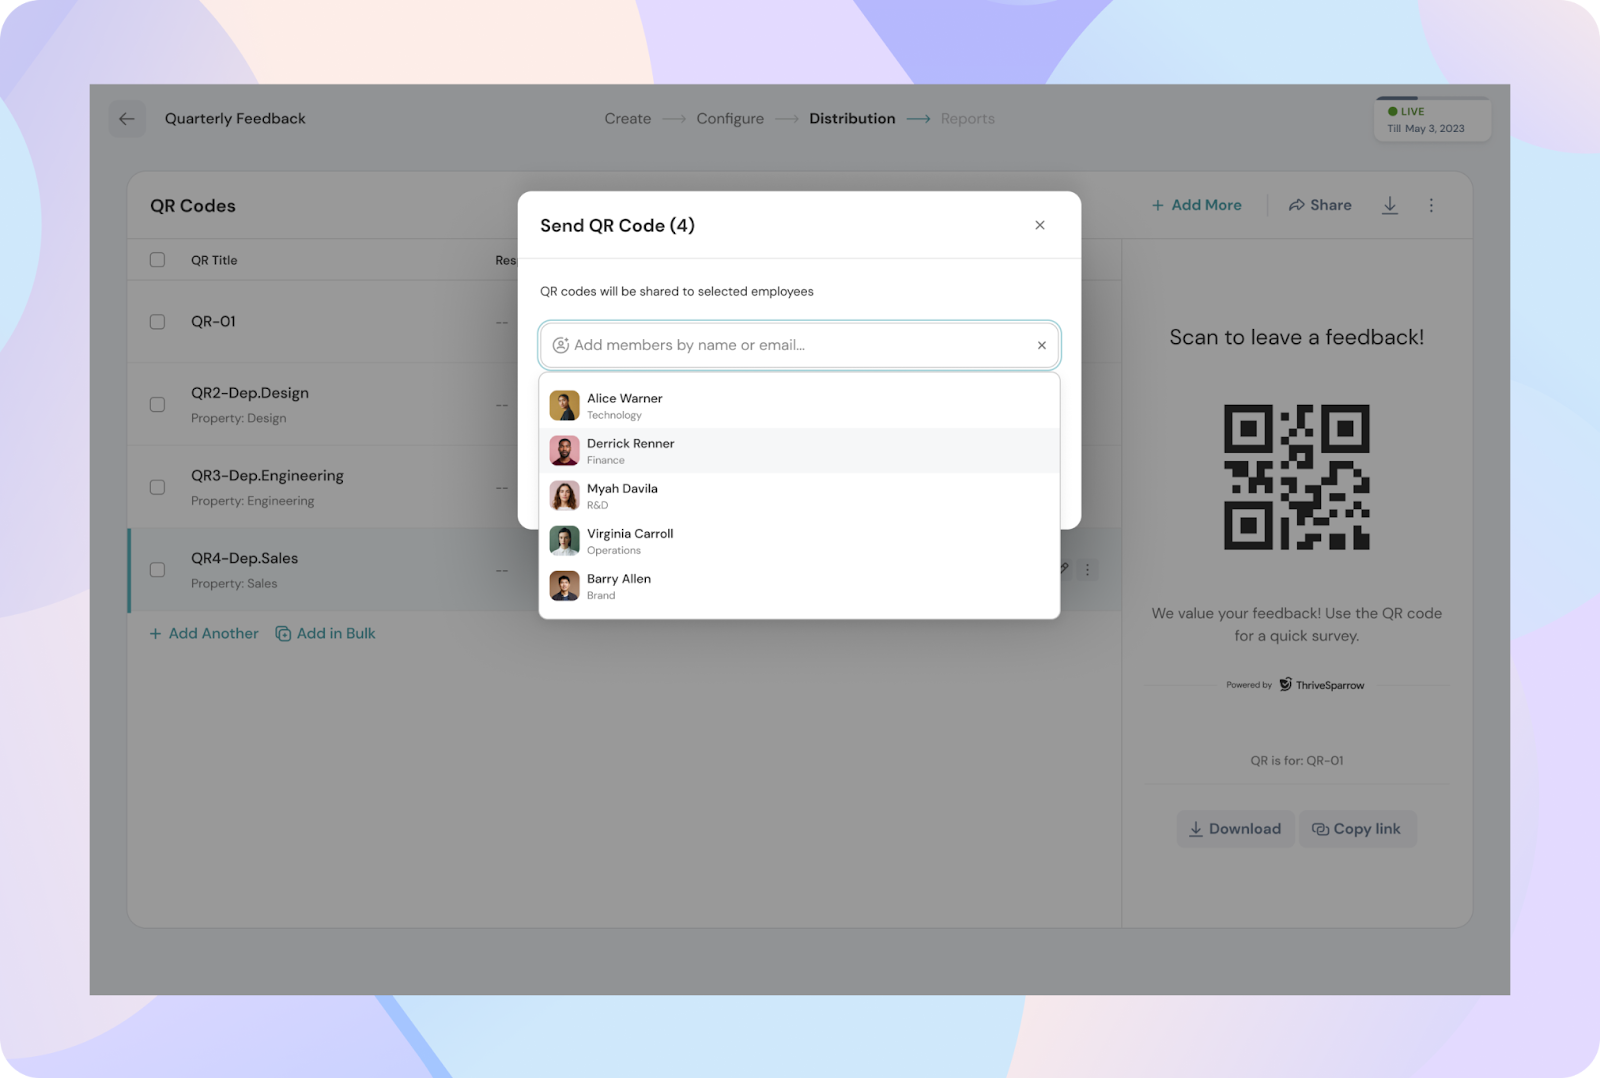
- You can also share each QR code individually with different people as needed.
- Once the survey is launched, all QR codes will automatically become active.
- At this point, emails will be triggered to those you’ve selected to share the QR codes with.
- These emails will include the QR codes in PNG format.
- If multiple QR codes are involved, they will be sent as a ZIP file.
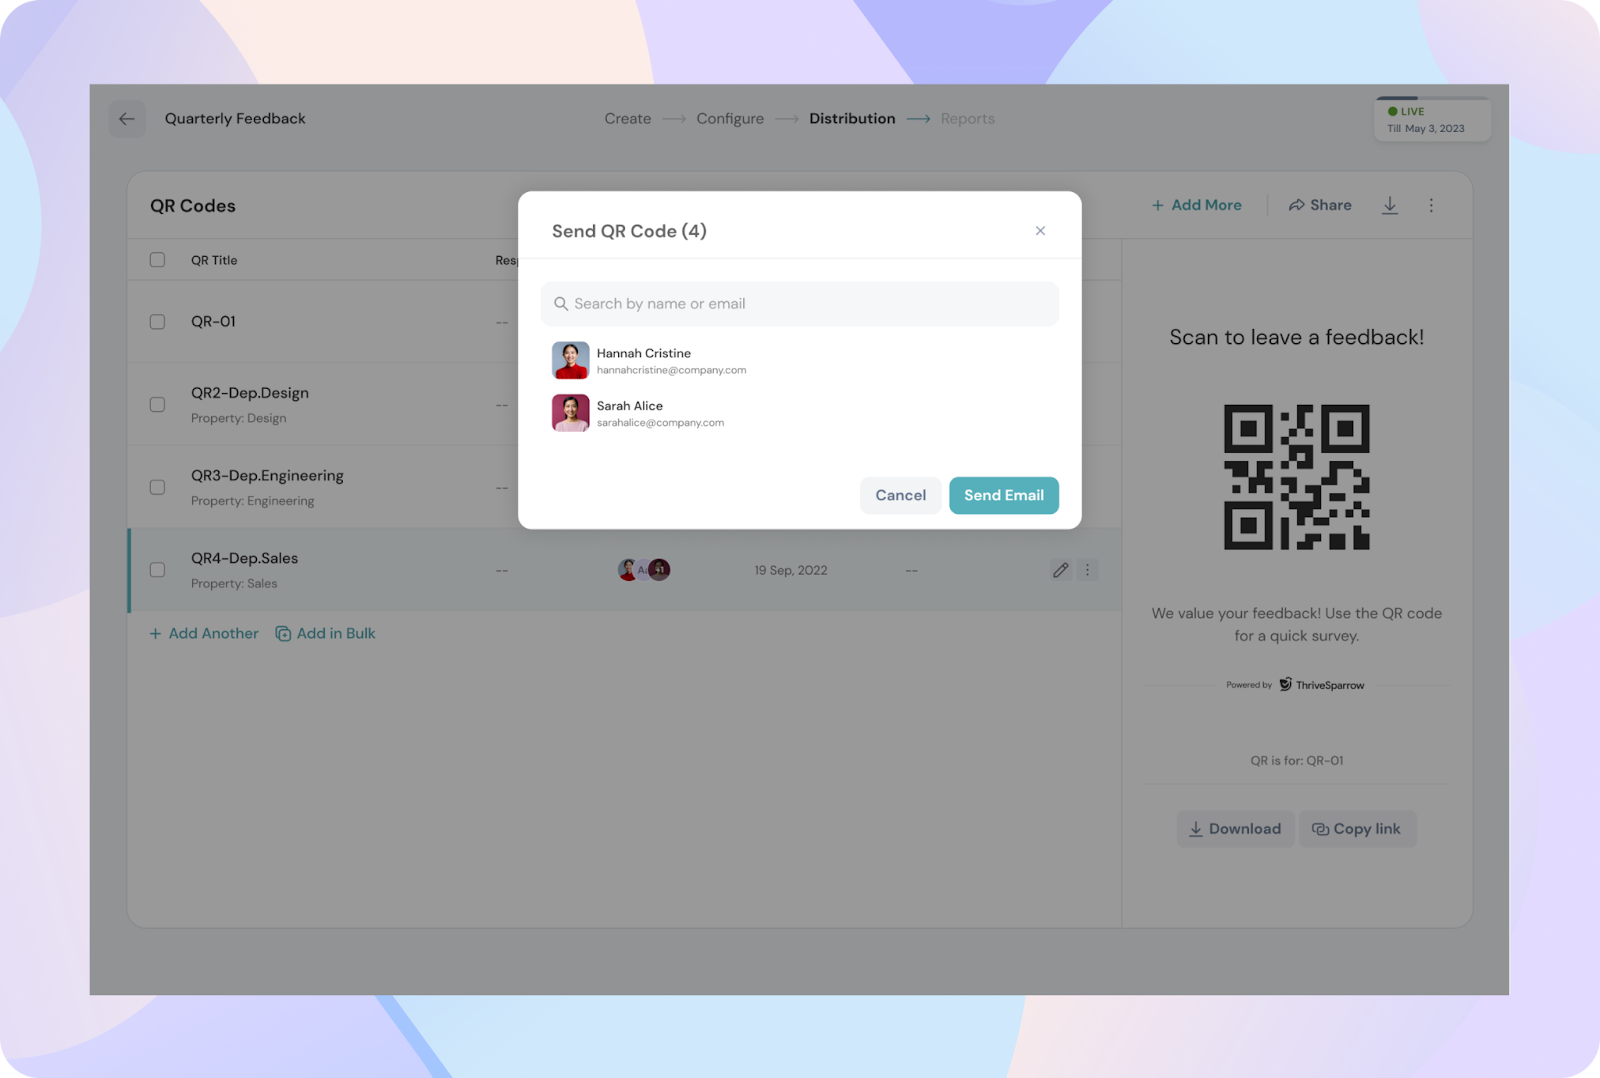
12. Post-Launch Options:
12.1 Sharing and Download Options
- If you add someone to the distribution list after the launch, an email with the QR codes will be triggered immediately.
- Additionally, you can download the QR codes either by clicking the download option in the preview section or by using the download button.
- After the survey is launched, you can also share the survey by copying the unique link for each QR code.
- Each QR code generates a unique link that directs respondents to the same survey, but each link is mapped with the specific properties relevant to that QR code.
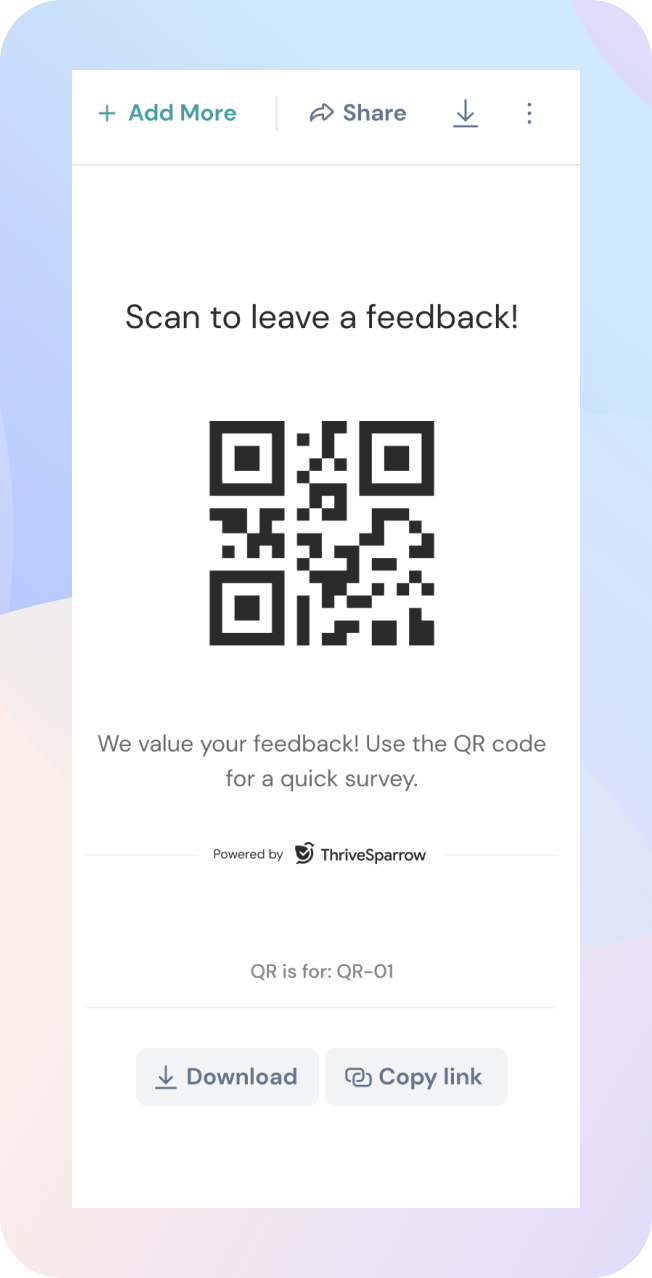
12.2. Post-Launch Limitations
- After the survey has been launched, you will no longer be able to edit any of the employee properties or tags associated with the QR codes.
- Ensure all configurations are finalized before launching the survey, as these settings will be locked once the survey goes live.
12.3. Pausing and Resuming QR Codes
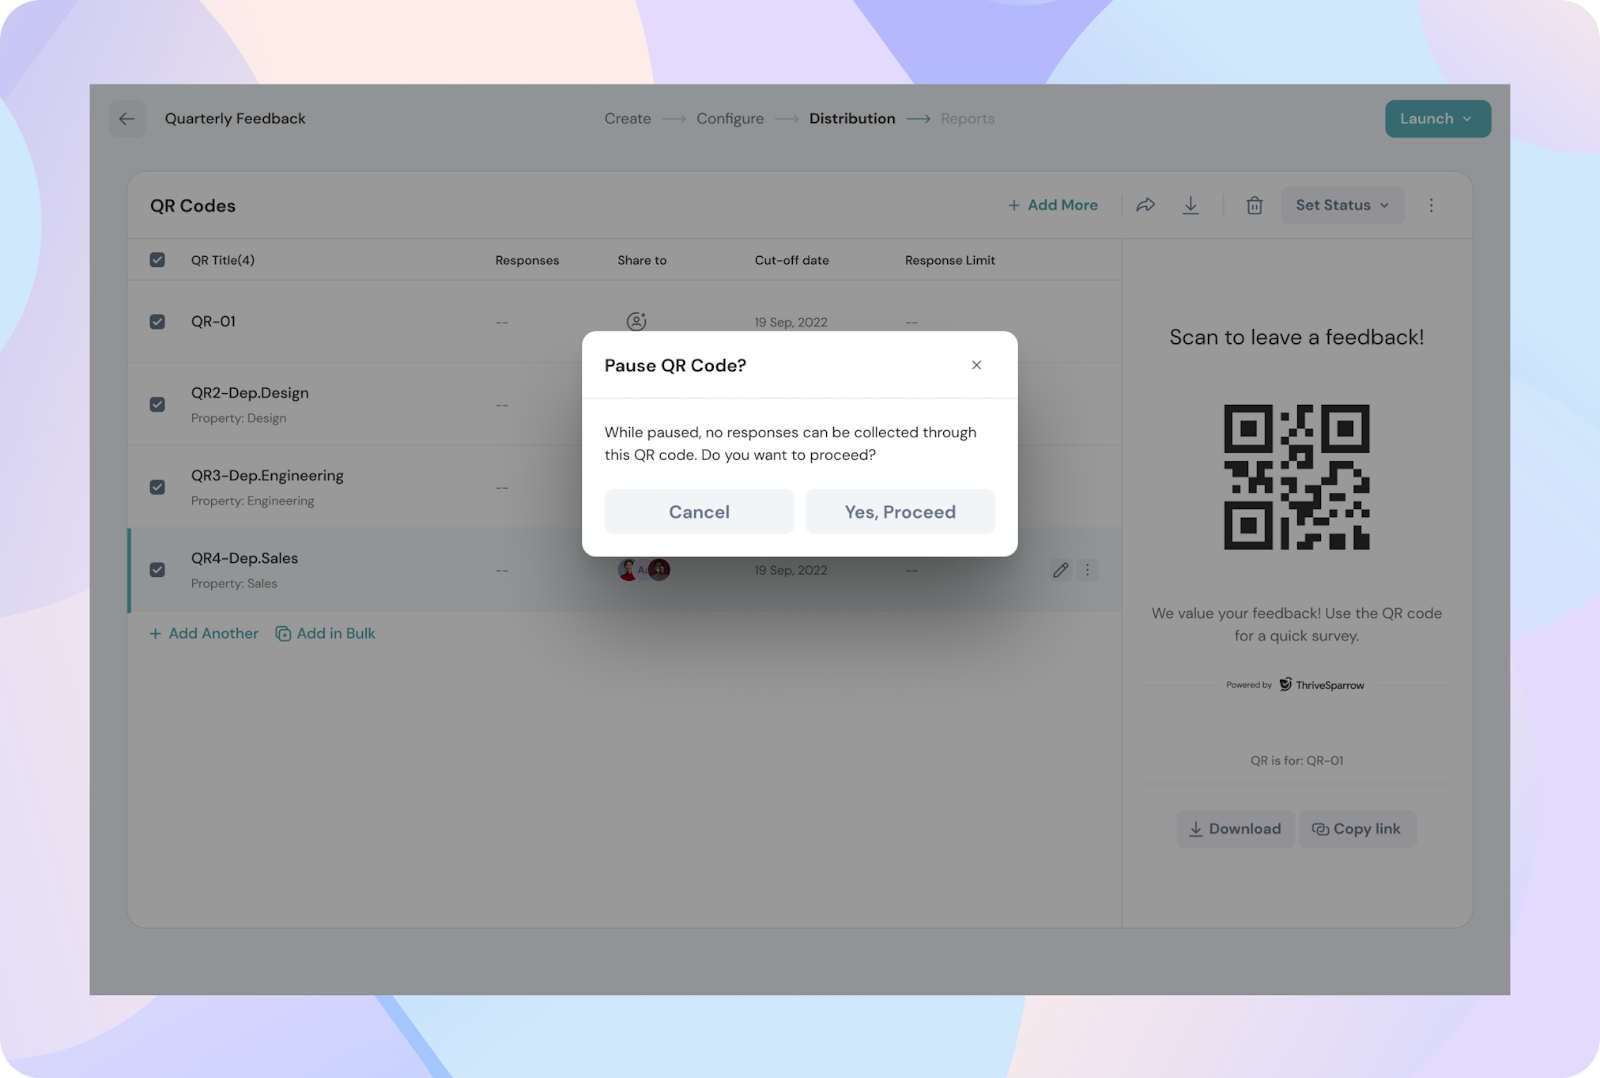
- You have the option to pause any QR code by clicking the three dots next to it and selecting "Pause."
- You can also pause or reactivate multiple QR codes at once by selecting "Set Status" and choosing "Pause All" or "Activate All."
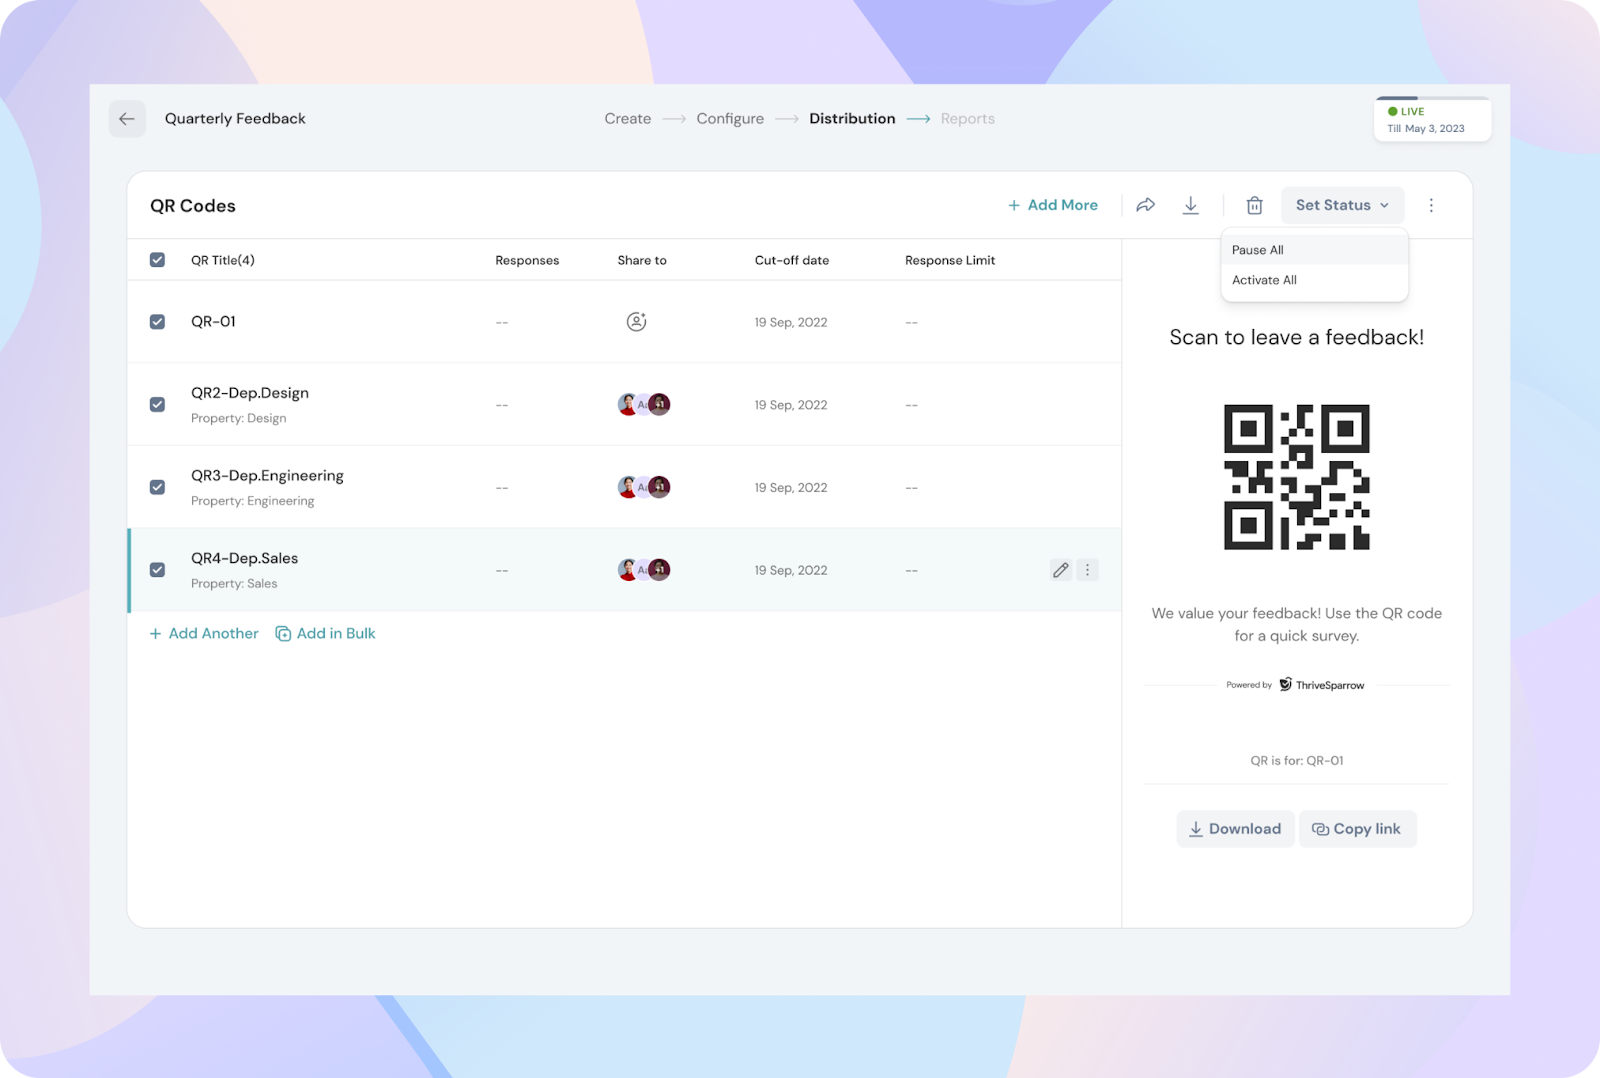
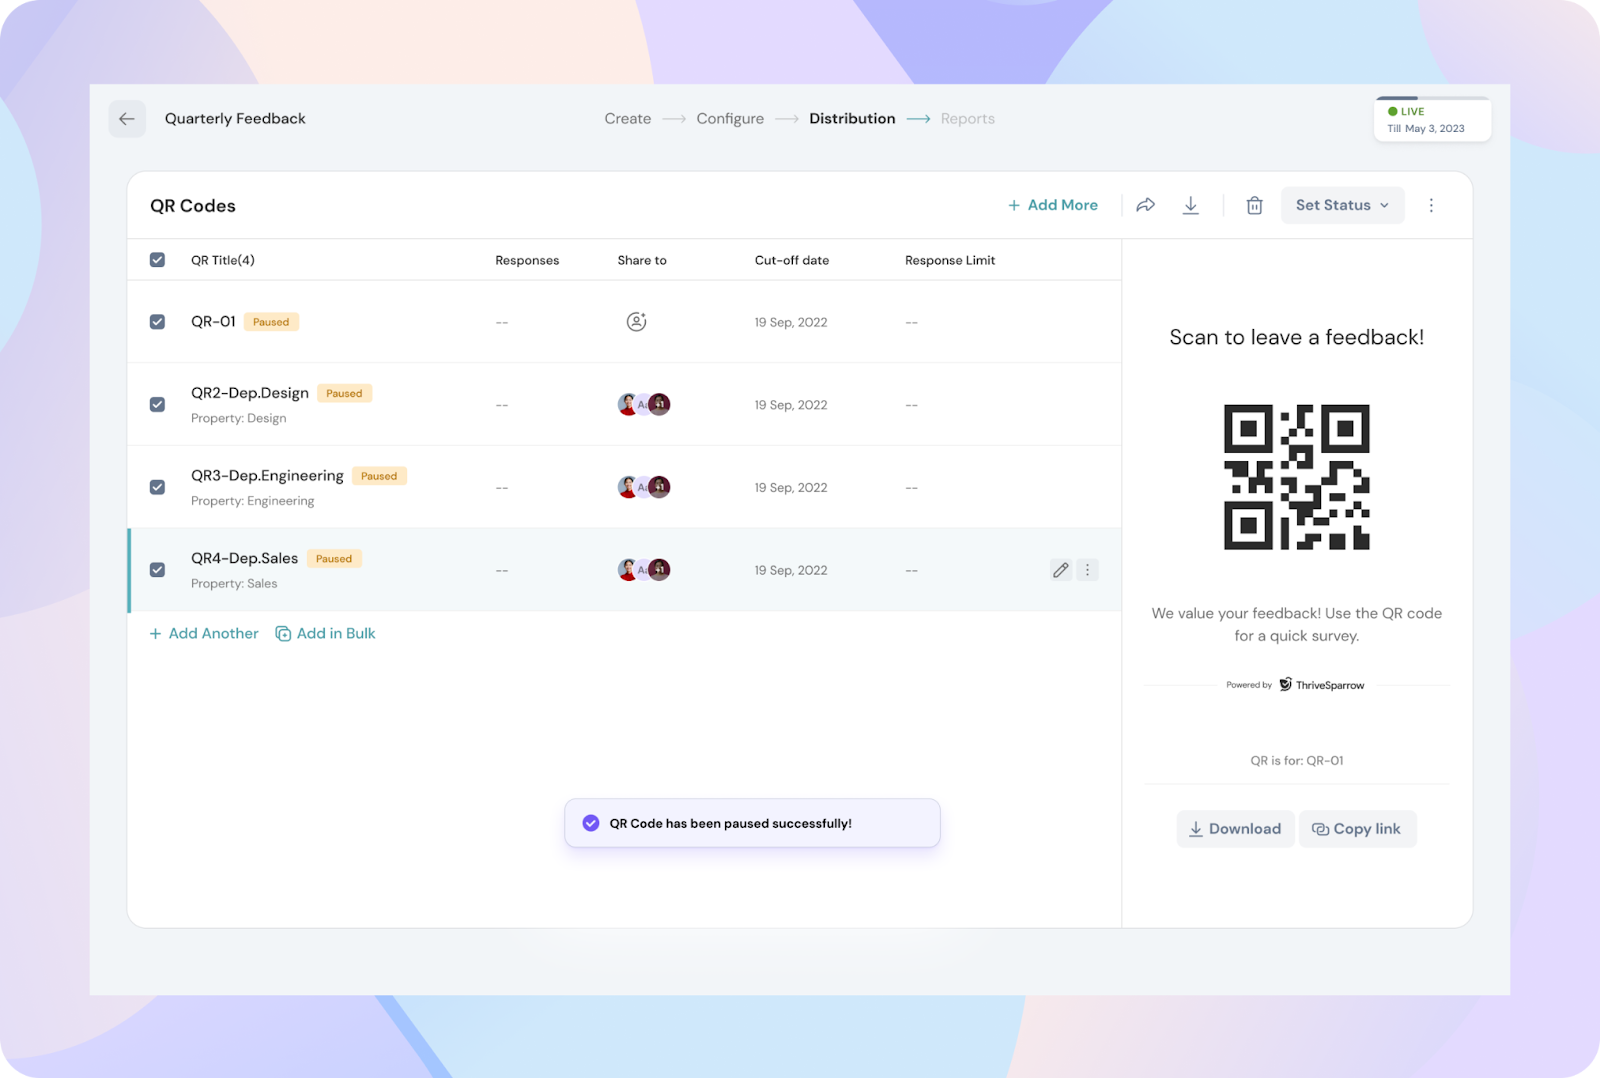
- When a QR code is paused, respondents won’t be able to submit responses—scanning the QR code will show that the survey is closed.
- You can reactivate paused QR codes at any time to resume survey participation.
Please reach out to us for any queries.


