Configuring Kudos

Venkata
September 13, 2023
Here's a snappy guide to get you started with the Kudos configuration:
Accessing the Kudos Module:
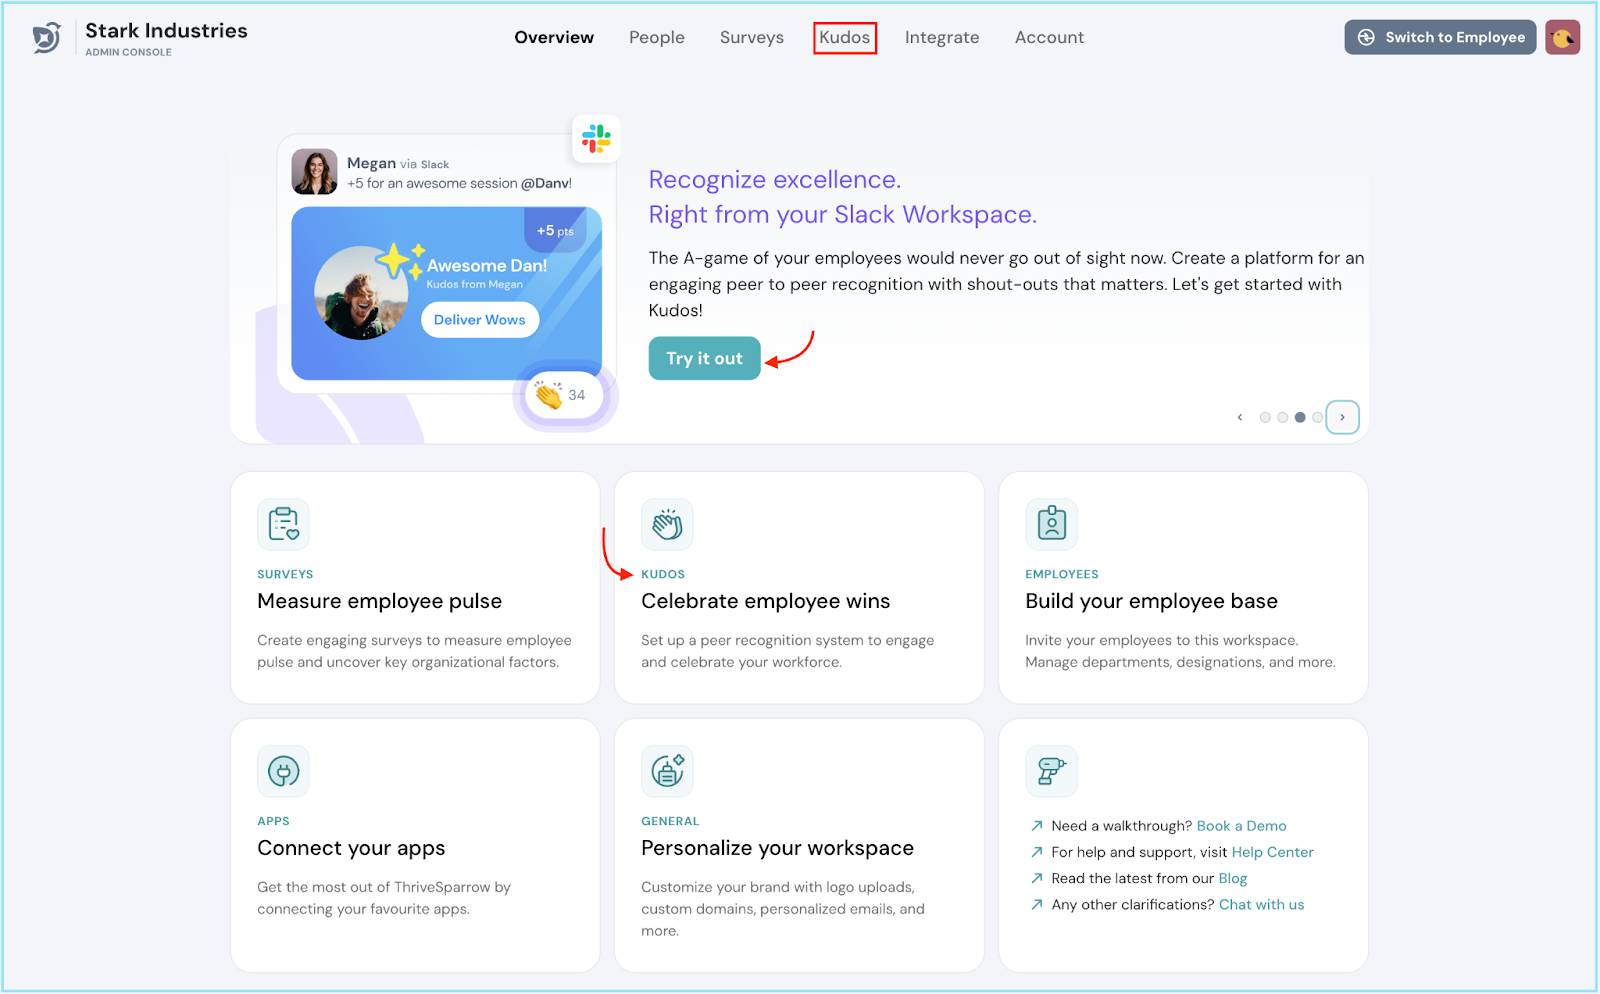
To begin, access the Kudos module by either clicking on the Kudos option in the top header navigation bar or by selecting the Kudos tiles found on the Overview page.

Setting Up Kudos:
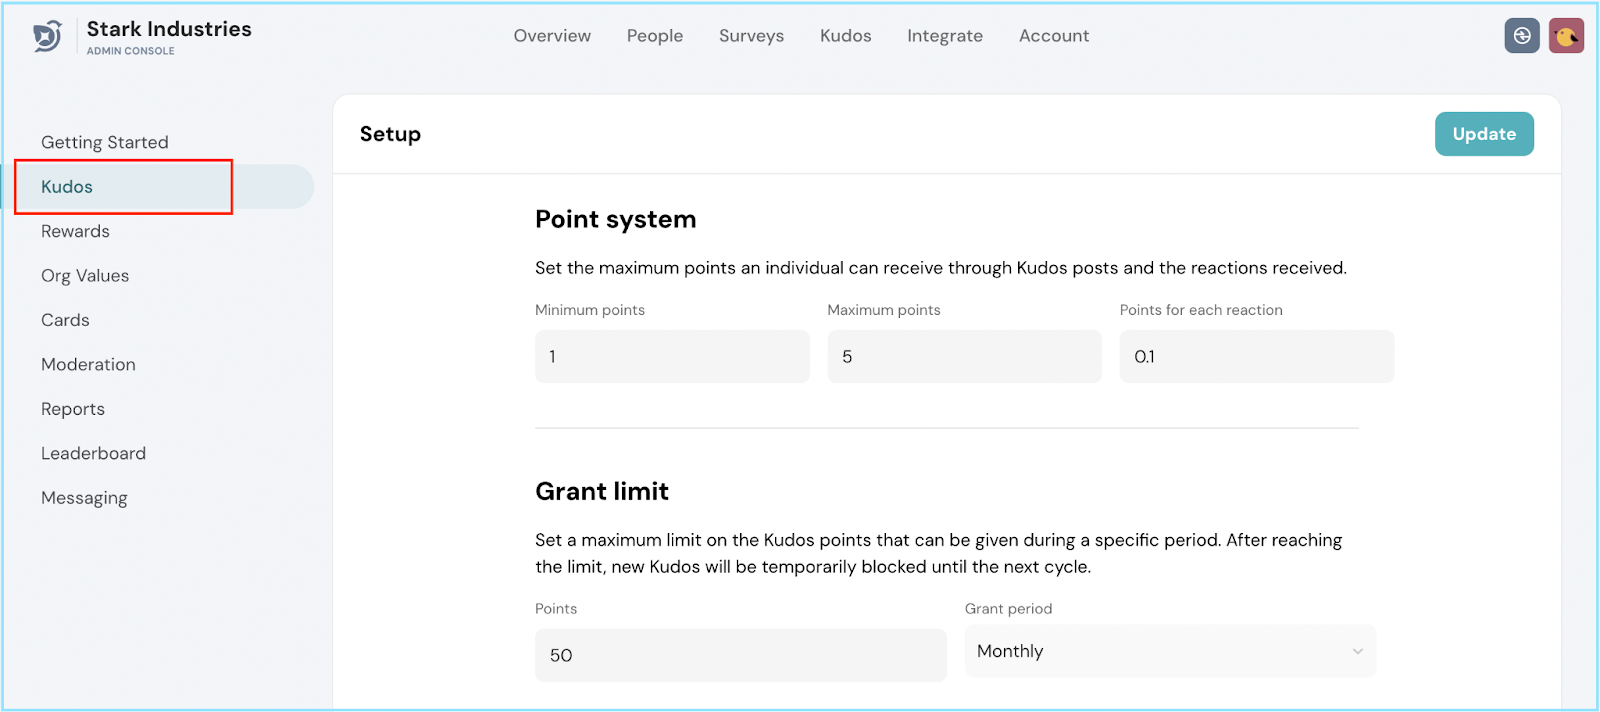
Now, let's dive into configuration! Head over to the side navigation bar and click on the Kudos tab to initiate your setup journey.

Point System:
Minimum Points:
- Define the minimum points in the respective text box.
- This sets the baseline number of points that can be granted or received for a single Kudos post.
- If no points are mentioned in a Kudos message, this default minimum will be granted.
Maximum Points:
- Set the maximum points in the designated text box.
- This limits the highest number of points that can be granted or received in a single Kudos post.
- Keep in mind that if points given in a single post surpass this maximum, the post will still grant the minimum points.
Points for each Reaction:
- Specify the desired points for each reaction in the relevant text box.
- Whenever someone reacts to a Kudos post, the recipient will receive these configured points per reaction.

Grant Limit:
- Moving forward, it's time to determine the Grant Limit.
- This is the maximum count of points an employee can grant within a specified period, typically on a monthly basis.
- Once the limit is reached, new Kudos will be temporarily paused until the next cycle.
- Set your desired limit in the text box provided.

Kudos on Slack:
Eager to extend the Kudos to Slack? Tap the Use Kudos on Slack tab to create a dedicated Slack channel for giving and receiving Kudos. This action will lead you to the Integrate page. For a deep dive into Integration, click here.

With this swift guide, you're all set to shape your Kudos experience!
Should you need any help, don't hesitate to contact our support team. Happy thriving!


